
Why Indoor Mold Remediation Matters More Than You Think
Indoor mold remediation is the process of identifying, containing, and safely removing mold growth inside a building — then correcting the moisture problem that caused it in the first place.
Here’s a quick overview of what it involves:
- Identify the mold and the moisture source causing it
- Contain the affected area to stop spores from spreading
- Remove mold-damaged materials using safe, proven methods
- Clean remaining surfaces with appropriate tools and solutions
- Verify the work is complete through a post-remediation inspection
- Prevent recurrence by controlling humidity and fixing water intrusion
Mold is everywhere — outdoors and indoors. That’s normal. The problem starts when moisture builds up inside your home or building and gives mold a place to grow and spread.
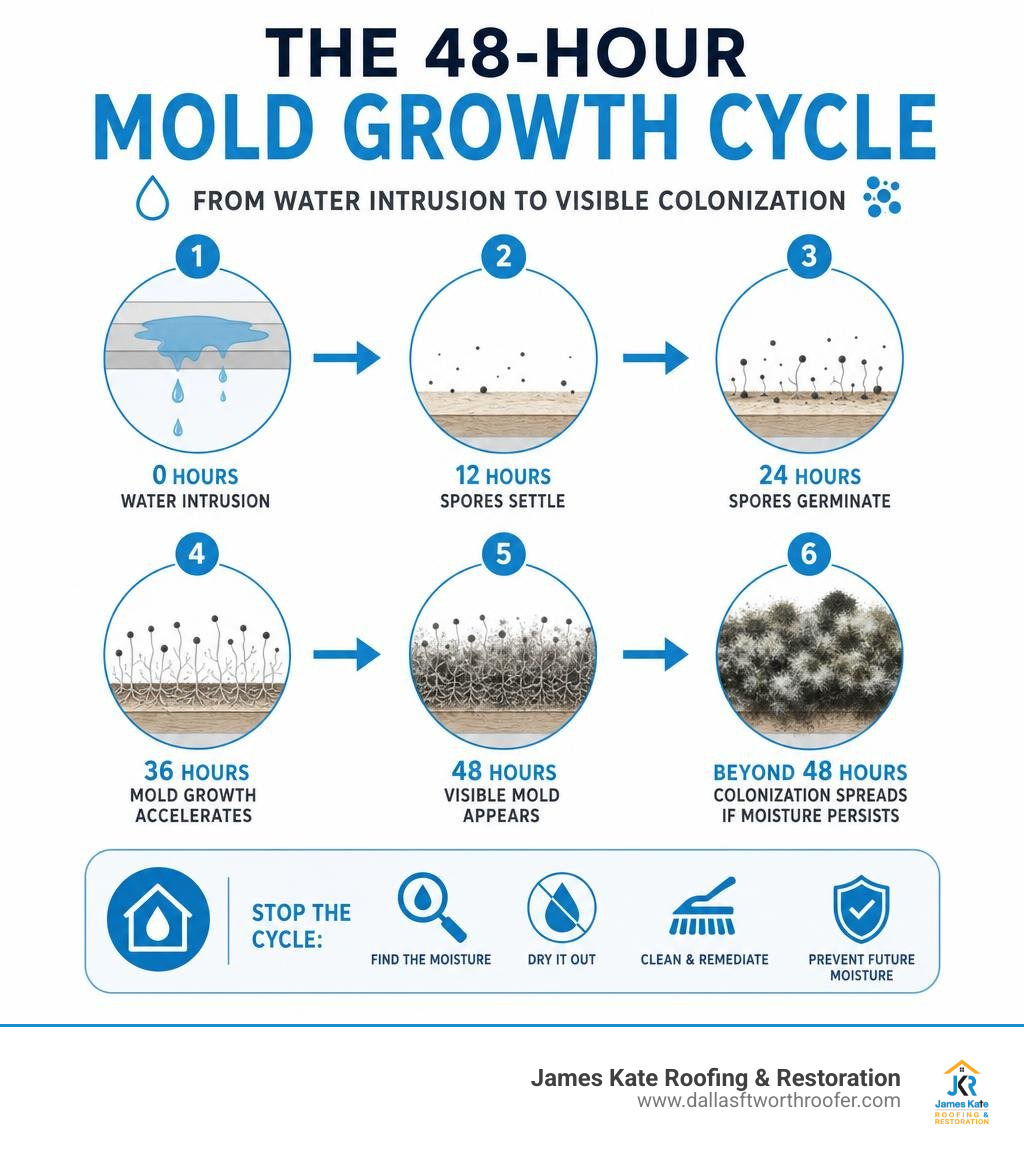
It can happen fast. Mold growth can begin in as little as 48 hours after a water leak or moisture event. And once it takes hold, it doesn’t just damage your walls, floors, or ceilings — it can affect your health too.
Exposure to mold can cause or worsen allergies, asthma symptoms, congestion, coughing, and trouble breathing. People with respiratory conditions or weakened immune systems are at even greater risk.
The good news? With the right approach, mold is manageable. The goal isn’t to eliminate every last spore — that’s impossible. The goal is to return mold levels back to normal, natural levels and remove the conditions that let it get out of control.
I’m Dustin Eatman, owner of James Kate Roofing & solar in the Dallas–Fort Worth area, and I’ve seen how roof leaks and water intrusion lead directly to serious indoor mold remediation problems if they aren’t addressed quickly. In this guide, I’ll walk you through everything you need to know — from spotting early warning signs to understanding when to call a professional.
Similar topics to indoor mold remediation:
Understanding Indoor Mold: Causes, Prevention, and Health Risks
To effectively tackle mold, we must first understand what we are up against. Mold is not an invader from outer space; it is a natural, microscopic fungus that plays a vital role in our outdoor ecosystem by breaking down organic matter. However, when those microscopic spores find their way inside our homes in Mansfield, Arlington, or Grand Prairie, they look for the exact same thing: moisture and organic “food” to digest.
What Causes Indoor Mold Growth?
Mold spores are constantly floating through the air, completely invisible to the naked eye. They enter our homes through open doors, windows, HVAC systems, and even on our clothes or pets. On their own, these dry spores are harmless. But the moment they land on a wet surface, they wake up.
Within 24 to 48 hours of water exposure, mold spores begin to germinate and colonize. Mold requires three basic ingredients to thrive:
- Moisture: This is the ultimate catalyst. Whether it is a sudden pipe burst, a slow roof leak, or simple condensation from high humidity, water is the lifeblood of mold.
- An Organic Substrate: Mold eats organic materials. Unfortunately, our homes are built out of its favorite foods—wood, drywall paper backing, ceiling tiles, carpets, and wallpaper glue.
- Oxygen and Warmth: Mold grows exceptionally well in temperatures between 70°F and 90°F, which perfectly matches the interior of most Texas homes.
Because moisture is the only variable we can truly control, keeping your home dry is the single most effective way to prevent mold. Letting water sit is an open invitation for trouble, which is why we always stress that you Don’t Let It Fester: How to Handle Mold After a Leak. Keeping indoor relative humidity below 45% to 50% using air conditioners or dehumidifiers will keep spores dormant and prevent them from taking over your living space.
Health Risks of Indoor Mold Exposure
Living with mold is not just an aesthetic issue or a threat to your property value; it can have real, measurable impacts on your physical well-being. When mold colonies grow, they release millions of new spores, fungal fragments, and volatile organic compounds (VOCs) directly into your indoor air.
For many people, breathing in these particles triggers allergic reactions. Typical symptoms include:
- Persistent sneezing and a runny or stuffy nose
- Itchy, watery, or red eyes
- Dry coughing and throat irritation
- Skin rashes or hives
For individuals with asthma or pre-existing respiratory conditions, mold exposure can trigger severe asthma attacks, wheezing, and extreme difficulty breathing. In some cases, certain molds produce toxic substances called mycotoxins. While the term “toxic mold” is often sensationalized, prolonged exposure to high concentrations of mycotoxins can lead to more severe health issues, particularly for young children, the elderly, and immunocompromised individuals. If you suspect you have a toxic strain growing in your home, you must act quickly to Get Rid of the Grime with Expert Black Mold Remediation to protect your family’s health.
Identifying Hidden and Visible Mold Problems
Identifying a mold problem is sometimes as simple as looking at a dark stain on your wall. Other times, it requires some detective work, as mold loves to grow in the dark, undisturbed corners of our homes.
Visual and Odor Detection
The two most powerful tools for finding mold are your eyes and your nose.
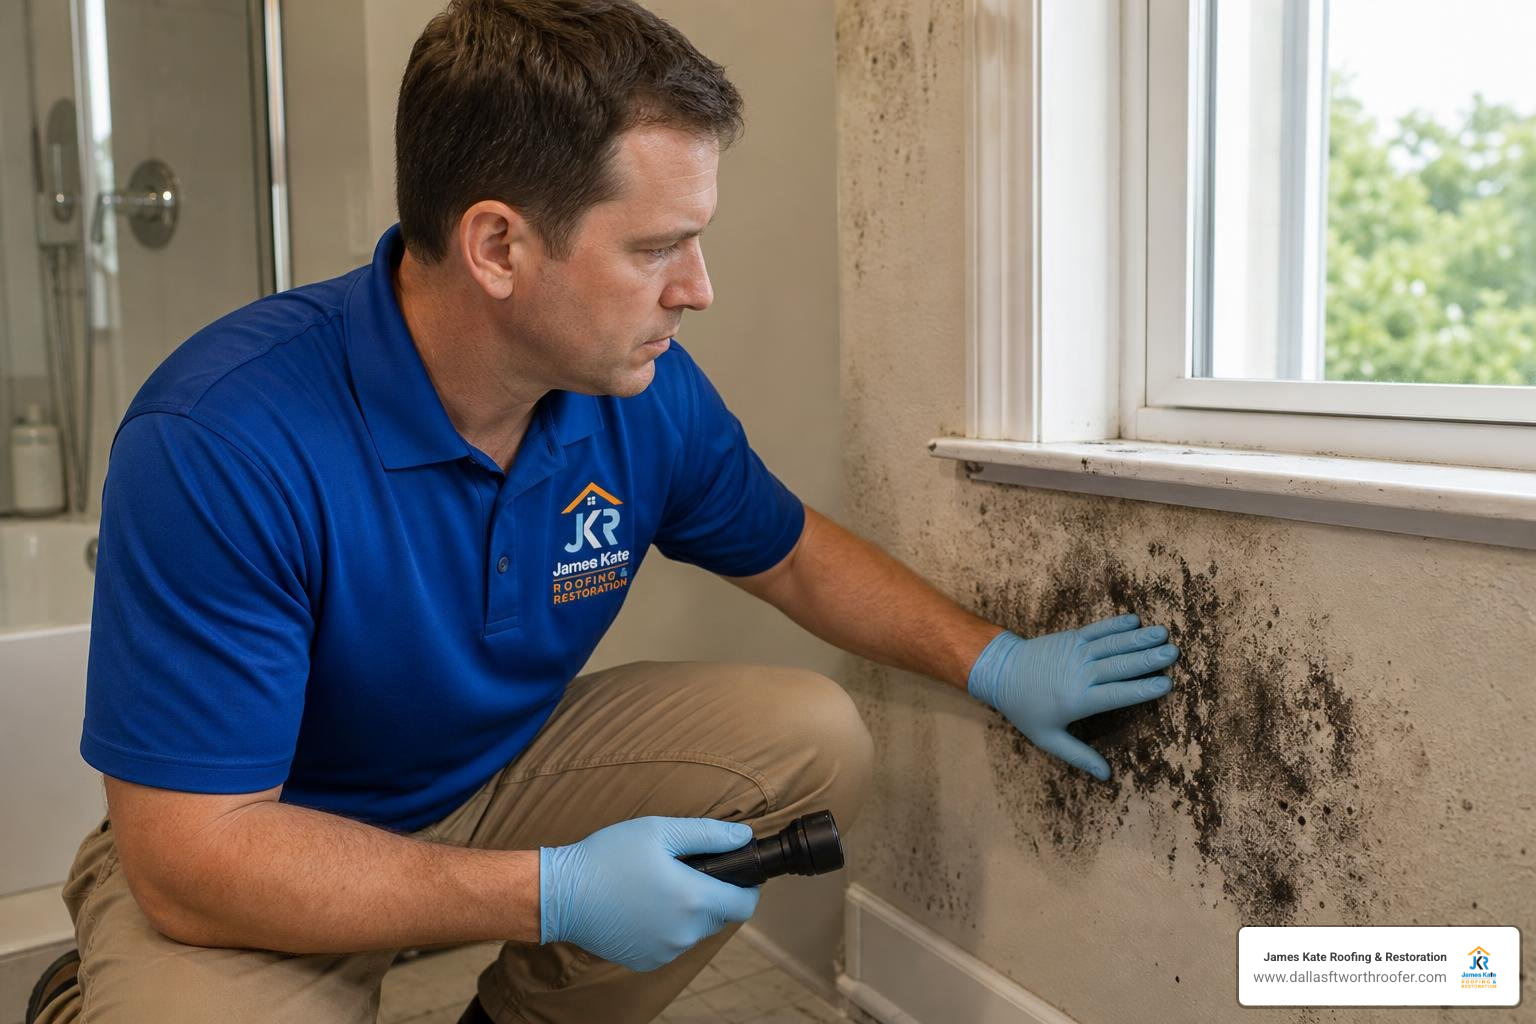
Visible mold can appear in a variety of colors, including fuzzy black, dark green, powdery yellow, grey, or even bright orange. It often grows in circular patterns or patches on surfaces that frequently get wet, such as bathroom tile grout, window moldings where condensation pools, or drywall near a plumbing fixture.
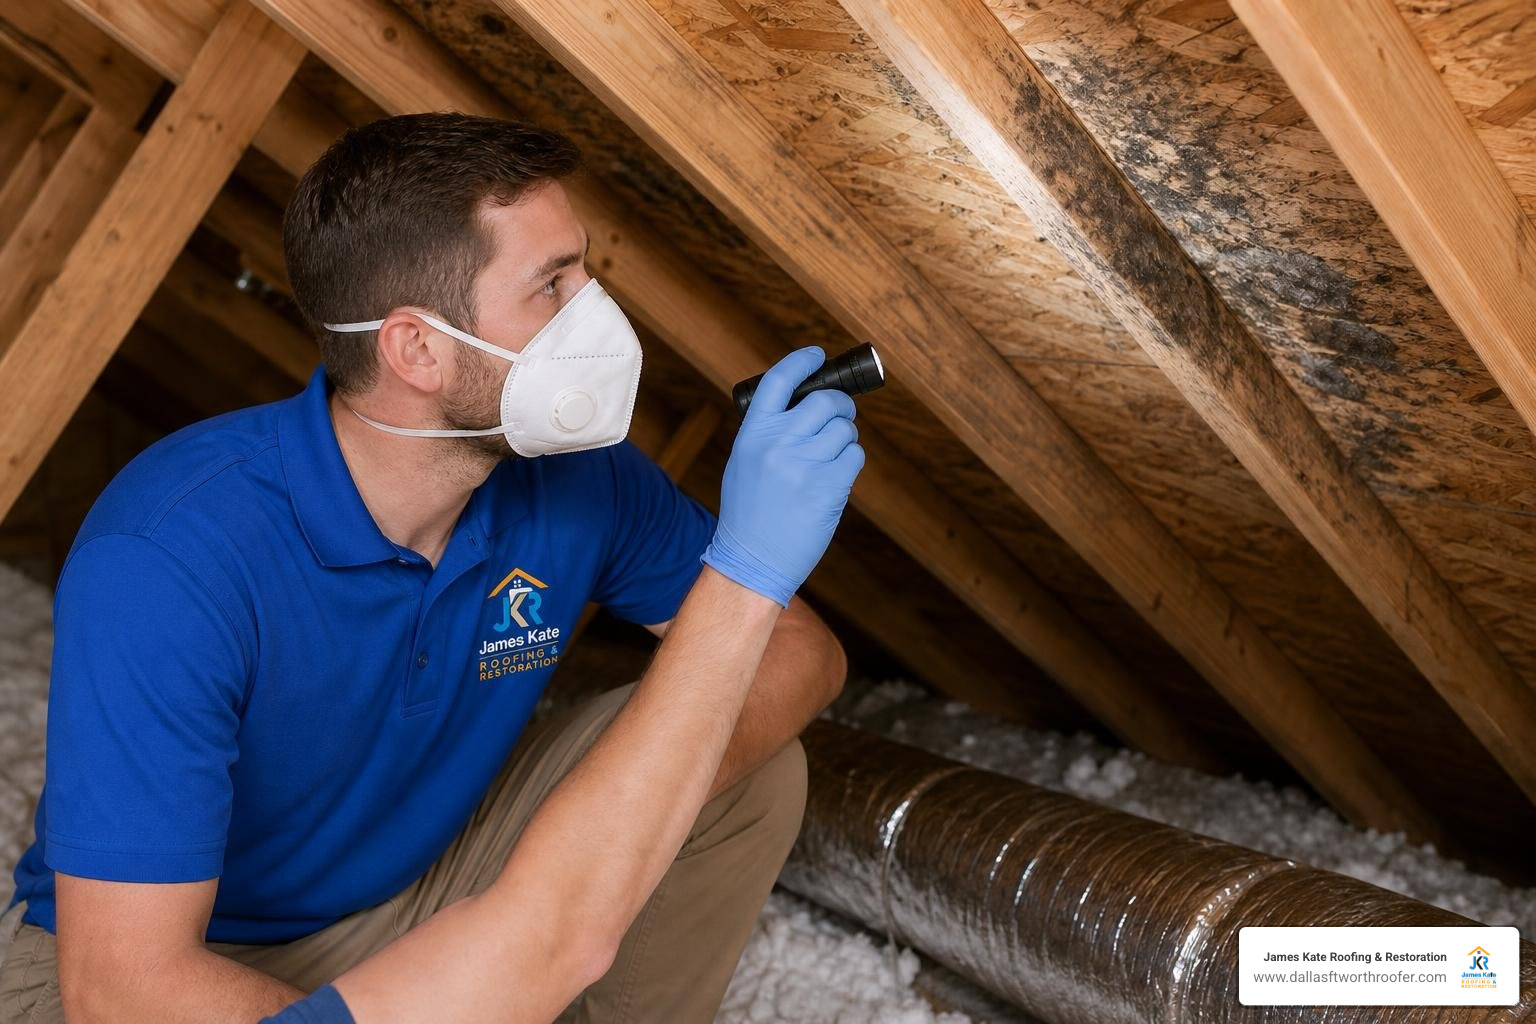
However, mold often starts growing out of sight. A strong, persistent, musty or earthy odor—frequently described as smelling like wet dirt or old, damp cardboard—is often the very first sign of a hidden problem. If you smell this musty scent but cannot see any visible growth, it is time to check high-risk areas. Pay close attention to your attic, where roof leaks can go unnoticed for months. If you suspect your attic has been compromised, you should learn How to Safely Evict Mold From Your Attic for Good before the spores migrate down into your main living areas.
Investigating Hidden Mold Safely
Investigating hidden mold requires extreme caution. If you suspect mold is growing behind a wall, peeling back vinyl wallpaper or ripping open drywall without proper containment can release a massive cloud of millions of spores directly into your indoor air, turning a localized issue into a whole-house contamination event.
Common locations for hidden mold include:
- The backside of drywall, paneling, and wallpaper (especially vinyl wallpaper, which traps moisture against the wall)
- Above ceiling tiles underneath roof leaks or uninsulated HVAC ductwork
- Inside utility tunnels, pipe chases, and wall cavities containing plumbing lines
- Under carpet padding from slow slab leaks or poor subfloor sealing
If you must investigate these areas, always wear basic personal protective equipment (PPE), such as a mask and gloves, and avoid creating dust. If the suspected area is large or difficult to access, it is always safest to call in a professional mold inspector to run air quality testing and moisture mapping.
DIY Cleanup vs. Professional Indoor Mold Remediation
When you discover mold, your immediate instinct might be to grab a bucket of soapy water and a scrub brush. While DIY cleanup is perfectly fine for minor issues, larger infestations require a professional touch to ensure the mold is safely contained and thoroughly remediated.
When to Attempt DIY Mold Cleanup
As a general rule of thumb established by the U.S. Environmental Protection Agency (EPA), if the mold-affected area is less than 10 square feet (roughly a 3-foot by 3-foot patch), you can usually handle the cleanup yourself.
DIY cleanup is highly effective for non-porous surfaces like tile, metal, glass, and solid wood. If you catch a small patch of mold on your bathroom wall or window sill early, you can safely clean it by wearing waterproof gloves, protective eyewear, and an N-95 respirator. Scrub the area with simple soap and water or a specialized mold cleaner, dry the area completely, and throw away any rags or sponges used during the process. If you want to tackle a small project yourself, check out our guide on How to Remove Mold in 5 Simple Steps to make sure you do it safely and correctly.
When to Hire Professional Indoor Mold Remediation Services
If the mold coverage exceeds 10 square feet, if the water damage was caused by sewage or contaminated floodwaters, or if the mold has penetrated porous materials like drywall and carpeting, DIY methods are no longer safe or effective.
| Feature / Scenario | DIY Mold Cleanup | Professional Remediation |
|---|---|---|
| Affected Area Size | Less than 10 square feet | Greater than 10 square feet |
| Surface Types | Non-porous (tile, metal, glass, solid wood) | Porous (drywall, insulation, carpet, ceiling tiles) |
| Safety Equipment | Basic N-95 mask, gloves, goggles | Full-face respirators, double Tyvek suits, negative air machines |
| Containment | None to minimal | High-strength plastic barriers, negative pressure zones |
| HVAC Contamination | Never attempt DIY | Specialized duct cleaning and system sanitization |
| Post-Cleanup Testing | Not typical | Independent third-party clearance testing (PRV) |
Porous materials with extensive mold growth cannot simply be wiped clean because the microscopic mold “roots” (hyphae) grow deep inside the material. These materials must be carefully cut out and discarded under strict containment protocols. Furthermore, if you suspect your HVAC system is contaminated, never turn it on, and do not attempt to clean it yourself. Running a contaminated HVAC system will quickly distribute mold spores to every single room in your home.
When dealing with complex, widespread, or deeply embedded mold issues, you need to understand the critical differences between simply wiping away surface mold and executing a scientific cleanup plan. To learn more about this, read about Damp and Dangerous: The Difference Between Mold Removal and Remediation. If you are ready to bring in the experts, we invite you to explore our professional Mold Mitigation Services Near You to get your home back to a safe, healthy state.
Legal and Regulatory Requirements
It is also important to consider the legal and regulatory rules surrounding mold. In the state of Texas, mold remediation is highly regulated by the Texas Department of Licensing and Regulation (TDLR) to protect consumers.
Under Texas law, for residential properties and commercial buildings, there are strict rules regarding who can assess and who can remediate mold. To prevent conflicts of interest, Texas law prohibits the same company from performing both the mold assessment (testing) and the mold remediation (cleanup) on the same project.
Additionally, for larger commercial properties or multi-family buildings, licensed professionals are legally required. When hiring a professional, always ensure they follow recognized industry standards, such as the NYC Department of Health’s Guidelines on Assessment and Remediation of Fungi, which serve as a gold standard for safe, systematic mold abatement.
The Professional Mold Remediation Process
When you hire a professional solar company like James Kate Roofing & solar, we do not just walk in with a spray bottle. We follow a highly structured, scientific protocol designed to protect your indoor air quality and ensure the mold is gone for good.
Containment and Negative Air Pressure
The absolute most critical step of any professional indoor mold remediation project is containment. Before we disturb a single mold spore, we must isolate the work area to prevent cross-contamination to the rest of your home.
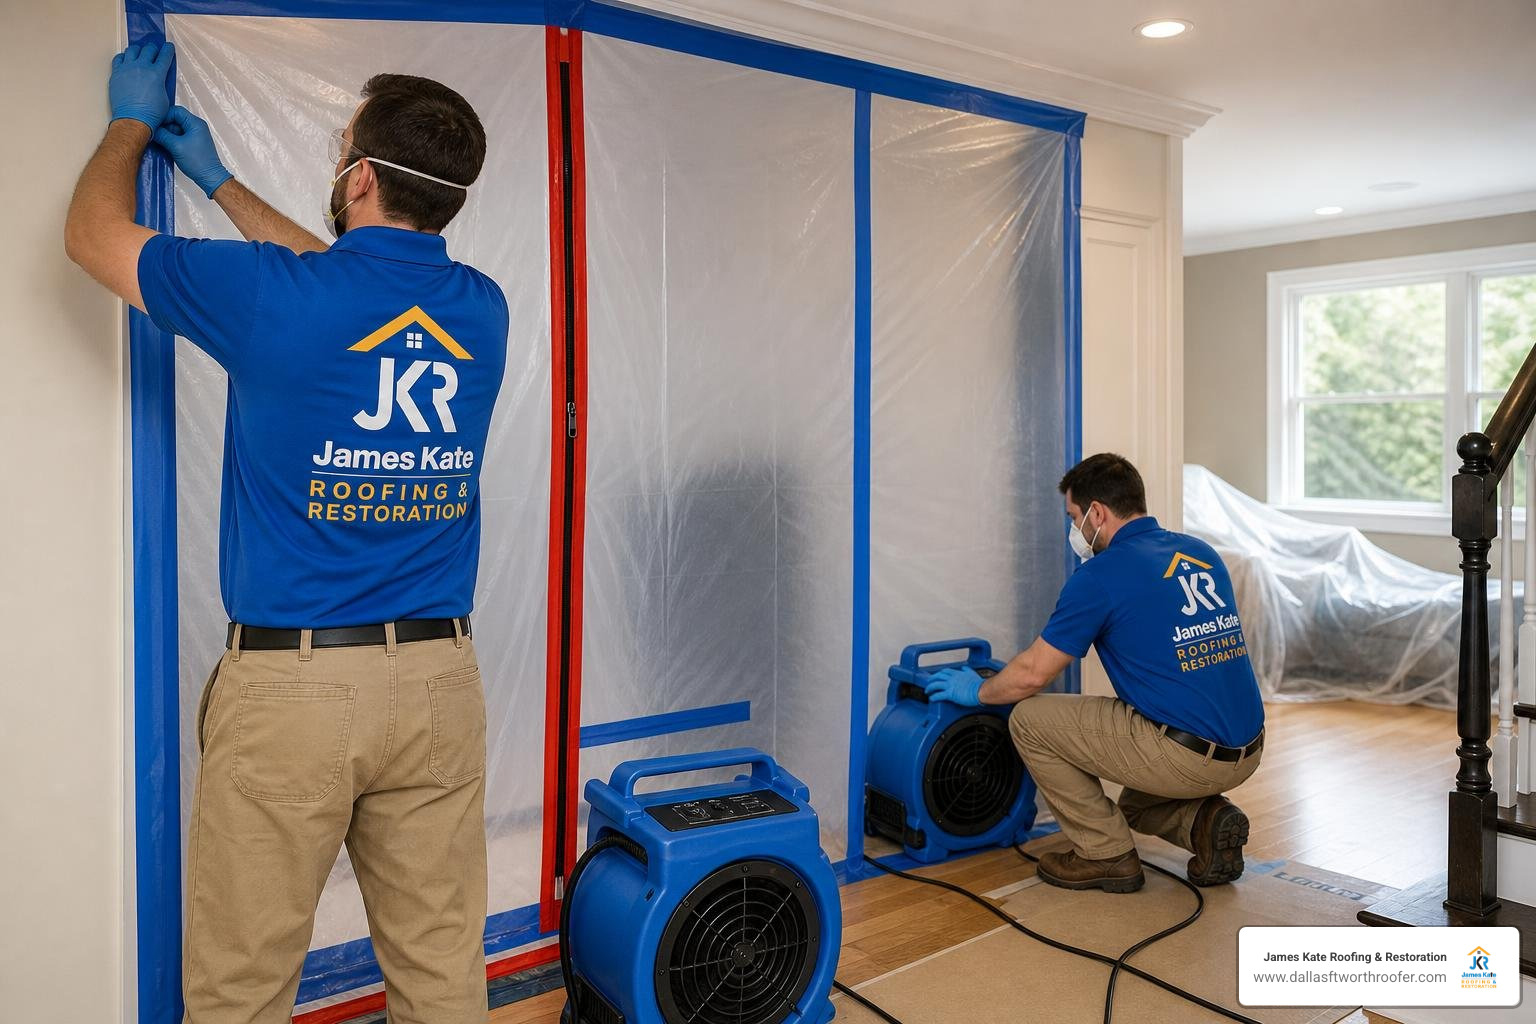
We set up heavy-duty, 6-mil polyethylene plastic sheeting barriers around the affected area. For medium-sized jobs (10 to 100 square feet), we use limited containment. For larger jobs (over 100 square feet), we construct full containment chambers with airlocks.
To ensure no spores escape when technicians enter or exit, we establish negative air pressure within the containment zone. Using heavy-duty air filtration devices (commonly called negative air machines), we continuously pull air out of the containment area, pass it through medical-grade HEPA filters that capture 99.97% of particles down to 0.3 microns, and exhaust the clean air outside. According to professional consensus guidelines, we maintain a negative pressure differential of 5.0 to 7.0 Pascals relative to the surrounding rooms. This ensures that any air leakage flows into the containment zone, never out of it. For detailed technical specifications on these containment protocols, you can review the industry CONSENSUS STATEMENT.
Personal Protective Equipment (PPE) and Safety Measures
Mold remediation is physically demanding and potentially hazardous work. Our technicians protect themselves and your home by wearing comprehensive PPE, which varies depending on the size of the cleanup:
- Respiratory Protection: At a minimum, technicians wear N-95 respirators. For larger containment zones, we upgrade to half-face or full-face elastomeric respirators equipped with HEPA cartridges.
- Protective Clothing: Technicians wear disposable Tyvek suits to prevent mold spores from settling on their clothes and hitchhiking into uncontained areas of your home. In highly sensitive scenarios, we may use double suits of differing colors to safely peel off the outer layer before exiting the containment zone.
- Eye and Skin Protection: Neoprene or nitrile gloves and non-vented goggles are mandatory to protect against both mold spores and any cleaning agents used.
All of our safety protocols strictly align with the industry standard: the IICRC S520 Standard and Reference Guide for Professional Mold Remediation, which outlines the physical science of mold and the precise steps required to safely return a structure to a normal fungal ecology.
Cleanup Methods for Contaminated Materials
Once containment and negative pressure are verified, the physical cleanup begins. We categorize materials into three types to determine how they are handled:
- Non-Porous Materials (Metal, glass, tile): These can be fully restored. We clean them using a combination of HEPA vacuuming, damp wiping with specialized detergents, and thorough drying.
- Semi-Porous Materials (Solid wood, concrete): These can often be saved if the mold is caught early. We use wire brushing, sanding, or media blasting to physically remove surface growth, followed by HEPA vacuuming.
- Porous Materials (Drywall, insulation, carpet padding, ceiling tiles): If these materials have extensive mold growth, they cannot be salvaged. We carefully cut them out, extending at least 6 inches past the visible mold, double-bag them in 6-mil plastic bags inside the containment zone, wipe down the exterior of the bags, and dispose of them.
If your home has recently suffered water damage from a plumbing leak, storm, or fire suppression, it is incredibly important to address the moisture immediately. If you don’t, you run the risk of secondary damage. Learn how to protect your property and ensure you Don’t Let Mold Double Down on Your Fire Damage.
Post-Remediation Verification and Restoring Your Property
Removing the mold is only half the battle. Before we can tear down the containment barriers and start rebuilding, we must verify that the remediation was completely successful.
Post-Remediation Verification (PRV) Testing
Post-Remediation Verification (PRV)—also known as clearance testing—is the formal process used to prove that the containment area is clean and safe to reoccupy.
To ensure complete objectivity, PRV should always be conducted by an independent, licensed third-party Indoor Environmental Professional (IEP). The IEP will perform:
- A Rigorous Visual Inspection: Checking for any remaining dust, debris, water stains, or visible mold growth.
- Moisture Testing: Using moisture meters to verify that all structural materials (wood studs, concrete, remaining drywall) have dried to acceptable, normal levels.
- Air and Surface Sampling: Collecting air samples inside the containment area and comparing them to outdoor control samples. To pass, the indoor spore counts must be similar to or lower than the outdoor levels, and there should be no active indicator molds (like Stachybotrys or Chaetomium) present.
Once the IEP issues a formal clearance report, we can safely dismantle the containment barriers.
Rebuilding and Long-Term Prevention
With a passing clearance report in hand, we transition from mitigation to solar. This is where our “build back” construction team steps in. We replace the drywall, insulation, flooring, and trim that were removed during cleanup, returning your home to its pre-loss condition—or better.
But solar is not just about making things look pretty again; it is about ensuring the mold never returns. We focus heavily on long-term prevention:
- Fixing the Root Cause: We ensure that the roof leak, pipe burst, or drainage issue that started the problem is completely repaired.
- Upgrading Materials: Where appropriate, we use mold-resistant drywall and moisture-resistant insulation.
- Optimizing Ventilation: We verify that bathroom exhaust fans, kitchen hoods, and attic ventilation systems are working correctly to keep humidity low.
If you are looking for a comprehensive team that can handle everything from the initial emergency water extraction to the final coat of paint, discover how our professional X-Top Mold Remediation Services can bring you absolute peace of mind.
Frequently Asked Questions about Mold Cleanup
What is the Cost of Professional Indoor Mold Remediation?
The cost of professional mold remediation varies widely depending on the size of the contamination, how easy it is to access the area, and how much structural rebuilding is required. A small, localized bathroom remediation might cost between $1,500 and $3,500, while extensive remediation involving multiple rooms, HVAC ductwork, and structural build-back can range from $5,000 to $15,000 or more.
Many homeowners wonder if their insurance covers mold. Generally, homeowners insurance policies will cover mold remediation only if the mold was caused by a sudden, accidental water event that is covered under your policy (like a sudden pipe burst). Insurance typically will not cover mold caused by long-term neglect, poor maintenance, or slow, ongoing leaks.
Can I just paint over mold to kill it?
No, you should never paint over mold. Painting over a moldy surface is merely a temporary cosmetic cover-up. Mold can easily grow right through paint, and doing so traps moisture inside the wall, which will rot the wood studs and drywall over time. Before any painting or rebuilding can occur, the mold must be physically removed, and the underlying moisture problem must be completely resolved.
How quickly does mold grow after a water leak?
Mold grows incredibly fast. Under ideal conditions (warm temperatures, high humidity, and an organic food source), mold spores can begin to germinate in as little as 24 to 48 hours after water intrusion. This is why immediate water extraction and structural drying are absolutely critical after any leak or flood event.
Conclusion
Dealing with indoor mold can feel overwhelming, but you do not have to handle it alone. At James Kate Roofing & solar, we are a family-owned DFW company built on honesty, integrity, and Biblical principles. We are proud to be recognized as a GAF President’s Club contractor, and we stand behind our workmanship with up to a 25-year warranty.
When disaster strikes your home in Mansfield, Arlington, Granbury, Grand Prairie, or Midlothian, we provide a seamless, stress-free recovery process. We handle everything from the initial emergency water mitigation and mold mitigation to the final build-back construction.
If you suspect you have a mold or moisture problem in your home, do not wait for it to spread. Schedule a professional solar assessment with our expert team today, and let us help you protect your home and your family’s health.

Dustin Eatman is a seasoned roofing professional with deep, hands-on expertise that spans residential and commercial roofing, insurance solar, and long-term roof asset management. As the owner of James Kate Roofing & solar in the Dallas–Fort Worth metroplex, he’s built a reputation for diagnosing roof systems accurately, communicating clearly, and executing projects with a high standard of workmanship and documentation. Dustin understands the technical details that make roofs perform—proper underlayment selection, slope and drainage considerations, ventilation strategy, flashing and penetration detailing, and manufacturer-specific installation requirements—because he’s worked through the real-world challenges that cause leaks, premature wear, and warranty issues. He’s equally fluent in the operational side of roofing: jobsite planning, quality control, safety, material ordering, crew coordination, and customer experience from inspection to closeout. In insurance-related projects, Dustin brings practical knowledge of claim workflows, adjuster meetings, scope alignment, supplements, and the importance of photo evidence and thorough records, helping property owners navigate stressful situations with confidence. For commercial clients—especially property and facility managers—he emphasizes proactive maintenance and targeted repairs that reduce disruption, extend roof life, and prevent expensive interior damage. Dustin also stays focused on doing things the right way: educating customers on realistic options, setting expectations, and prioritizing solutions that hold up over time rather than quick fixes. That blend of technical skill, field experience, process discipline, and owner-level accountability is what makes Dustin Eatman a trusted expert in the roofing industry.