
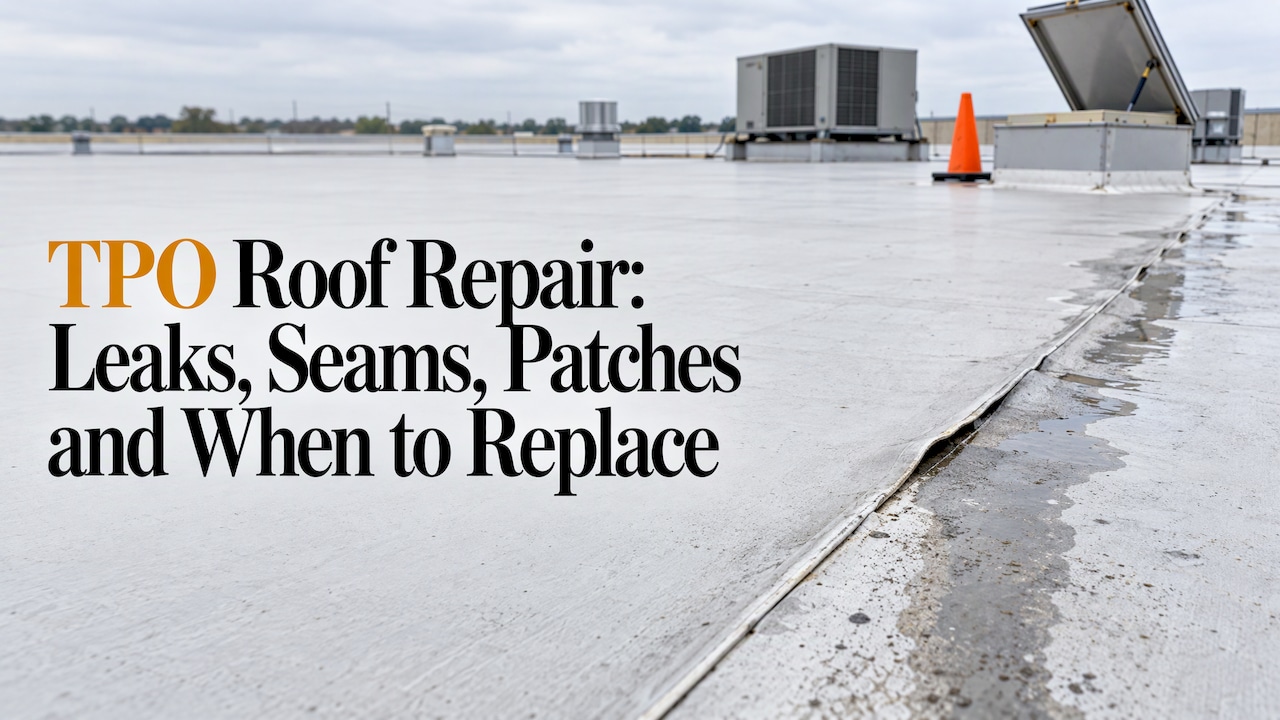
A TPO roof leak is repaired by finding the real source, cleaning the membrane, and hot-air welding a compatible patch or seam fix over it. The leak is rarely where the ceiling stain is. Most failures start at seams, flashings, pipe penetrations or drains. That is why a repair that begins with a full roof inspection holds up and one that begins with a dab of sealant does not. We are James Kate Roofing & solar, a GAF Master Elite® contractor in North Texas, and we offer commercial roof repairs and leak diagnosis for TPO roofs across Dallas-Fort Worth.
TL;DR
- TPO (thermoplastic polyolefin) is a single-ply white membrane. Its seams are heat-welded, so a proper repair is a welded repair, not a surface coating of sealant.
- Trace the leak across the whole roof system: perimeter, seams, curbs, penetrations and drains. The interior drip point only tells you where water ends up.
- Isolated punctures and seam defects are patchable. Damage in more than six spots within 100 square feet, or wet insulation, calls for a larger repair or evaluation.
- Check your manufacturer warranty before any work. IKO, for example, asks that suspected leaks be reported within 30 days.
- For a free inspection and estimate on a leaking TPO roof, start with our commercial roof inspection page.
Table of Contents
- What a TPO roof is and why it leaks
- Finding the leak before anyone patches anything
- How a proper TPO repair is done
- Materials: what actually goes into the repair
- Repair or replace: where the line sits
- What affects the cost of a TPO repair
- Check the warranty before work begins
- Get a TPO leak looked at
- FAQ
- Sources
What a TPO roof is and why it leaks
TPO is a flat or low-slope roofing membrane sold in rolls, typically white to reflect heat. Sheets are joined by melting the overlapping edges together with a hot-air welder, which creates a continuous waterproof surface. If you want to understand how it differs from other membranes, our guides on TPO versus PVC and on thermoset versus thermoplastic roofing cover that ground.
Because the field of the membrane is a single sheet, water rarely gets through the middle of it unless something punctures it. Leaks usually come from:
- Seams where welds were undersized, incomplete or later opened by movement.
- Flashings and terminations at walls, curbs and edges.
- Penetrations such as pipes, vents, conduit and rooftop equipment supports.
- Drains and clamping rings, where debris or failed sealant lets water in.
- Punctures and tears from foot traffic, dropped tools, hail or wind-blown debris.
IKO’s building-owner guide for its TPO system points owners to the same places: flashings, penetrations, drains, clamping rings and sealants, plus clearing anything that blocks drainage. It also tells owners to look inside the building for stains, discoloration or rusted surfaces, which are often the first sign.
North Texas adds its own stress: summer heat, hard hail seasons and sudden wind. After any storm, a roof that looked fine can have bruised or punctured membrane that only shows up as a leak weeks later. Our guide to spotting roof damage after a storm lists what to look for from the ground.
Finding the leak before anyone patches anything
The most common reason a TPO repair fails is that it was made in the wrong place. Water travels along the deck, insulation and seams before it drips, so the stain on a ceiling tile can sit many feet from the opening.
Carlisle’s inspection sequence treats the roof as a system: perimeter details, seams, curbs, penetrations and drains, then a final walk across the field. Following that order catches the cause rather than the symptom.
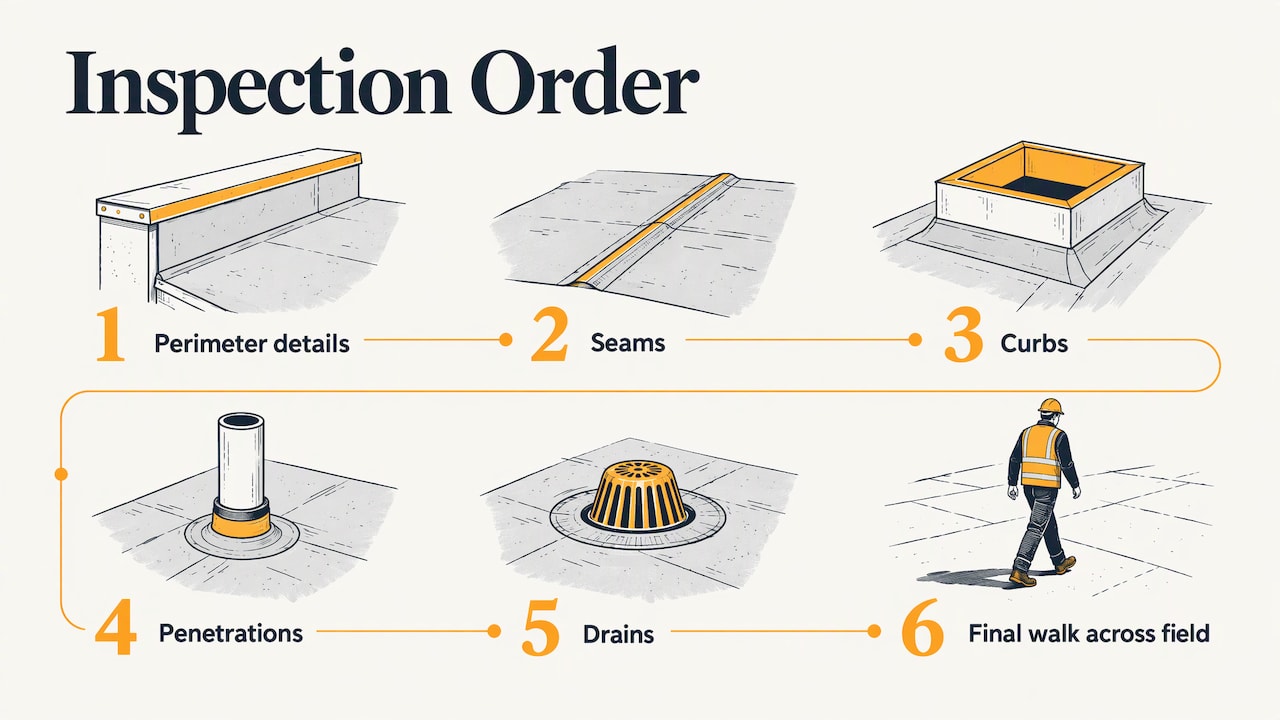
Once welds have cooled to ambient temperature, the inspector probes the seams with a blunt tool and marks every void. The same Carlisle guidance calls for marked voids to be repaired by the end of the workday, so a gap is not left open overnight. Versico adds that probing should wait until welds have cooled for at least 20 minutes, and that a seam needs a minimum 1.5-inch weld. An undersized weld requires an overlay even if probing finds no defect. Scorched or overheated membrane may need an overlay too, even when the weld probes cleanly.
Rooftop equipment deserves its own look. Units sit on curbs that are penetrations in the membrane, and service visits move foot traffic across the roof. A rooftop unit maintenance checklist helps building managers catch condensate, panel and curb issues that can end up as roof leaks.
If water is coming in right now, our guides on what to do if your roof is leaking and handling minor leaks before they escalate cover the first steps to limit interior damage while you arrange a repair.
How a proper TPO repair is done
Manufacturers publish detailed repair instructions, and a qualified roofer follows them. Here is the sequence, with where each step goes wrong.
1. Inspect and mark the damage
Every puncture, open seam and failed detail is located and marked before work starts. Where it goes wrong: only the one obvious hole gets fixed and the open seam three feet away keeps leaking.
2. Clean the membrane
Elevate’s in-service repair instructions call for scrubbing dirt with warm soapy water, rinsing, drying, and then wiping with a splice wash before hot-air welding. Where it goes wrong: aged TPO collects dirt and residue, and a weld made on a dirty surface can look sealed while failing to bond.
3. Cut a patch that is large enough
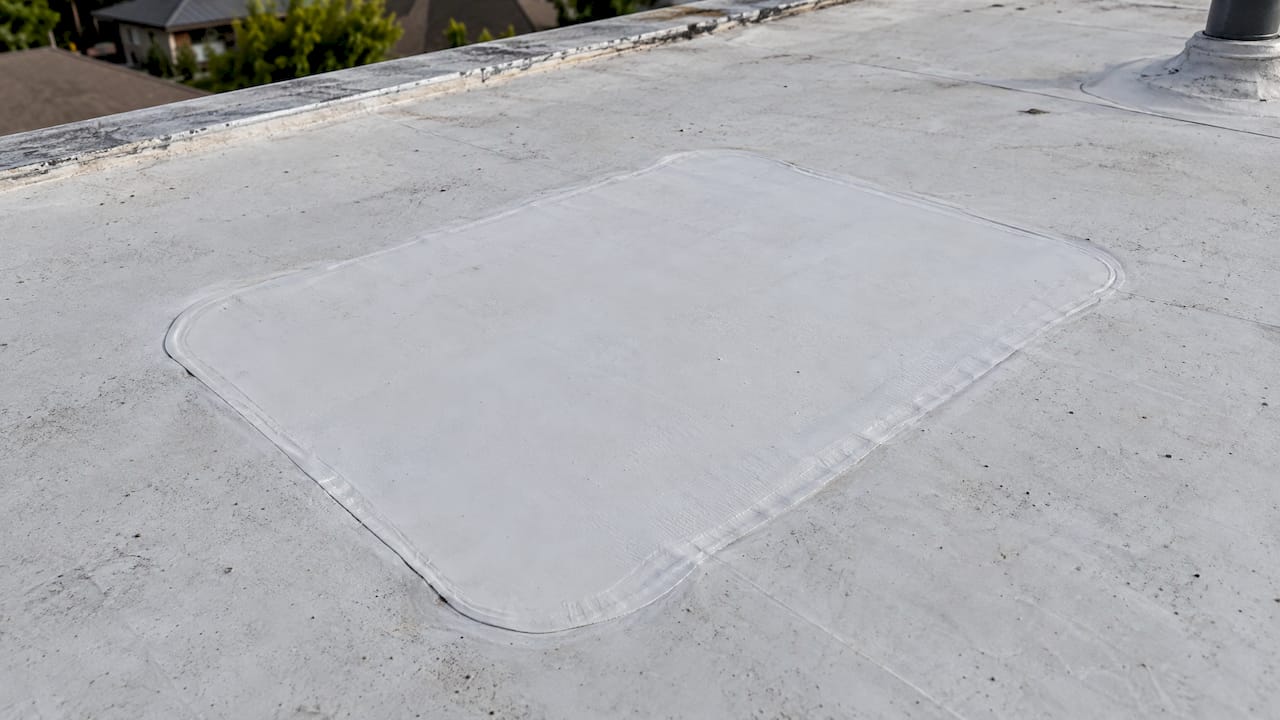
The same guide requires hot-air-welded patch material to extend at least 2 inches beyond the damage on every side, with rounded corners. For a pinhole, the minimum patch is 4 by 4 inches. Where it goes wrong: square corners lift and peel, and undersized patches leave the edge of the damage unsupported. Our article on patching a pinhole explains why even tiny openings need a proper patch.
4. Prime or use the right materials where needed
Some repair details use pressure-sensitive products instead of welds. Carlisle specifies TPO primer or low-VOC primer with pressure-sensitive products approved for TPO. Where it goes wrong: a generic tube from a hardware store is not an approved TPO product.
5. Heat-weld the patch
A hot-air welder melts the patch and membrane together, and a roller pressure-finishes the edge. Temperature, speed and pressure all matter. Where it goes wrong: too little heat gives a cold weld that opens later, and too much scorches the membrane, which Versico notes can itself require an overlay.
6. Probe, seal and document
Once cooled, the edges are probed, and any voids are redone. Photos of the finished repair and a written record help with warranty and insurance files. Where it goes wrong: no record means no proof that repairs followed the manufacturer’s requirements.
At this stage, we handle leak diagnosis and repair for residential low-slope roofs and commercial repairs for DFW businesses, with free inspections and estimates.
Materials: what actually goes into the repair
Materials matter because TPO only welds to compatible TPO. GAF’s repair toolkit lists seam cleaner, TPO primer, a backpack welder, weldable or self-adhered TPO and PVC patches, silicone sealant and mastic. The right choice depends on the detail being repaired and on the manufacturer’s instructions for that system.
Can TPO be glued down? Yes, in the right places. GAF’s spray adhesive bonds smooth TPO membrane to substrates. But WeatherBond’s installation guide says bonding adhesive is for adhering membrane to substrates and should not be applied to splice areas that will be hot-air welded. Glue holds the sheet to the roof. Welds make the sheet watertight.
For penetrations, Mule-Hide’s July 2026 maintenance guide identifies TPO pipe seals for single-pipe penetrations and says T-joint covers are mandatory on 60- and 80-mil systems, and on 45-mil systems where step-offs have not been properly sealed. A T-joint is the spot where three sheets meet, and it is a common weak point.
Repair or replace: where the line sits
Isolated punctures and seam defects are good candidates for a patch, as long as the existing membrane is clean and weldable. The line moves when the damage spreads.
Elevate’s application guide says that if damage occurs in more than six locations within a 100-square-foot area, new membrane extending 6 inches beyond the damaged area must be installed over the existing membrane. Widespread deterioration or wet insulation calls for evaluation beyond a simple patch, and wet insulation must be dealt with before the area is covered. Sealing a roof over saturated insulation traps moisture and the problem returns.
| Situation | Typical response |
|---|---|
| One puncture or tear | Cleaned, welded patch with rounded corners, at least 2 inches beyond the damage |
| Open or undersized seam | Probe, mark, then repair or overlay the seam |
| Failed pipe or curb detail | Replace the flashing detail with approved components |
| More than six damage spots in 100 sq ft | Larger membrane overlay under the manufacturer’s rules |
| Wet insulation or widespread aging | Full evaluation, with section or full replacement considered |
After a hailstorm, a number of small punctures across a large area is exactly the pattern that pushes a job past a patch. Our roof damage assessment guide shows how to check and document the damage, and our hail damage page explains the assessment process.
What affects the cost of a TPO repair
A fixed price list does not exist, because every leak is different. These are the factors that set the number on an estimate:
- How many repair points. One patch is a small job. A seam run or a dozen punctures is much more.
- Where the damage sits. Penetrations, curbs and drains need custom flashing work, which takes longer than a flat field patch.
- Wet insulation. Removing and replacing saturated insulation adds materials and labor.
- Membrane age and condition. Old, dirty or chalked membrane may not weld well and may need a larger overlay.
- Access and safety. Roof height, edge protection and equipment on the roof all affect time on site.
- Urgency. A leak with water in the building may need emergency roofing response.
The cheapest way to keep repair costs down is to find small problems early. Routine inspections after storms and at the change of each season catch open seams before water reaches the insulation.
Check the warranty before work begins
A manufacturer warranty on a TPO roof can be affected by who repairs it and how fast a leak is reported. IKO’s U.S.-market owner guide tells owners to report suspected leaks to its warranty services within 30 days of discovery. It also requires maintenance for ongoing coverage and excludes the cost of removing overburden (such as pavers or ballast) unless included in the original warranty.
Before any repair, find your warranty paperwork and confirm four things:
- The deadline to report a leak.
- Who is authorized to make repairs.
- The maintenance duties the owner must keep up.
- Whether overburden removal is covered.
Photographs and a written repair record, as described above, protect your position. Terms differ by manufacturer, so read your own document rather than assuming.
Our view on TPO repair
We treat every TPO leak as a roof-system question first and a patch question second. As a GAF Master Elite® contractor, we are used to working to manufacturer specifications, and that is the standard we bring to inspections and repairs.
Our approach is data-driven: we assess the roof, document what we find, and recommend the repair that fits, whether that is a small weld or a bigger conversation about the membrane. Our instant roofing quote tool uses historical weather data to show whether a storm likely affected your roof, which helps owners decide where to start.
We offer free inspections and estimates because owners should understand the roof before they decide anything. Clear communication and honest recommendations are how we want every client to feel secure in their roofing choices.
Dustin Eatman
Get a TPO leak looked at
If you manage a commercial building or own a low-slope roof in Dallas-Fort Worth, we can inspect the whole system, locate the leak and give you a free estimate. Our commercial roof inspections cover seams, penetrations, flashings and drains, and our team also handles storm-damage assessments and hail and wind damage inspections.

If the damage is beyond a repair, we also provide commercial roof replacement and installation. You can reach us through our main site.
FAQ
Can a TPO roof leak be repaired without replacing the roof?
Yes, in most cases of isolated damage. Punctures, open seams and failed details can be repaired with compatible TPO patches and hot-air welding when the membrane is clean and weldable. Widespread deterioration or wet insulation needs a broader evaluation.
How big should a TPO patch be?
Manufacturer guidance for hot-air-welded patches is at least 2 inches beyond the damage on every side, with rounded corners. For a pinhole, the minimum is a 4-by-4-inch patch. Rounded corners resist lifting at the edge.
Why does my TPO roof leak when the membrane looks fine?
The membrane field is rarely the source. Water usually gets in through seams, flashings, pipe and curb penetrations or drains, then travels before appearing inside. A full inspection of those details is how the true entry point is found.
Can TPO roofing be glued down?
Yes. Spray and bonding adhesives attach TPO membrane to the substrate. They are not used on splice areas, which are joined by hot-air welding, so repairs to seams rely on welds rather than glue.
How soon should I report a TPO roof leak?
As soon as you find it. Some manufacturers set deadlines: IKO’s owner guide asks for suspected leaks to be reported within 30 days of discovery. Check your own warranty for its terms.
Sources
- IKO InnoviTPO building owner’s guide
- Carlisle TPO rooftop inspection and repair guidance
- Elevate UltraPly TPO InvisiWeld application guide
- Mule-Hide maintenance and repair guide, July 2026
- Versico seam probing guidance
- GAF commercial roof maintenance and repair solutions
- WeatherBond TPO rooftop detail installation guide
- Rooftop unit maintenance checklist
Recommended
- TPO vs. PVC: Which is better?
- Patch That Pinhole: A Practical Guide to Fixing Small Roof Leaks
- One Simple Way to Fix a Roof Leak
- Don’t Get Stuck: The Essential Roof Patch Buying Guide

Dustin Eatman is a seasoned roofing professional with deep, hands-on expertise that spans residential and commercial roofing, insurance solar, and long-term roof asset management. As the owner of James Kate Roofing & solar in the Dallas–Fort Worth metroplex, he’s built a reputation for diagnosing roof systems accurately, communicating clearly, and executing projects with a high standard of workmanship and documentation. Dustin understands the technical details that make roofs perform—proper underlayment selection, slope and drainage considerations, ventilation strategy, flashing and penetration detailing, and manufacturer-specific installation requirements—because he’s worked through the real-world challenges that cause leaks, premature wear, and warranty issues. He’s equally fluent in the operational side of roofing: jobsite planning, quality control, safety, material ordering, crew coordination, and customer experience from inspection to closeout. In insurance-related projects, Dustin brings practical knowledge of claim workflows, adjuster meetings, scope alignment, supplements, and the importance of photo evidence and thorough records, helping property owners navigate stressful situations with confidence. For commercial clients—especially property and facility managers—he emphasizes proactive maintenance and targeted repairs that reduce disruption, extend roof life, and prevent expensive interior damage. Dustin also stays focused on doing things the right way: educating customers on realistic options, setting expectations, and prioritizing solutions that hold up over time rather than quick fixes. That blend of technical skill, field experience, process discipline, and owner-level accountability is what makes Dustin Eatman a trusted expert in the roofing industry.