
Why Ice and Water Shield Installation Is the First Line of Defense Against Roof Leaks
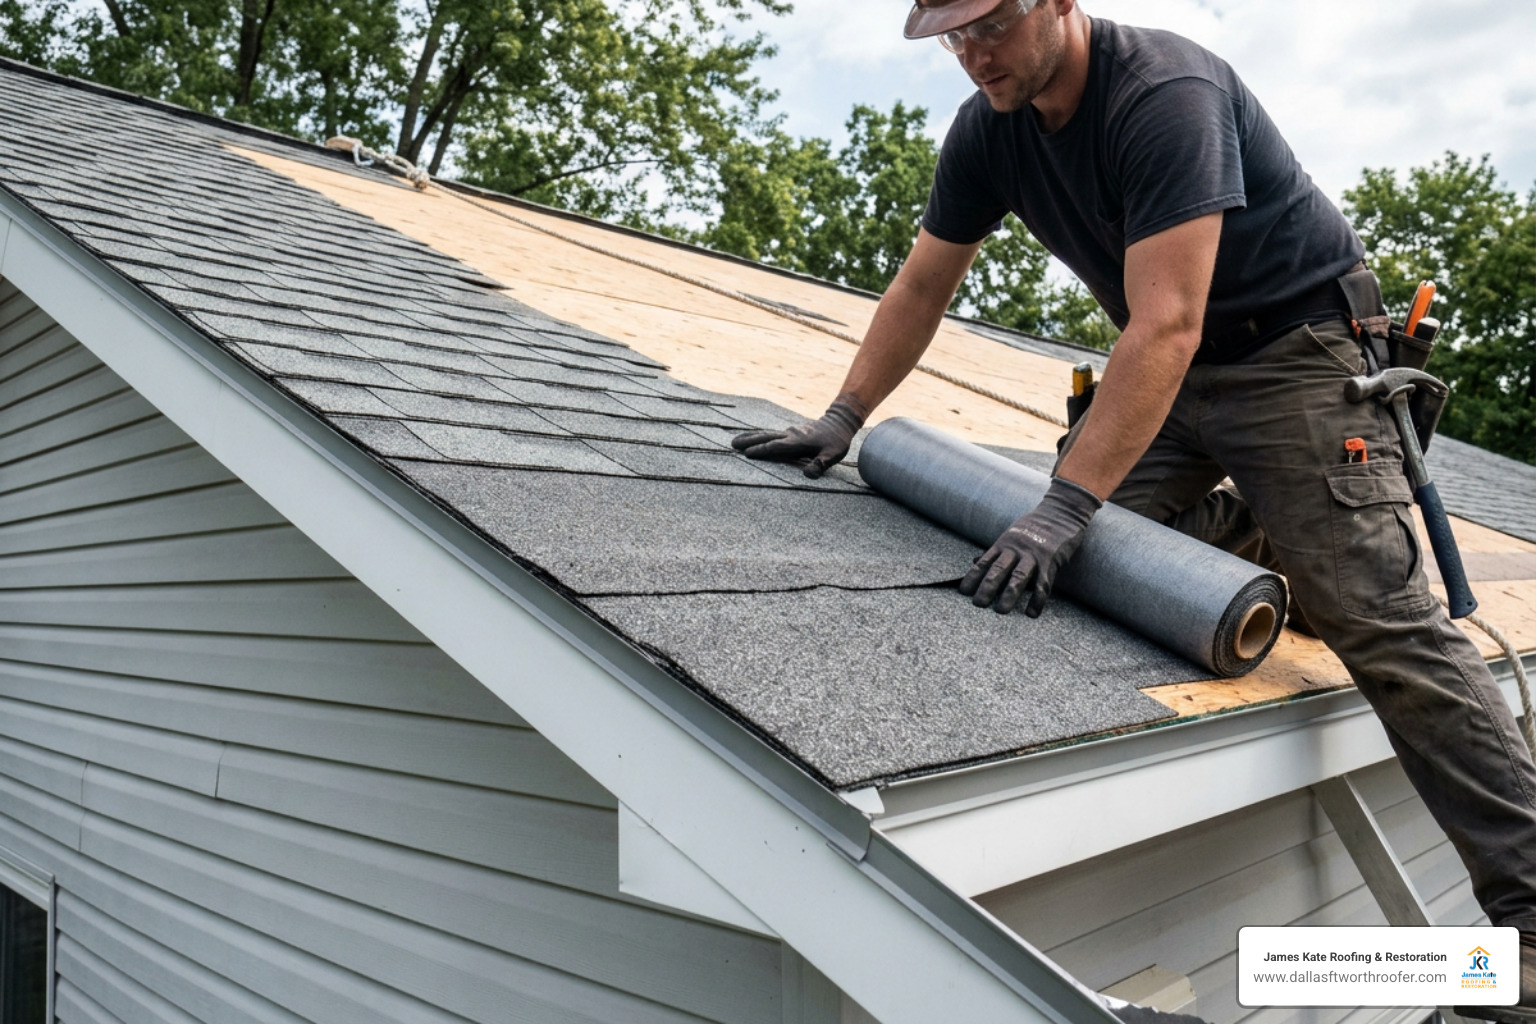
Ice and water shield installation is one of the most important steps in protecting your roof from leaks — especially in areas prone to ice dams, heavy rain, or wind-driven moisture.
Here’s a quick overview of how it works and where it goes:
- What it is: A self-adhering, waterproof membrane made from polymer-modified bitumen that sticks directly to your roof deck
- What makes it different: Unlike standard felt or synthetic underlayment, it seals around nails and fasteners — so water can’t sneak through
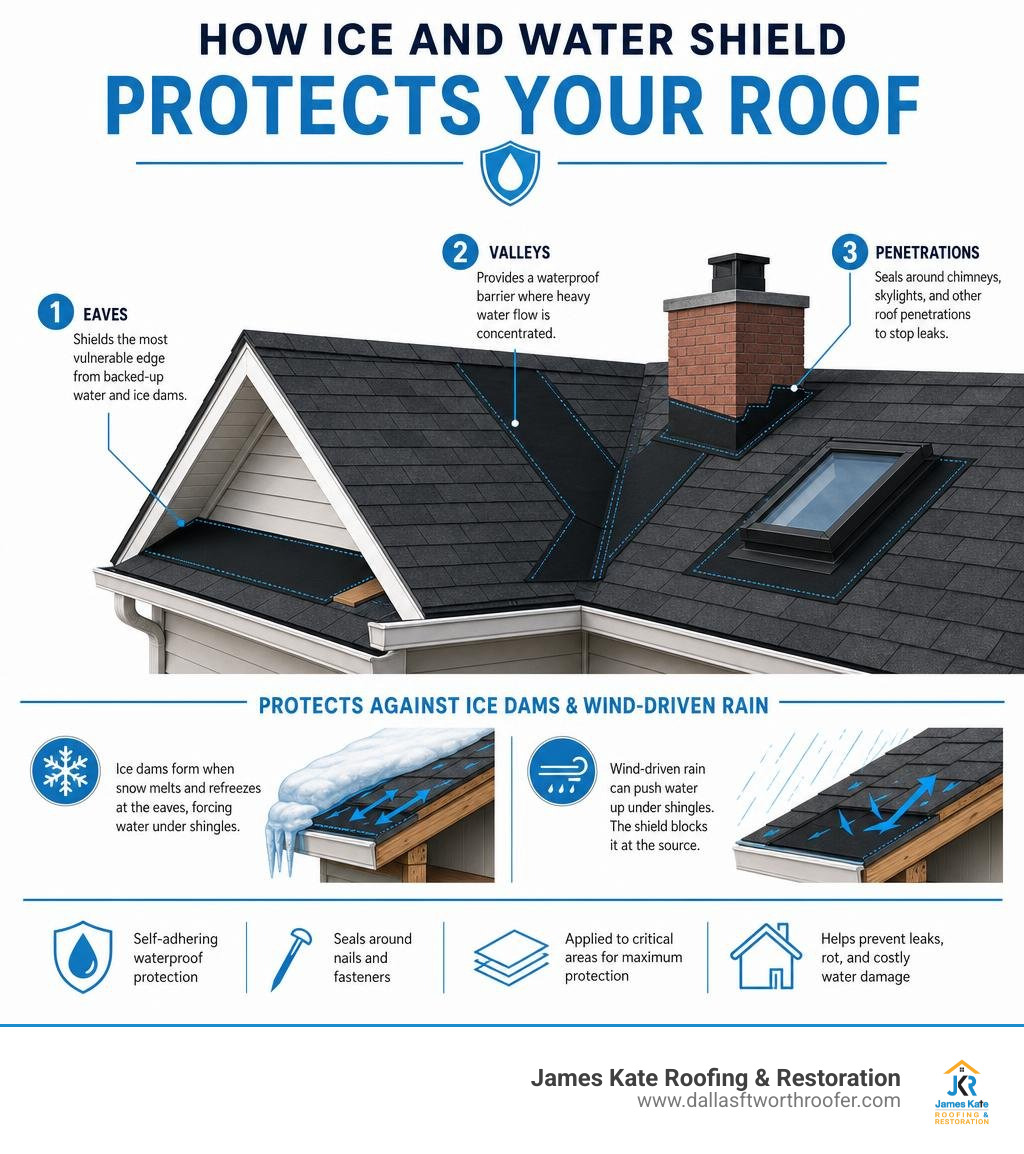
- Where it goes: Along the eaves (at least 24 inches past the interior wall line), in roof valleys, around penetrations like chimneys and skylights, and on low-slope sections
- Minimum temperature: Must be applied when the air and deck are at 40°F or above
- Key code requirement: IRC Section R905.1.2 requires ice barriers in areas where the average January temperature is 25°F or below
If your roof is leaking at the eaves or in the valleys, missing or improperly installed ice and water shield is often the culprit. This guide walks you through the full installation process — from deck prep to drip edge details.
I’m Dustin Eatman, owner of James Kate Roofing & solar in the Dallas–Fort Worth area, and I’ve overseen ice and water shield installation on hundreds of residential and commercial roofs across the region. In this guide, I’ll share the same practical approach my crews use on every job — no shortcuts, no guesswork.
Understanding Ice and Water Shield vs. Standard Underlayment
To understand why an ice and water shield is so critical, we have to look at the science of roof underlayments. Many homeowners assume that shingles are entirely waterproof. In reality, shingles are water-shedding, not waterproof. They rely on the pitch of the roof to guide water downward. When water pools, backs up, or is blown sideways by extreme North Texas winds, it gets beneath those shingles.
This is where your underlayment comes into play. Traditional underlayments, like organic felt paper or modern woven synthetic sheets, are water-resistant. They are excellent for shedding water that slips past your shingles under normal conditions, but they have a fatal flaw: they are held down by thousands of staples or plastic cap nails. Every single one of those fasteners punches a tiny hole through the underlayment. If water pools over these holes, it will leak through to your wooden roof deck.
An ice and water shield is a heavy-duty, self-adhering membrane made of polymer-modified bitumen (rubberized asphalt). When a roofer drives a shingle nail through this rubberized membrane, the asphalt “flows” and tightly grips the shank of the nail, forming a completely watertight, self-sealing gasket. It meets the rigorous standards of ASTM D1970, which tests for self-adhering polymer-modified bituminous sheet materials used as steep roofing underlayment for ice dam protection.
Choosing the right base layer is just as important as selecting the shingles themselves. If you are in the planning stages of a roof replacement, check out The Ultimate Guide to Picking Composition Roof Shingles to understand how these systems work together.
| Feature | Standard Synthetic Underlayment | Ice and Water Shield (Leak Barrier) |
|---|---|---|
| Material Composition | Woven or spun-bonded polypropylene | Polymer-modified bitumen (rubberized asphalt) |
| Attachment Method | Cap nails, staples, or mechanical fasteners | Self-adhesive backing (peel-and-stick) |
| Self-Sealing Around Nails | No | Yes (creates a watertight gasket around fasteners) |
| Waterproofing Ability | Water-resistant (sheds water) | Fully waterproof (withstands pooling & ice dams) |
| Vapor Permeability | Permeable to semi-permeable | Non-permeable (acts as a vapor barrier) |
| Typical Cost | Lower ($0.10 – $0.25 per sq. ft.) | Higher ($0.50 – $1.75 per sq. ft.) |
| Primary Locations | Full-deck coverage | Eaves, valleys, penetrations, low-slope areas |
Critical Areas: Where Does the Barrier Go?
Because ice and water shields are completely non-permeable vapor barriers, covering an entire residential roof with them can trap moisture inside your attic if your ventilation system isn’t perfectly configured. Therefore, targeted installation in high-risk zones is the standard, code-approved practice.
Here are the critical areas where we always install a leak barrier:
1. The Eaves (The 24-Inch Rule)
According to IRC Section R905.1.2, in regions where the average January temperature is 25°F or less, an ice barrier must be installed along the eaves. It must extend from the lowest edge of the roof deck to a point at least 24 inches inside the interior wall line. Even though we are based in the DFW metroplex—where January temperatures average slightly warmer—the severe winter freezes we experience every few years make this step highly recommended for local homeowners.
2. Roof Valleys
Valleys are the channels where two roof slopes meet. They carry the highest volume of water on your roof. During heavy rainstorms in Arlington or Grand Prairie, valleys turn into raging rivers. We run a continuous, full-width sheet of ice and water shield directly down the center of every valley before any shingles or metal valley flashing are installed.
3. Roof Penetrations
Chimneys, skylights, plumbing vents, and attic ventilation pipes are notorious leak hot spots. Water running down the roof hits these obstacles and pools behind them. Wrapping these penetrations in a self-adhering barrier ensures that even if water gets behind the metal flashing, it cannot reach the wood deck.
4. Low-Slope Roofs
Roofs with a pitch between 2:12 and 4:12 do not shed water as quickly as steeper roofs. On these low-slope sections, water can easily back up under shingles. For these areas, we often recommend full-deck coverage of a self-adhered leak barrier to guarantee watertight performance.
To determine if your home’s vulnerable areas are properly protected, you can cross-reference your roof’s current condition with The DFW Roof Inspection Checklist for Savvy Homeowners.
Best Practices for Ice and Water Shield Installation
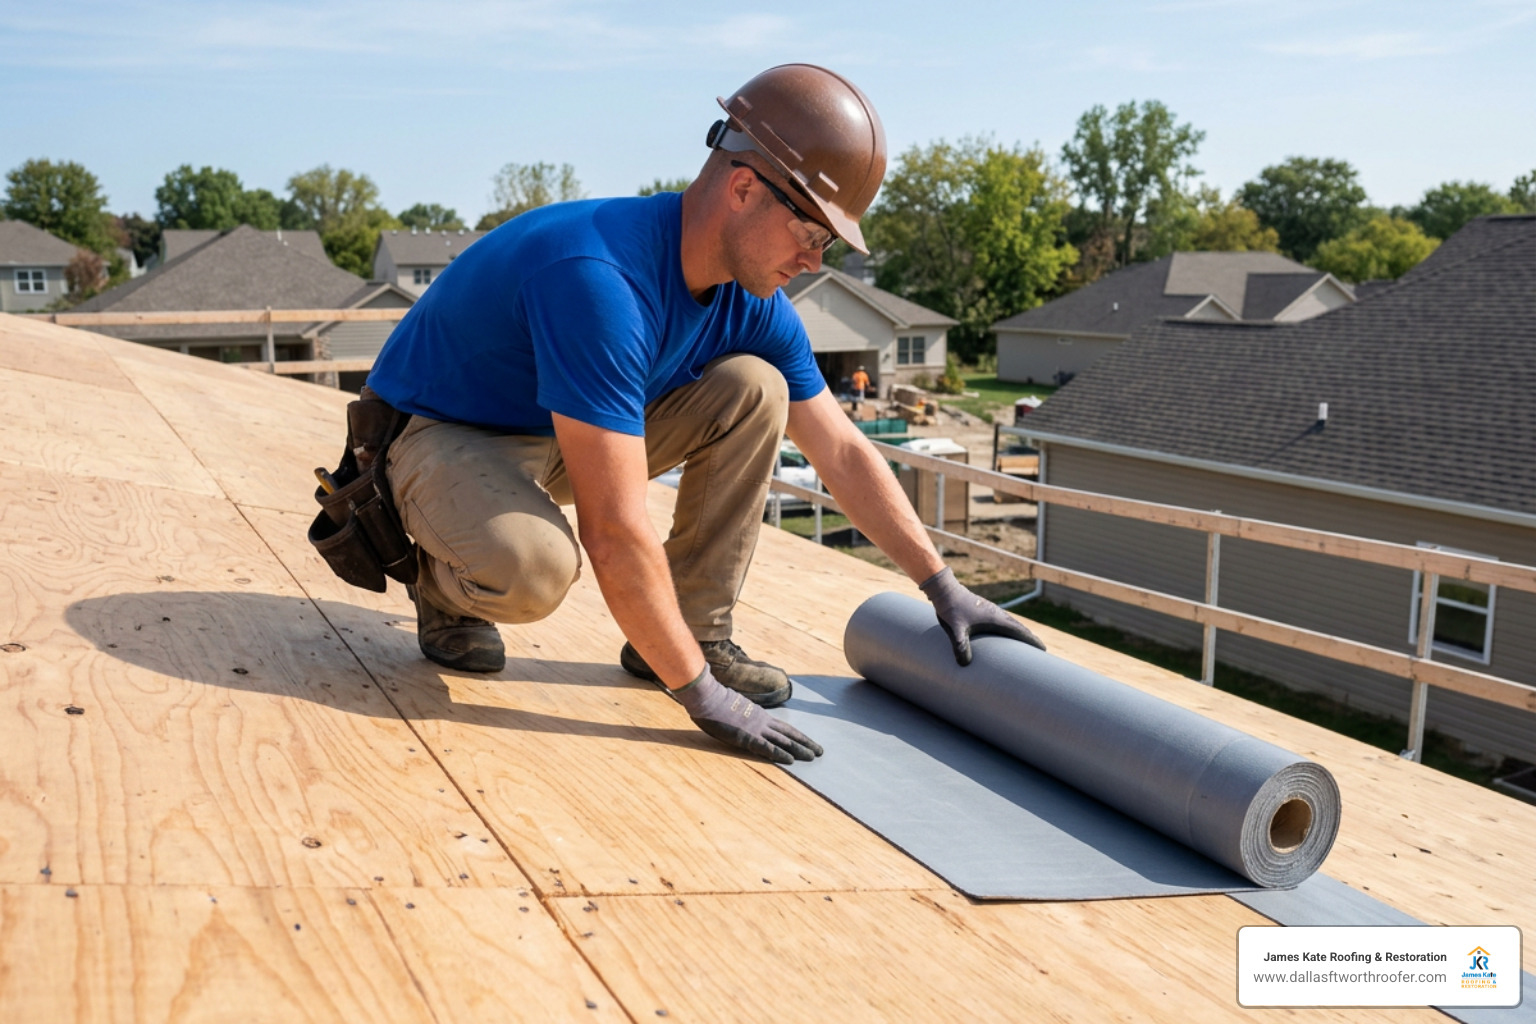
Installing a self-adhering membrane requires precision. Because the adhesive backing is incredibly sticky, you generally only get one chance to position it correctly. If you try to pull it up after it has made contact with the wood deck, you risk tearing the membrane or pulling up the top layer of the plywood.
When our crews perform a Roof Underlayment Installation Services in Mansfield, TX, we emphasize meticulous deck preparation, temperature monitoring, and safety. Working with sticky, rubberized asphalt on a sloped roof can be challenging, so our installers always wear fall protection harnesses, safety glasses, and high-traction roofing boots.
Preparation and Temperature Requirements for Ice and Water Shield Installation
Before unrolling a single foot of membrane, the roof deck must be absolutely pristine. Any leftover felt paper, old nails, wood splinters, sawdust, or moisture will ruin the adhesive bond.
- The Deck Substrate: The deck must be smooth, dry, and clean. It should consist of exterior-grade plywood (minimum 3/8-inch thickness) or oriented strand board (OSB, minimum 7/16-inch thickness). Do not install self-adhering membranes directly over dimensional lumber or spaced board sheathing, as the boards can shift, buckle, and tear the membrane over time.
- The 40°F Threshold: For the adhesive backing to properly bond (or “wet out”) onto the wood deck, the ambient air and substrate temperatures must be 40°F (4.4°C) or higher. If you attempt to install it in freezing temperatures, the adhesive will remain stiff and won’t stick, leading to wind lift and leaks. If winter installation is absolutely necessary, the deck must be primed with an asphalt-based primer, and the membrane may require back-nailing to hold it in place until warmer weather activates the adhesive.
- Priming: For concrete, masonry, or weathered wood composition decks, applying a compatible primer (such as those detailed in the GRACE ICE & WATER SHIELD® Data Sheet) is required to ensure a permanent bond.
Step-by-Step Guide to Ice and Water Shield Installation
For a standard residential installation, we recommend cutting the membrane into manageable 10- to 15-foot lengths. Working with a full 66- or 75-foot roll is incredibly difficult for a small crew and often leads to wrinkles, bubbles, and alignment errors.
- Relax the Membrane: Unroll your cut lengths on a flat surface and allow them to “relax” for a few minutes, especially in cooler weather, to eliminate curl.
- Align the Sheet: Lay the cut piece of membrane along the eave or valley. Keep the release paper backing fully intact during this step. Snap a chalk line to ensure your starter course remains perfectly straight.
- The Back-Roll Method: Once aligned, fold the membrane back on itself lengthwise. Carefully slit the plastic release liner at a 45-degree angle using a utility knife, taking care not to cut through the membrane itself.
- Peel and Press: Slowly peel away the release film at an angle while smoothing the membrane onto the deck from the center outward. This prevents air bubbles and wrinkles (often called “fishmouths”). For more visual guidance on this technique, you can watch this instructional video on How to Install Grace Ice & Water Shield.
- Roll the Surface: Use a heavy hand roller over the entire installed surface, paying special attention to the overlaps, to pressure-activate the adhesive bond.
- Manage the Overlaps: When installing successive courses, always work from the low point of the roof to the high point so that all laps shed water like a shingle.
- Side Laps: Must overlap by a minimum of 3.5 inches (90 mm).
- End Laps: Must overlap by a minimum of 6 inches (150 mm) and should be offset by at least 24 inches from any laps in the adjacent course.
Once the leak barrier is securely in place, you are ready to move on to the primary roof covering. You can read more about this transition in our guide to Composition Shingle Installation.
Integrating Flashing, Valleys, and Drip Edges
A leak barrier is only as good as its integration with the surrounding metal flashings. If you install these components in the wrong order, you will create a “lap leak” where water is guided underneath the waterproof barrier instead of over it.
- Drip Edge at the Eaves: Along the lower eaves, the metal drip edge must be installed directly onto the bare wood deck first. The ice and water shield is then installed over the drip edge. This ensures that any water backing up from an ice dam or clogged gutter flows over the metal and off the roof, rather than slipping under the drip edge and rotting the fascia board.
- Drip Edge at the Rakes: Along the rakes (the sloped side edges of the roof), the order is reversed. The underlayment goes down first, and the metal drip edge is installed over the underlayment. This protects the edge of the underlayment from being lifted by high winds.
- Valleys: When detailing valleys, center a full 36-inch-wide roll of ice and water shield directly over the valley centerline. Work from the bottom up, overlapping end laps by at least 6 inches. If you are using a metal valley liner, place it directly over the self-adhered barrier, securing it with clips rather than nails driven through the valley center.
- Chimneys and Roof-to-Wall Transitions: Run the membrane up vertical walls or chimney brick by at least 8 to 12 inches before installing your metal step flashing and counter-flashing. This creates a continuous, rubberized seal that prevents wind-driven rain from penetrating the transition joint.
For a deeper dive into these technical flashing specifications, you can review the manufacturer’s Application procedures for self-adhered document or explore our comprehensive guide on Mastering Roof Shingle Installation Tips and Tricks.
Common Installation Mistakes and How to Avoid Them
Even professional roofers sometimes cut corners when installing self-adhering membranes. Here are the most common mistakes we see during our inspection and solar work in Midlothian and Granbury, and how to avoid them:
1. Installing on a Wet Deck
This is the single most common cause of adhesion failure. Even a light morning dew or high humidity can leave a microscopic film of moisture on the plywood. If you apply a peel-and-stick membrane over a damp deck, it will trap the moisture, prevent the adhesive from bonding, and eventually cause the wooden decking to rot from the inside out. Always wait for the sun to fully dry the deck before application.
2. Leaving “Fishmouths” and Wrinkles
If the membrane is stretched or misaligned during installation, it will wrinkle. These wrinkles form hollow tunnels (fishmouths) that allow wind-driven rain to bypass the seal. If you get a wrinkle, cut it out entirely, lay the membrane flat, and apply a generous, rounded patch of membrane over the cut area, extending at least 6 inches in all directions.
3. Overdriving Nails
When installing shingles over your leak barrier, ensure your pneumatic nail guns are calibrated correctly. If a nail is overdriven, it will slice right through the membrane, ruining its self-sealing properties. Nails must be driven straight and flush with the shingle surface.
4. Exceeding Maximum Exposure Limits
While high-quality leak barriers can serve as a temporary roof, they are not designed for permanent UV exposure. Most standard shields can only be left uncovered for 30 days before the primary roof covering must be installed. Some premium high-temperature membranes can handle up to 90 or 120 days of exposure, but exceeding these limits causes the rubberized asphalt to dry out, crack, and lose its waterproofing capabilities.
For manufacturer-specific rules on exposure and installation, you should consult the GAF Leak Barrier Installation Guidelines. Taking care of these details early on is a key part of long-term roof health, as outlined in our Expert Tips for Affordable Roof Maintenance and Longevity.
Frequently Asked Questions about Roof Leak Barriers
Does ice and water shield go over or under the drip edge?
It depends on where you are looking on the roof. At the eaves (the bottom horizontal edges), the ice and water shield goes over the metal drip edge to prevent water from backing up behind the metal. At the rakes (the sloped side edges), the ice and water shield goes under the drip edge to protect the membrane’s edge from wind uplift.
Can you install ice and water shield in the rain or freezing cold?
No. You should never install a self-adhering membrane in the rain because water will destroy the adhesive bond. Similarly, if the temperature is below 40°F, the rubberized asphalt will not stick to the wood deck without the help of special primers and hot-air guns.
Should you cover the entire roof deck with ice and water shield?
In most residential applications, no. Because ice and water shields are completely vapor-impermeable (achieving a moisture transmission rate of less than 0.05 perms), covering the entire deck can trap warm, moist air inside your attic. Unless you have a highly engineered, unvented attic system with spray-foam insulation, full-deck coverage can lead to condensation, mold growth, and deck rot. It is much more cost-effective and structurally sound to use a breathable synthetic underlayment for the main body of the roof and reserve the leak barrier for high-risk areas like eaves, valleys, and penetrations.
Conclusion
Installing a high-quality ice and water shield is one of the smartest investments you can make when replacing your roof. It acts as an invisible insurance policy, protecting your home’s structure from severe North Texas thunderstorms, wind-driven rain, and sudden winter freezes.
At James Kate Roofing & solar, we are committed to doing things the right way. As a family-owned DFW business built on honesty, integrity, and Biblical principles, we don’t cut corners on underlayments. Our status as a GAF President’s Club contractor allows us to offer industry-leading warranties, including up to a 25-year workmanship warranty on our installations. Whether you are in Mansfield, Arlington, Granbury, Grand Prairie, or Midlothian, our team is here to ensure your home stays dry and secure.
If you suspect your current roof is missing these critical protective layers, don’t wait for the next major storm. Schedule a professional roof inspection today with our team, and read Your Guide to Hiring a Qualified Roof Inspector to learn what to look for when choosing a roofing partner.

Dustin Eatman is a seasoned roofing professional with deep, hands-on expertise that spans residential and commercial roofing, insurance solar, and long-term roof asset management. As the owner of James Kate Roofing & solar in the Dallas–Fort Worth metroplex, he’s built a reputation for diagnosing roof systems accurately, communicating clearly, and executing projects with a high standard of workmanship and documentation. Dustin understands the technical details that make roofs perform—proper underlayment selection, slope and drainage considerations, ventilation strategy, flashing and penetration detailing, and manufacturer-specific installation requirements—because he’s worked through the real-world challenges that cause leaks, premature wear, and warranty issues. He’s equally fluent in the operational side of roofing: jobsite planning, quality control, safety, material ordering, crew coordination, and customer experience from inspection to closeout. In insurance-related projects, Dustin brings practical knowledge of claim workflows, adjuster meetings, scope alignment, supplements, and the importance of photo evidence and thorough records, helping property owners navigate stressful situations with confidence. For commercial clients—especially property and facility managers—he emphasizes proactive maintenance and targeted repairs that reduce disruption, extend roof life, and prevent expensive interior damage. Dustin also stays focused on doing things the right way: educating customers on realistic options, setting expectations, and prioritizing solutions that hold up over time rather than quick fixes. That blend of technical skill, field experience, process discipline, and owner-level accountability is what makes Dustin Eatman a trusted expert in the roofing industry.