
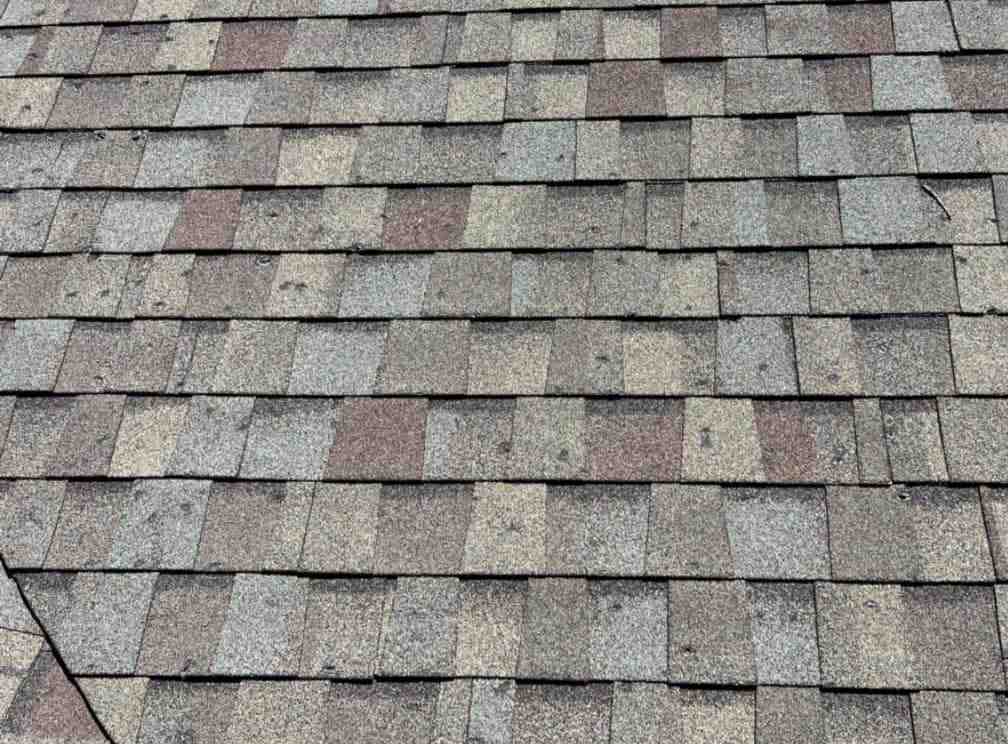
Fast, Safe Composition Shingles Roof Repair Starts With the Right Fix
For a small, dry, easy-to-reach problem, composition shingles roof repair usually means lifting the shingle above the damage, removing the old fasteners, sliding in a matching replacement, and securing it with galvanized roofing nails. For a minor crack, clean and dry the area, apply a thin layer of asphalt roofing cement, then press loose granules into the surface to protect the patch from UV exposure.
Do not patch a roof in rain or climb onto a steep, wet, or storm-damaged roof. Missing shingles, curled edges, cracked tabs, nail pops, loose flashing, ceiling stains, and heavy granule buildup in gutters all deserve a closer look. If damage is widespread, the roof deck feels soft, or leaks keep returning, a professional inspection is the safer next step.
A composition shingle roof is a system, not just a layer of shingles. A lasting repair depends on sound decking, dry materials, correct nail placement, sealed flashing, and good attic ventilation. Acting quickly can keep one damaged shingle from becoming a larger water-damage problem.
I am Dustin Eatman, owner of James Kate Roofing & solar. My work in composition shingles roof repair, insurance solar, flashing details, ventilation, and long-term roof maintenance helps North Texas property owners make practical decisions before minor damage turns into a major repair.
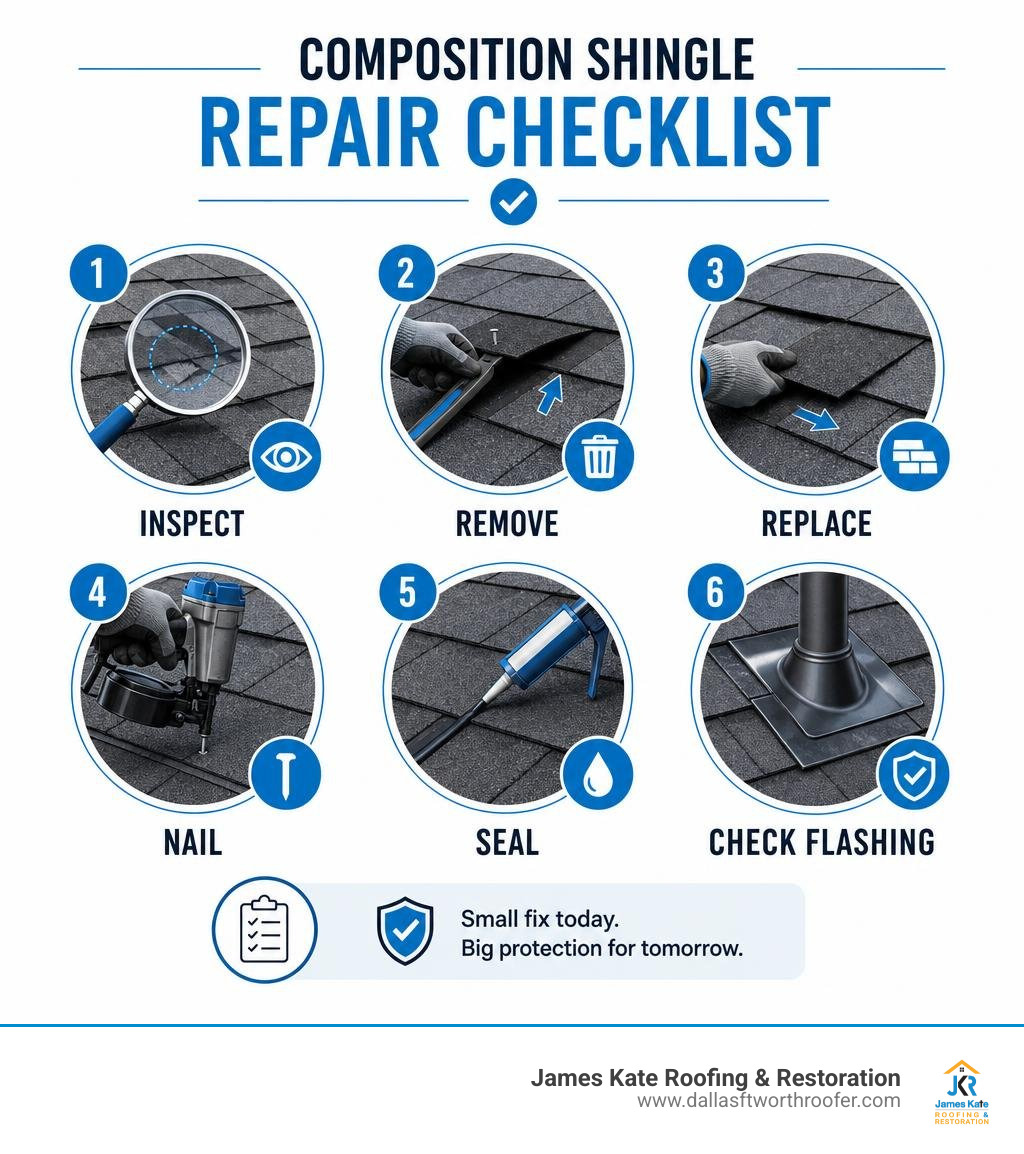
Composition shingles roof repair terminology:
Identifying Common Composition Shingle Damage

Spotting issues early is the key to preventing water intrusion from rotting your roof deck or ruining ceiling drywall. Composition shingles are made of an asphalt-saturated fiberglass mat surfaced with ceramic-coated mineral granules. These granules reflect ultraviolet (UV) rays and provide critical fire resistance. When the protective surface begins breaking down, the underlying asphalt dries out, becomes brittle, and cracks.
To properly diagnose problems, review our composition shingles complete guide to familiarize yourself with how shingle layers interact. Pay close attention to the 30% rule: once a shingle sheds roughly 30% of its mineral granules, it completely loses effective UV protection and requires immediate repair or replacement. In places like Mansfield, TX and Arlington, TX, where summer sun bakes roofing surfaces daily, UV breakdown can rapidly accelerate if left unaddressed. For a wider perspective on diagnostic methods, you can review this composite shingle damage diagnosis reference.
Look for these everyday signs of shingle distress:
- Curling or Cupping Tabs: Shingles whose edges turn upward or curl inward have lost their flexibility, often due to high attic heat or advanced age.
- Granule Accumulation: Finding heavy piles of colored sand in your gutters or downspout washouts signals the asphalt mat is exposed.
- Cracked or Split Shingles: Thermal expansion and seasonal temperature swings cause brittle shingles to fissure horizontally or vertically.
- Blistering Surfaces: Moisture trapped inside the shingle during manufacturing or poor attic ventilation can boil under extreme heat, popping small craters onto the tab surface.
Assessing Wind, Hail, and Storm Damage
Severe storms across North Texas frequently test residential roofing systems. High winds exceeding 60 to 70 mph get underneath unsealed tabs, creasing the shingles along their top edge or tearing them off entirely. Hail stones leave circular impact dimples that bruise the internal fiberglass mat and dislodge the granule protective layer.
When evaluating storm impacts, keep detailed records. Take clear photos from multiple angles of creased shingles, spatter marks on metal vents, and impact craters. If your attic shows fresh water drips or dark damp spots after a thunderstorm, review our comprehensive roof repair guide 2026 to understand the proper steps for storm recovery and insurance claim documentation.
Checking Penetrations, Valleys, and Flashing
A large percentage of residential roof leaks do not start in the open field of shingles; they begin where shingles meet vertical walls, roof penetrations, or intersecting slopes.
Inspect these critical transition points regularly:
- Valley Intersections: Roof valleys channel massive volumes of runoff. Misaligned shingle cuts, cracked valley underlayment, or poorly placed nails can cause hidden deck rot.
- Plumbing Pipe Boots: The rubber collar on plumbing vent flashings hardens, splits, and tears after 8 to 12 years of heat exposure, allowing water to trickle directly down the vent pipe into interior walls.
- Step and Counter Flashing: Metal flashing steps up along brick chimneys and dormers. Missing sealant beads, rusted metal, or loose mortar joints permit wind-driven rain to bypass shingles.
Understanding the cost to fix a small roof leak flashing shingles and labor breakdown will give you a clear idea of how localized flashing repairs differ in scope and budget compared to standard shingle tab replacement.
Step-by-Step Guide to Composition Shingles Roof Repair
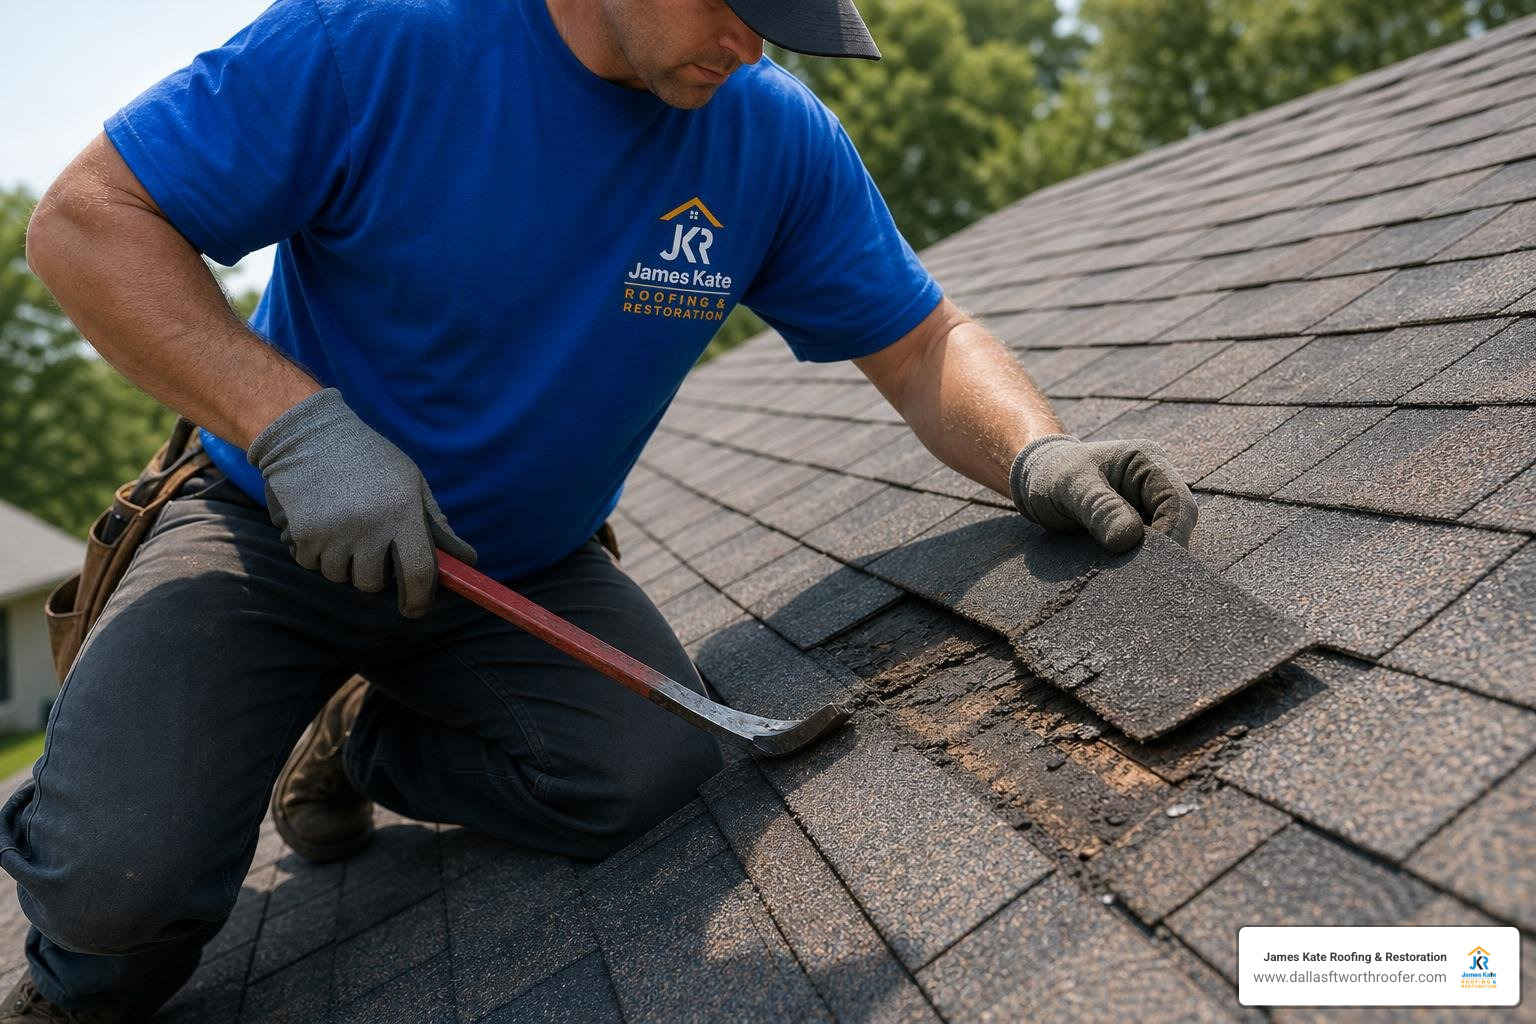
Repairing an isolated damaged shingle is well within the capabilities of a handy homeowner, provided the roof slope is mild and conditions are completely dry. Never attempt roof repairs when moisture is present. Wet asphalt shingles are exceptionally slippery, and moisture prevents roofing adhesives from bonding properly.
Consult these step-by-step composition shingle repair instructions and our guide on how to replace damaged shingles like a pro before gathering your gear.
Essential Tools and Safety Gear for Composition Shingles Roof Repair
Before climbing your ladder, assemble the right materials:
- Flat Pry Bar (Roofing Bar): Essential for gently breaking adhesive seals and extracting hidden nails without ripping adjacent shingles.
- Roofing Hammer or Hatchet: Designed with a striking face and built-in gauge for consistent nail depth.
- Hook-Blade Utility Knife: The hooked blade slices through tough asphalt backing smoothly without dulling against granules.
- Galvanized Roofing Nails (1-1/4 inch): Never use standard construction or finish nails; galvanized fasteners resist corrosion and hold firmly against uplift.
- Asphalt Roofing Cement: High-grade mastic formulated for sealing shingle tabs and flashing edges.
- Loose Ceramic Granules: Recovered from gutter cleanings to shield fresh sealant patches from UV deterioration.
- Safety Gear: Soft-soled roofing shoes, sturdy ladder stabilizers, and a certified personal fall-arrest harness system.
Removing Broken Shingles and Extracting Fasteners
Every shingle on your roof is secured not only by its own row of nails but also by the nails driven through the overlapping shingle directly above it.
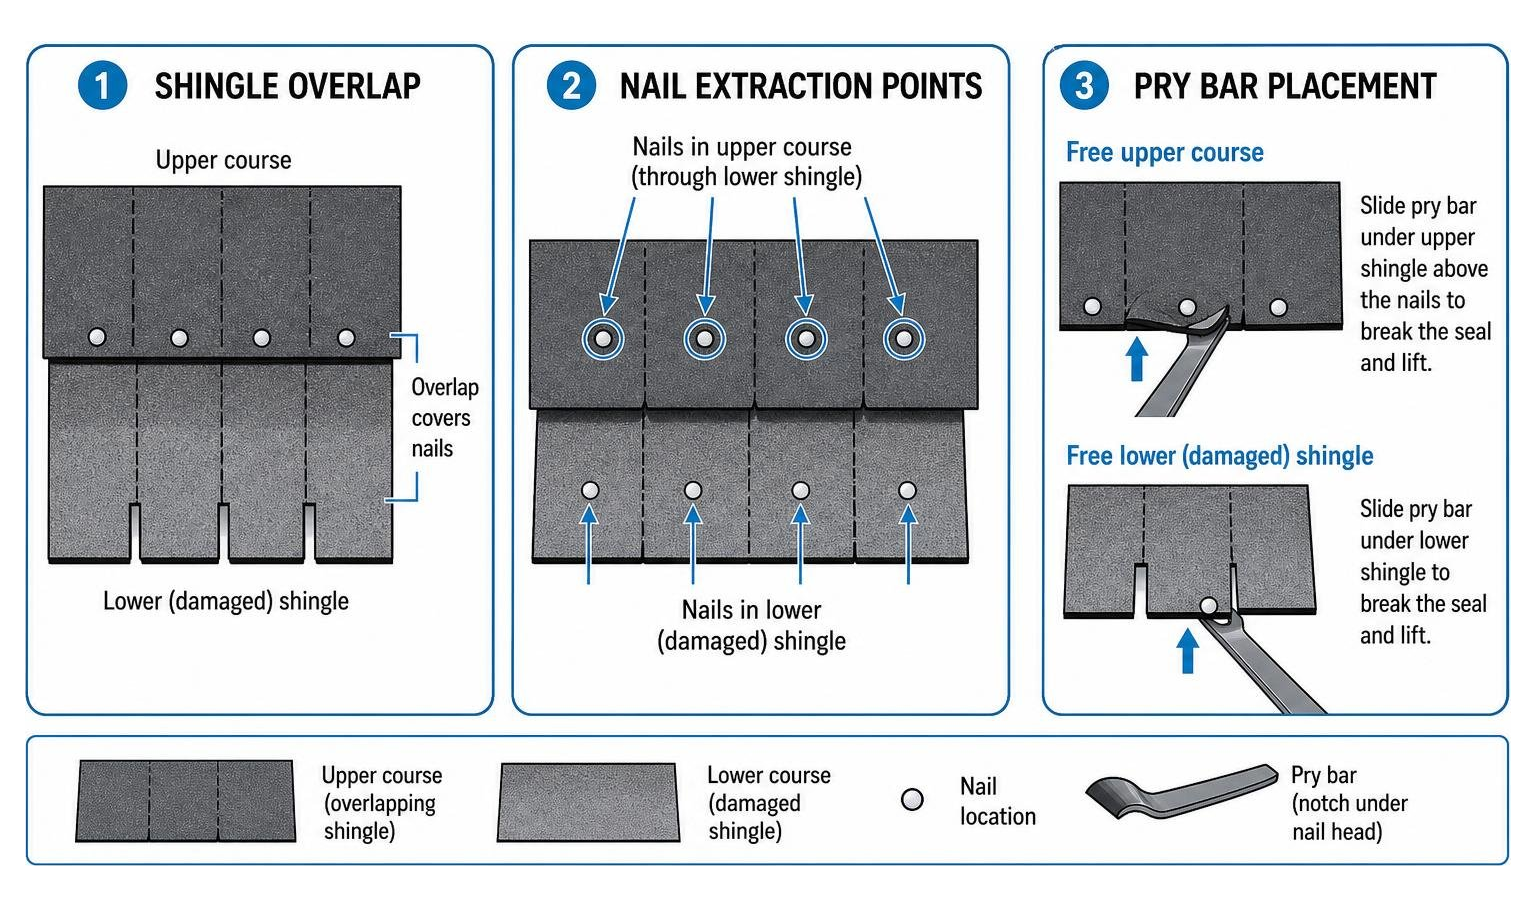
- Break the Thermal Adhesive Seal: Slide your flat pry bar gently beneath the damaged tab to pop the factory sealant bond. Next, slide the bar under the shingle directly above the damaged one, freeing both courses. Perform this on a mild day (65°F to 80°F). If it is too cold, the shingles will snap; if too hot, the asphalt becomes gummy and tears easily.
- Locate the Hidden Nails: Composition shingles, such as a traditional 3-tab composition shingle, usually have four nails driven just above the tab cutouts.
- Extract the Fasteners: Position the pry bar notch beneath the nail head, lever the bar against a wood block or the flat edge of your hammer to lift the nail slightly, then press the shingle back down while pulling the nail completely free. Repeat this for the nails securing the damaged shingle and the row above it.
- Inspect the Decking: Once you slide the damaged shingle free, inspect the exposed underlayment and wood beneath it. If the wood feels spongy or shows black mold growth, you must address the wood substrate first by consulting a step-by-step guide to replacing damaged roof decking.
Installing New Shingles, Nailing, and Granule Sealing
Proper alignment ensures your repaired area blends seamlessly and maintains complete weatherproofing integrity.
- Slide the Replacement into Position: Match the exposure line of the adjacent shingles so horizontal shadow lines remain straight.
- Fasten the New Shingle: Lift the overlying shingle just high enough to swing your hammer. Drive four 1-1/4 inch galvanized roofing nails along the designated manufacturer nailing strip—typically 5/8 inch above the tab cutouts. Avoid nailing too high or driving nails crookedly, as under-driven heads puncture the overlying tab and over-driven nails tear right through the shingle mat. For advanced fastening insights, read our tips on mastering roof shingle installation tips and tricks.
- Renail the Upper Course: Re-fasten the nails you removed from the course above to maintain multi-layer wind resistance.
- Apply Roofing Cement and Reseal: Dab a quarter-sized spot of asphalt roofing cement under each replaced tab.
- The UV Granule Seeding Trick: If any cement squeezes out around the tab edges, immediately sprinkle loose mineral granules over the wet mastic and pat them in lightly. Uncovered asphalt degrades within months when exposed to raw sunlight; mineral granules create an impenetrable UV shield that significantly extends your repair’s life.
Patching Small Cracks and Minor Surface Gaps
If a shingle tab has a hairline split from a fallen tree branch but remains firmly adhered, you may not need a full replacement. You can learn one simple way to fix a roof leak by applying a quick surface patch:
- Clean away all dirt, loose debris, and loose granules around the crack using a stiff nylon brush.
- Apply a smooth, continuous bead of asphalt roofing cement directly into and over the crack using a putty knife.
- Feather the edges flat against the surrounding shingle surface.
- Press a generous handful of matching ceramic granules firmly into the wet cement until no black mastic is visible.
Repair vs. Replacement: Making the Right Decision
Deciding whether to continue patching or invest in a new roof comes down to structural integrity, roof age, and overall damage density. A composition roof that has been patched dozens of times often resembles a patchwork quilt and remains vulnerable to future leaks.
| Decision Factor | Minor Patch Repair | Full Roof Replacement |
|---|---|---|
| Damage Scope | Isolated to fewer than 5–10 individual shingles (<15% surface) | Widespread damage affecting >15–20% of total roof surface |
| Roof Age | Less than 12–15 years old | Exceeds 20–25 years old (near end of service life) |
| Granule Retention | Shingles retain over 70% of original mineral surface | Widespread granule depletion, bald spots, exposed asphalt mat |
| Deck Condition | Plywood or OSB decking is firm, solid, and dry | Decking is soft, rotting, sagging, or delaminating across slopes |
| Cost Range | $150 – $1,200 depending on complexity | $8,000 – $25,000+ depending on home size and materials |
Understanding your system’s overall composite shingle lifespan what to expect from your roof helps determine whether temporary fixes make financial sense. When widespread weathering sets in, moving forward with an asphalt shingle replacement protects your property’s value and prevents repetitive interior solar expenses.
Estimated Costs for Composition Shingles Roof Repair vs. Full Replacement
Repair costs fluctuate depending on roof pitch, height, accessibility, and the specific materials required:
- Single Shingle Replacement: Typically ranges from $150 to $350, which accounts for labor setup, matching materials, and proper fastener installation.
- Localized Flashing and Valley Repairs: Repairing failed step flashing, pipe boots, or dormer junctions generally costs between $400 and $1,200, as it involves removing several courses of shingles to re-flash the wood decking.
- Full Composition Roof Replacement: Complete tear-off and replacement on an average single-family home generally ranges from $8,000 to $25,000, depending on the home’s square footage, architectural complexity, and whether premium architectural or impact-resistant shingles are selected.
Standard manufacturer material warranties on composite shingles protect against manufacturing defects for 20 to 50 years, while contractor labor warranties generally span 5 to 10 years. At James Kate Roofing & solar, we back our premium installations with up to a 25-year workmanship warranty, giving homeowners complete peace of mind.
When to Call a Licensed Professional Roofer
While simple repairs on accessible single-story porches are achievable DIY projects, certain situations demand professional equipment and expertise:
- Steep Roof Pitches (7:12 slope or greater): Working on steep slopes without commercial scaffolding and specialized fall arrest gear is hazardous.
- Chronic Leaks with Hidden Paths: Water can enter at a high ridge and travel along rafters for thirty feet before dripping through a ceiling fixture.
- Compromised Decking or Structural Rafters: Soft spots underfoot indicate extensive rot requiring structural carpentry.
- Inadequate Attic Ventilation: If your attic traps extreme heat and humidity, shingles bake from underneath, voiding warranties and causing premature failure.
When you need an experienced eye to assess complex roof issues, scheduling a professional roof fix ensures every detail is addressed correctly according to local building codes.
Frequently Asked Questions About Composition Shingle Repairs
Can I repair a composition shingle roof in the rain?
No. You should never perform composition shingle repairs while it is raining. Moisture compromises personal safety on slick roof planes and prevents asphalt cement, mastic, and silicone sealants from bonding to the shingle mat. If water is actively leaking during a storm, perform emergency water mitigation from inside the home or hire a professional crew to install a secure, temporary tarp over the exterior slope until conditions dry out completely.
Why are my newly installed composition shingles not sticking down?
New composition shingles rely on a heat-activated asphalt adhesive strip along their underside. In moderate to warm weather, direct sunlight and thermal radiant heat naturally seal the tabs down within a few days. If you install shingles during cold weather, overcast periods, or in heavy tree shade, you must manually apply quarter-sized dabs of asphalt roofing cement beneath each tab to prevent wind uplift until warmer weather permanently activates the factory sealant.
How many shingles can be repaired before a full replacement is required?
If damaged or missing shingles account for more than 15% to 20% of your total roof surface, replacement is significantly more economical than continuing to perform piecemeal patches. Beyond financial considerations, extensive localized repairs leave behind noticeable color mismatches and brittle surrounding shingles, increasing the likelihood of future leaks during severe storms.
Conclusion
Taking care of minor shingle issues today keeps your home dry and structurally sound for years to come. Routine maintenance—such as clearing debris from valleys, keeping gutters clean, trimming overhanging tree branches, and scheduling seasonal inspections—helps you maximize the service life of your roofing system.
At James Kate Roofing & solar, we proudly serve homeowners across Mansfield, TX, Arlington, TX, Granbury, TX, Grand Prairie, TX, and Midlothian, TX. As a family-owned DFW business committed to honesty, integrity, and Biblical principles, we bring top-tier craftsmanship to every project. Recognized with GAF President’s Club status, our certified specialists deliver durable repairs, seamless replacements, and full-service property solar—including water, fire, and mold mitigation, followed by complete structural build-back construction.
If your roof shows signs of storm damage, persistent leaks, or aging shingles, explore our composition and asphalt shingle roofing solutions and contact our team today to schedule your comprehensive roof evaluation.

Dustin Eatman is a seasoned roofing professional with deep, hands-on expertise that spans residential and commercial roofing, insurance solar, and long-term roof asset management. As the owner of James Kate Roofing & solar in the Dallas–Fort Worth metroplex, he’s built a reputation for diagnosing roof systems accurately, communicating clearly, and executing projects with a high standard of workmanship and documentation. Dustin understands the technical details that make roofs perform—proper underlayment selection, slope and drainage considerations, ventilation strategy, flashing and penetration detailing, and manufacturer-specific installation requirements—because he’s worked through the real-world challenges that cause leaks, premature wear, and warranty issues. He’s equally fluent in the operational side of roofing: jobsite planning, quality control, safety, material ordering, crew coordination, and customer experience from inspection to closeout. In insurance-related projects, Dustin brings practical knowledge of claim workflows, adjuster meetings, scope alignment, supplements, and the importance of photo evidence and thorough records, helping property owners navigate stressful situations with confidence. For commercial clients—especially property and facility managers—he emphasizes proactive maintenance and targeted repairs that reduce disruption, extend roof life, and prevent expensive interior damage. Dustin also stays focused on doing things the right way: educating customers on realistic options, setting expectations, and prioritizing solutions that hold up over time rather than quick fixes. That blend of technical skill, field experience, process discipline, and owner-level accountability is what makes Dustin Eatman a trusted expert in the roofing industry.