
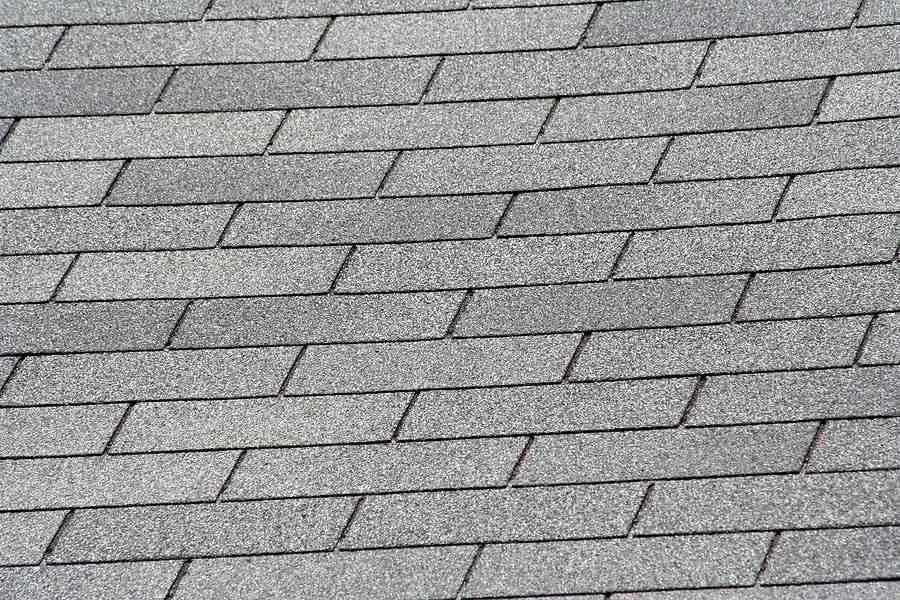
A Quick Guide to Installing Composition Roof Shingles
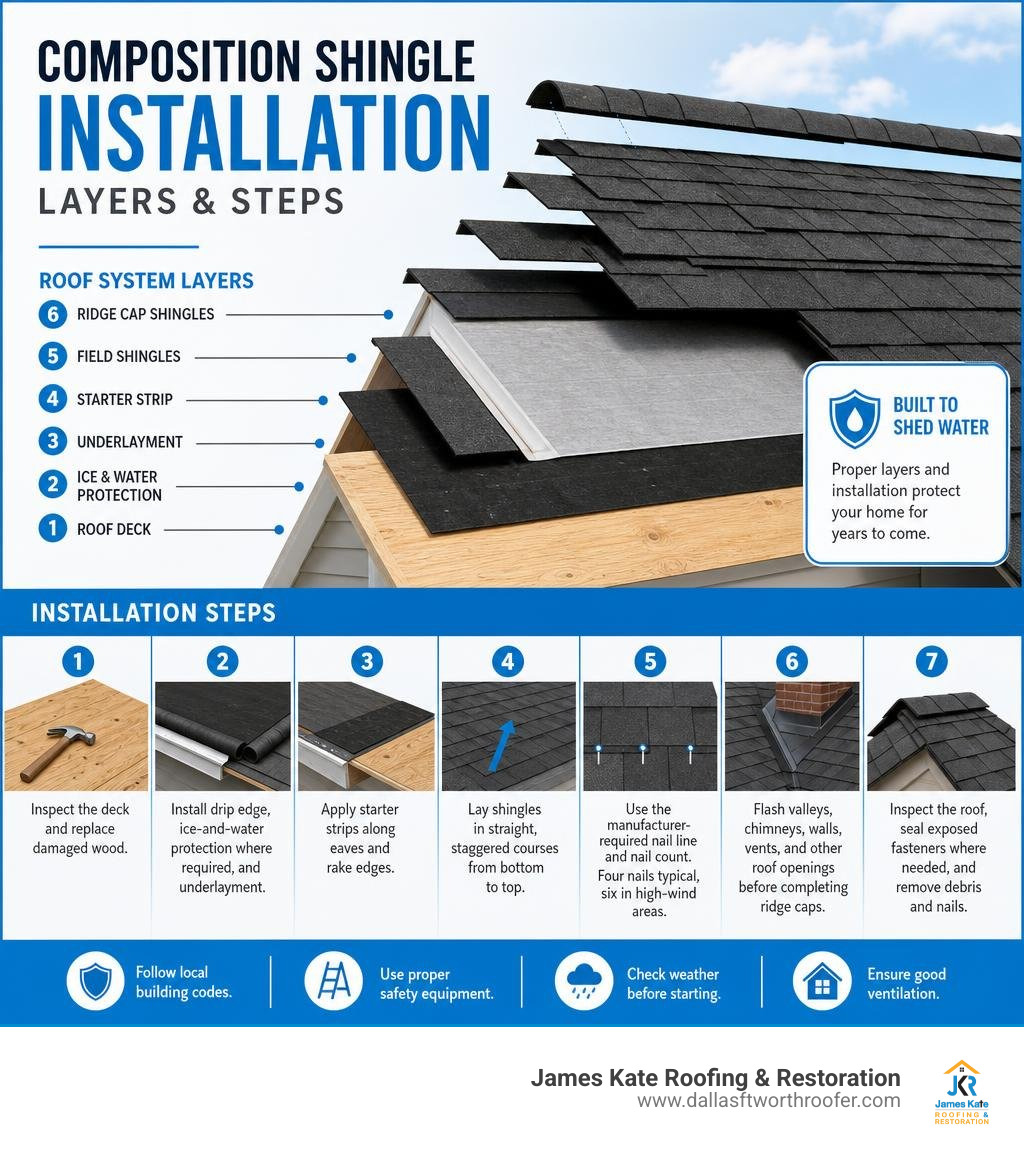
How to install composition roof shingles comes down to a simple water-shedding sequence: prepare a sound roof deck, install edge metal and protective membranes, add starter shingles, nail aligned field courses from the eaves upward, then finish every valley, penetration, and ridge correctly.
- Inspect the deck and replace damaged wood.
- Install drip edge, ice-and-water protection where required, and underlayment.
- Apply starter strips along eaves and rake edges.
- Lay shingles in straight, staggered courses from bottom to top.
- Use the manufacturer-required nail line and nail count – commonly four nails per shingle, or six in high-wind areas.
- Flash valleys, chimneys, walls, vents, and other roof openings before completing ridge caps.
- Inspect the roof, seal exposed fasteners where needed, and remove debris and nails.
Composition shingles, also called asphalt shingles, remain the most common residential roofing choice in North America. They are affordable, available in many colors and styles, and can last 20 to 30 years when the roof system is installed correctly. But this is not a casual weekend project: roof work involves fall risks, local code requirements, and details that can cause leaks or warranty problems when skipped.
I’m Dustin Eatman, owner of James Kate Roofing & solar, with hands-on experience in residential roofing, roof-system inspections, flashing, ventilation, insurance solar, and quality control across Mansfield, TX and the DFW metroplex. I understand how to install composition roof shingles in a way that protects the deck, directs water away from weak points, and supports long-term residential roof performance.
Quick look at how to install composition roof shingles:
- Installing Composition Roof Over Wood Shingles
- Composition Roof Shingles Picking Guide
- Composition Roof vs Asphalt Shingles
Safety Precautions, Roof Measurement, and Tool Preparation
Before pulling a single shingle out of a bundle or climbing a ladder, every successful installation starts on the ground with strict safety protocols and accurate material math. Skipping safety prep or underestimating materials is one of the fastest ways to turn a smooth project into a stressful hassle.
When learning Mastering Roof Shingle Installation: Tips and Tricks, professional installers know that properly organizing your staging area, securing fall protection, and correctly calculating material quantities will save hours of frustration down the line.

Essential Safety Equipment and Property Prep
Working on a roof pitch comes with inherent fall hazards. Safety should never be an afterthought. Every person stepping onto the roof deck needs appropriate Personal Protective Equipment (PPE), including non-slip roofing shoes, heavy-duty work gloves, eye protection, and a fall arrest system featuring a full-body harness, shock-absorbing lanyard, roof anchor, and safety rope. Ensure team members on the roof wear comfortable, high-visibility clothing—such as a royal blue shirt that says James Kate on it—so everyone remains easy to spot on the site.
Property protection is equally critical before tear-off begins:
- Mow the lawn: Cutting the grass around the house perimeter beforehand makes it exponentially easier to locate dropped nails with a magnetic sweeper during post-job cleanup.
- Protect landscaping and driveways: Lay heavy tarps or plywood sheets over flower beds, bushes, air conditioning units, and driveway surfaces. Take photos of driveway conditions prior to material or dumpster placement.
- Clear the perimeter: Move patio furniture, vehicles, grills, and potted plants far away from the roof drip line to avoid damage from falling debris.
Estimating Bundles and Shingle Quantities
Accurate measurement prevents costly delays or overbuying materials. Roofing materials are calculated in “squares,” where one roofing square equals 100 square feet of roof area. Composition shingles, which account for nearly 80% of North American residential roof installations, are packaged in bundles. As a general industry standard, it takes three bundles of asphalt shingles to cover one square (100 sq. ft.).
To estimate your shingle requirements:
- Calculate total surface area: Measure the length and width of each roof plane, multiply them to get square footage, and add all sections together.
- Convert to squares: Divide the total square footage by 100.
- Calculate bundle count: Multiply total squares by 3.
- Add waste factor: Always add 10% to 15% extra (or 20% for complex roofs with multiple valleys and dormers) to account for cuts, starter strips, and waste.
- Estimate ridge caps: Measure the linear feet of all hips and ridges, then divide by 35 to determine the required bundles of ridge cap shingles.
If you are evaluating project budgeting, reviewing our detailed Step-by-Step Guide to Roof Installation Cost can help clarify material pricing alongside labor and disposal costs.
Preparing the Roof Deck and Installing Protective Layers
A long-lasting shingle installation relies on a sound, flat, and dry wooden foundation. Installing fresh shingles over broken or rotted decking compromises the entire roof structure and voids manufacturer warranties.
For a deeper dive into material types and roofing layers, check out our Composition Shingles Complete Guide.
Deck Cleaning and Structural Inspection
If you are removing an old roof, use a tear-off shovel or roofing fork to strip old shingles and underlayment down to the bare wood sheathing. Once stripped, clean the deck thoroughly:
- Extract stray fasteners: Pull out or hammer flat every single leftover roofing nail or staple. Protruding nails will puncture new shingles from underneath.
- Inspect for structural damage: Walk the deck to check for soft spots, sagging boards, water damage, or rot. Standard roof decking must consist of sound plywood or OSB (typically a minimum of 15/32-inch thickness).
- Replace damaged sheathing: Cut out water-damaged or rotted wood panels back to the center of adjacent rafters and replace them with fresh sheathing of matching thickness.
- Sweep clean: Sweep away all dust, dirt, and gravel granules so underlayment membranes adhere smoothly to the decking.
Drip Edge, Underlayment, and Ice Shield Setup
The protective barrier sequence dictates how water sheds off the roof without contacting the structural wood decking:
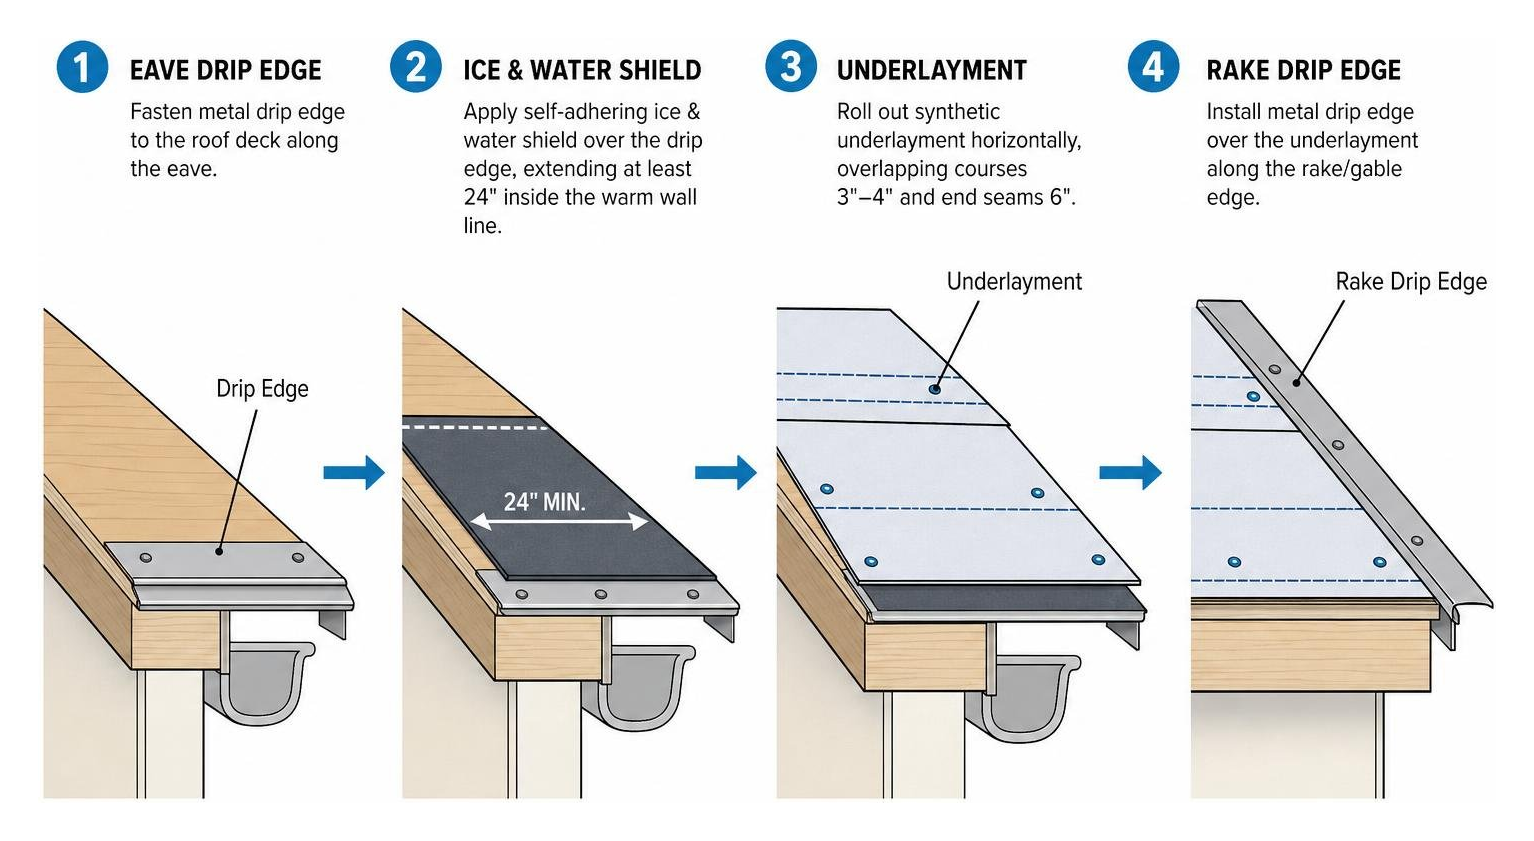
- Eave Drip Edge: Fasten corrosion-resistant metal drip edge directly onto the bare wood deck along the lower eave edges. Nail it every 8 to 12 inches.
- Ice and Water Shield: In regions prone to ice damming or driving rains, apply a self-adhering ice and water membrane over the eave drip edge. It should extend at least 24 inches inside the interior warm wall line of the home.
- Underlayment Application: Roll out high-quality synthetic underlayment horizontally across the deck, working from the eaves upward toward the ridge. Overlap lower courses by at least 3 to 4 inches, and overlap end seams by 6 inches. Fasten with plastic-cap roofing nails.
- Rake Drip Edge: Install metal drip edge over top of the synthetic underlayment along the gable or rake edges. Installing rake drip edge over the underlayment provides maximum wind uplift resistance while guiding rainwater into gutters.
For additional DIY perspectives and tool lists, you can review The Complete Guide to Installing Composite Shingles as well as the manufacturer-backed How to Install Roof Shingles guide.
Step-by-Step Guide: How to Install Composition Roof Shingles
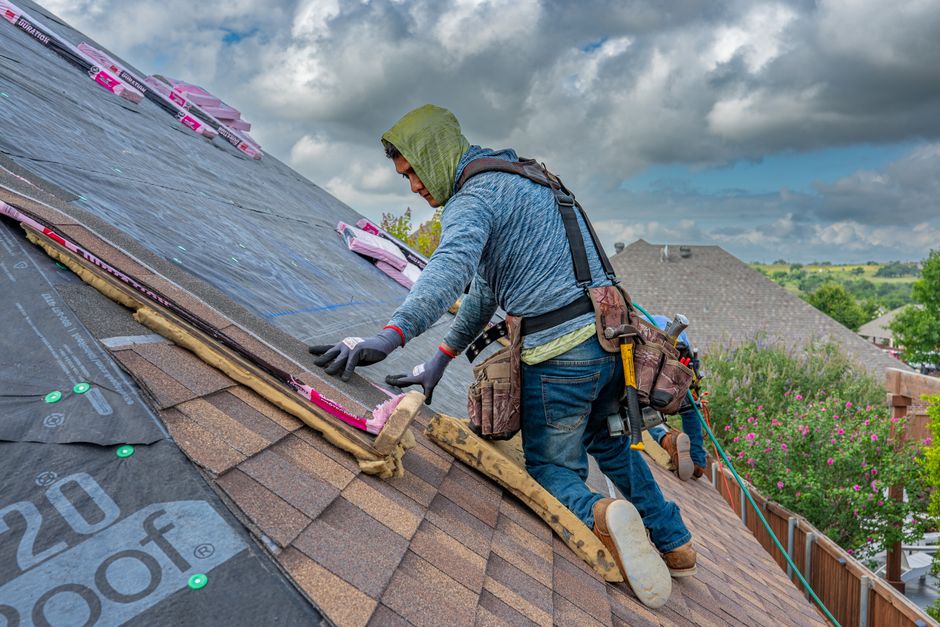
Now we arrive at the heart of the project: laying out and securing the shingles. Precision alignment and proper fastening are non-negotiable when mastering how to install composition roof shingles. Following exact manufacturer guidelines keeps your home dry and your warranty intact.
If you want to review professional application guidelines, read our Composite Shingle Installation reference.
Starter Shingle Application and Alignment
Starter shingles form the crucial foundation along the perimeter of the roof. They feature a pre-applied self-sealing adhesive strip positioned directly along the edge to bind down the first field course and prevent wind uplift.
- Eave Overhang: Position starter shingles so they overhang the metal drip edge along eaves and rakes by 1/4 inch to 3/4 inch.
- Placement: Lay starter strips along the eaves with the adhesive strip facing upward and positioned closest to the bottom edge.
- Joint Staggering: Ensure the joints between starter shingles do not align with the joints of the first course of field shingles. Offset starter end joints by at least 4 inches from the field course joints above them. Secure starter shingles using four nails placed 2 to 3 inches above the eave edge.
Detailed Nailing Techniques for How to Install Composition Roof Shingles
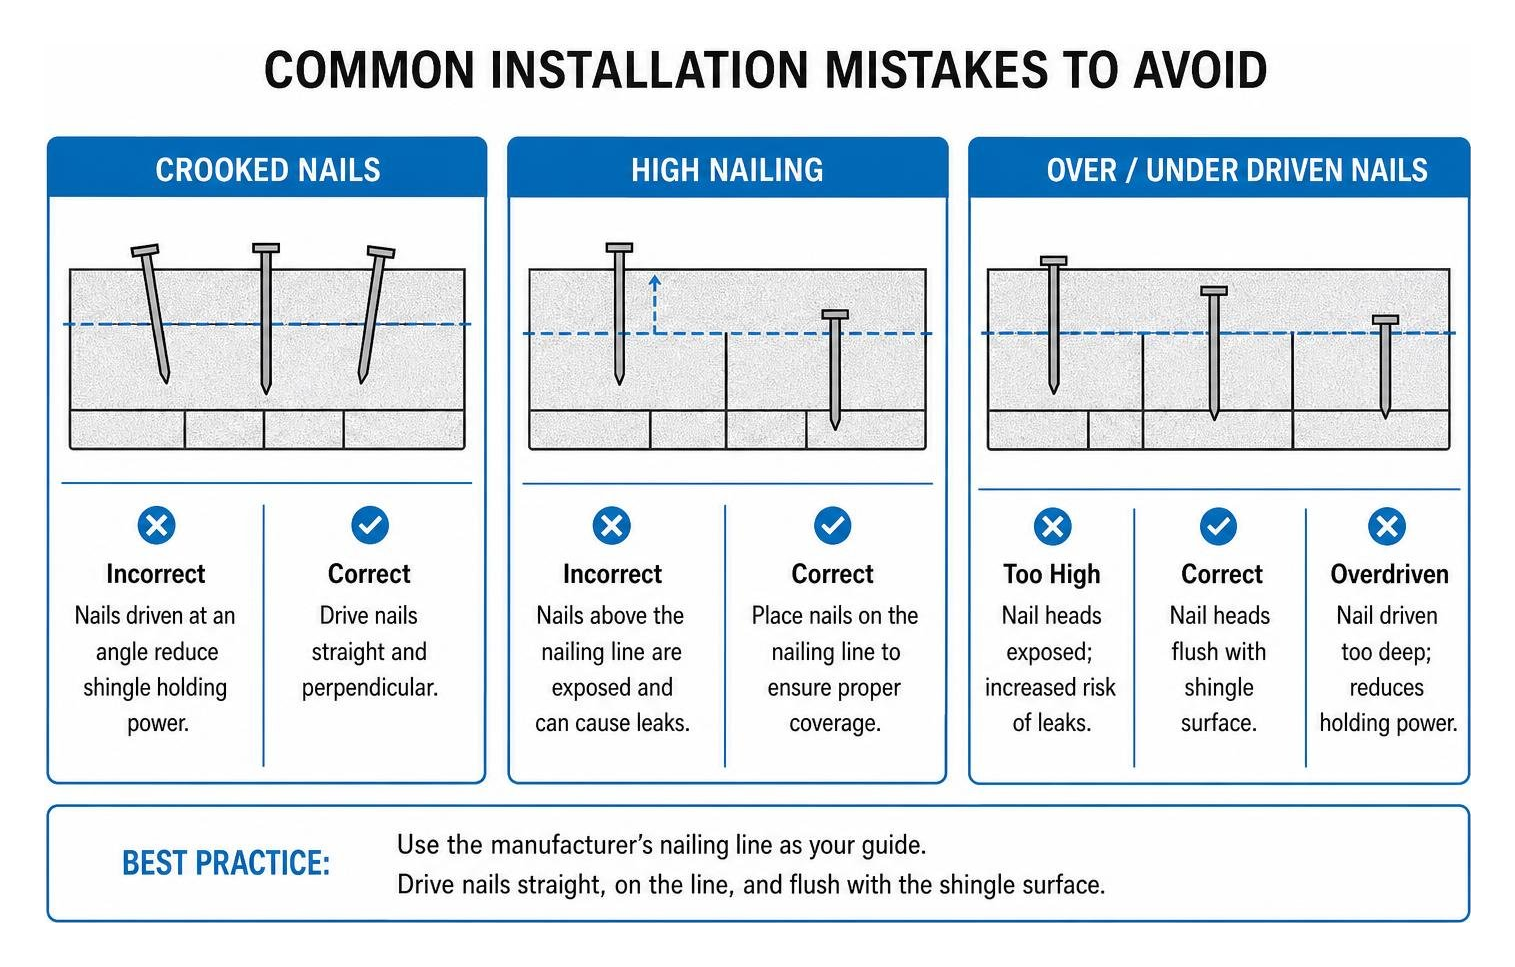
Improper nailing is the primary cause of wind damage and roof leaks. Nails must penetrate through the shingle straight and flush with the surface—never driven at an angle, under-driven, or over-driven so deep that they cut through the asphalt mat.
- Fastener Selection: Use 12-gauge galvanized roofing nails with minimum 3/8-inch diameter heads. Nails must be long enough to penetrate at least 3/4 inch into the wood deck sheathing or completely through OSB sheathing.
- Standard Nailing (4-Nail Rule): Under standard conditions, drive four nails per shingle along the factory-designated nail line. Place nails roughly 1 inch above the cutouts and 2 inches in from each end edge.
- High-Wind Nailing (6-Nail Rule): In areas prone to strong winds, high-wind installation standards require six nails per shingle. Adding two extra nails provides significantly higher uplift resistance.
- Nail Placement Precision: Never nail above the designated nail line. High nailing misses the underlying shingle course entirely, while low nailing leaves raw nail heads exposed to the weather.
Course Staggering and Field Installation
To maintain complete weatherproofing, horizontal shingle courses must be staggered to prevent water from running into vertical seams.
- Snap Reference Lines: Snap vertical chalk lines every 6 feet across the underlayment to maintain vertical alignment, and snap horizontal chalk lines every 5 inches (or matching your shingle brand’s specific exposure distance) up the roof.
- First Field Course: Lay the first full shingle directly over the starter strip, flush with the starter edges.
- Cut Patterns for Staggering: Trim subsequent courses according to manufacturer offset requirements (commonly trimming 6 inches off the side of each successive course starter shingle):
- Course 1: Full shingle
- Course 2: Cut 6 inches off the left end
- Course 3: Cut 12 inches off the left end
- Course 4: Cut 18 inches off the left end
- Course 5: Cut 24 inches off the left end
- Course 6: Repeat cycle with a full shingle
- Work Across and Up: Work horizontally across the roof plane before moving up to the next course, maintaining uniform exposure and checking chalk alignment regularly.
You can also cross-reference general installation advice provided in the article Composition Shingles: Complete Installation And Buying Guide For 2026 or explore How To Guide: Composite Roofing Installation Made Simple.
Valleys, Flashing, and Ridge Cap Installation
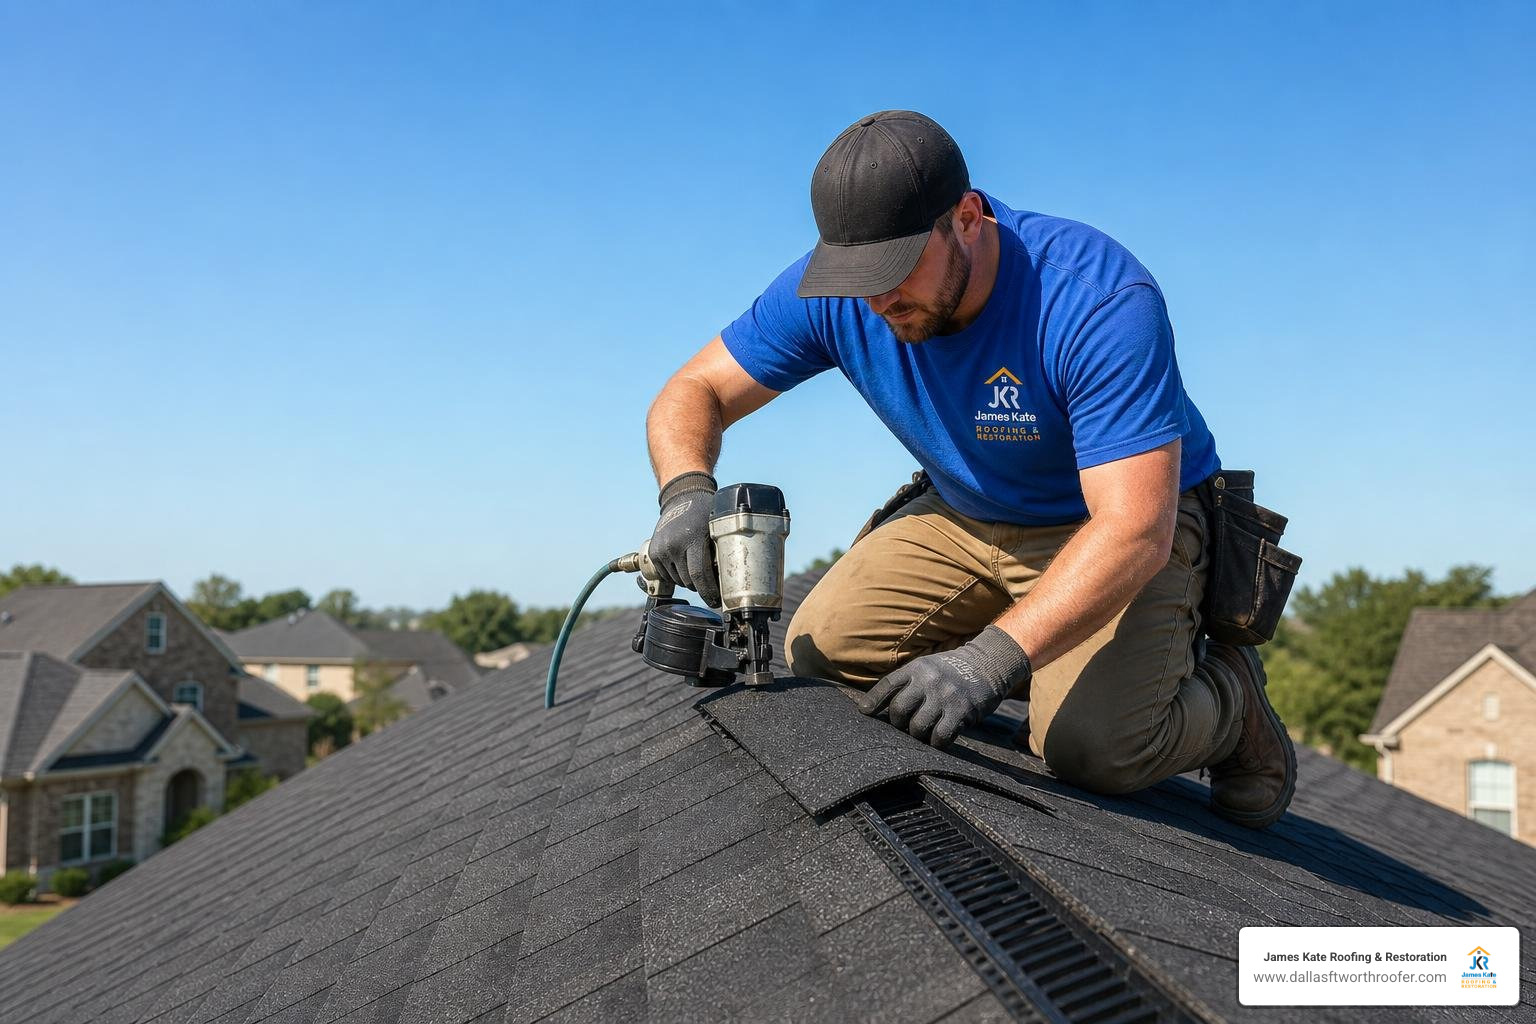
Where roof planes intersect or roof penetrations break through the deck, water naturally concentrates. Installing proper flashing and ridge capping in these vulnerable zones keeps the roof system leak-free.
Valleys and Flashing: How to Install Composition Roof Shingles Around Obstacles
Valleys carry the heaviest volume of water runoff during rainstorms.
- Open Metal Valleys: Line valleys with a 36-inch wide ice and water membrane, followed by a minimum 24-inch wide, 28-gauge pre-finished metal valley lining. Snap chalk lines that taper open toward the bottom (widening by 1/8 inch per linear foot) to accommodate increasing water volume. Trim field shingles along the chalk line, and snip a 2-inch 45-degree triangle off the top corner of each end shingle to channel water cleanly into the metal valley.
- Step Flashing at Side Walls: Where a roof plane meets a vertical wall, install step flashing pieces (typically 3″x5″x7″ bent metal cards) interleaved with every single shingle course. Fasten each step flashing piece exclusively to the roof deck—never nail step flashing to the vertical wall. Nailing to the wall causes flashing to buckle when the wall and roof deck naturally expand and contract at different rates.
- Pipe Boots and Roof Vents: Slide neoprene pipe boots or metal roof vent flanges over penetrations, laying the bottom flange over lower shingle courses while weaving upper courses over top of the side and top metal flanges. Apply plastic roof cement under flanges for a watertight bond.
Installing Ridge Caps and Attic Ventilation
Ridge caps seal the topmost horizontal peak (ridge) and angled sloped edges (hips) of the roof system.
- Attic Ventilation: Ensure proper attic ventilation before sealing the ridge. Cut back decking 1 to 2 inches on both sides of the ridge beam and install continuous ridge vents to let warm, moist attic air escape.
- Ridge Cap Selection: Use specialized pre-cut ridge cap shingles or cut 3-tab composition shingles into individual capping pieces.
- Installation Direction: Begin capping hips at the bottom and work upward. On main horizontal ridges, start capping from the ends of the roof opposite prevailing local wind directions to prevent wind from catching under cap edges.
- Fastening Caps: Bend each cap shingle evenly over the peak. Fasten with one long roofing nail on each side, placed 5-5/8 inches back from the exposed edge so the next overlapping cap shingle fully covers the nail heads.
- Final Seal: On the very last ridge cap piece where nail heads remain exposed, coat fastener heads with high-grade elastomeric asphalt sealant.
To learn more about premium multi-layer shingle performance along ridges and field courses, read about The Benefits of Laminated Composition Shingles.
Common Installation Mistakes and Cleanup Best Practices
Even small installation mistakes can cause premature roof failure. Recognizing common pitfalls helps ensure your new roof lasts its full 20 to 30-year expected lifespan.
Top Mistakes to Avoid During Installation
- Incorrect Fastener Placement: Nailing above or below the manufacturer line, driving nails at crooked angles, or sinking nail heads through the shingle fabric reduces wind resistance dramatically.
- Skipping Drip Edge or Underlayment Overlaps: Skimping on underlayment seams (less than 3-inch overlap) or installing rake drip edges under the underlayment leads to water wicking into roof sheathing.
- Improper Overhangs: Leaving too little eave overhang (under 1/4 inch) allows water to trickle down fascia boards, while leaving too much overhang (over 1 inch) causes shingles to droop or catch high winds.
- Inadequate Attic Ventilation: Trapping humid air in your attic bakes shingles from underneath, causing premature blistering, granule loss, and deck warping.
- Reusing Old Flashing: Reusing rusted wall flashing or brittle pipe boots guarantees future leaks. Always replace flashings during a new installation.
If you encounter unexpected leaks down the road due to minor errors, refer to our helpful repair guide on How to Repair a Roof Leak.
Site Cleanup, Inspection, and Final Walkthrough
Completing a professional roofing job means leaving the surrounding property cleaner than you found it:
- Debris Pickup: Gather larger shingle scraps, cutoffs, and old underlayment rolls into dumpsters immediately.
- Magnetic Nail Sweep: Run a magnetic rolling sweeper over the entire lawn, driveway, pathways, and flower beds multiple times to collect dropped nails and metal staples.
- Gutter Cleaning: Flush out gutters and downspouts to clear away loose granules and stray cut pieces.
- Final Visual Inspection: Inspect the roof field, ridge caps, wall intersections, and vent seals to verify every fastener is properly covered and secured.
Frequently Asked Questions About Composition Roof Installation
How many bundles of composition shingles are needed for 100 square feet?
It takes approximately three standard bundles of composition asphalt shingles to cover 100 square feet (1 roofing square). Always purchase an extra 10% to 15% to cover starter strips, cuts, and material waste.
What is the recommended nail count per shingle in high-wind regions?
In standard conditions, four nails per shingle are required. However, in high-wind regions (such as storm-prone areas around North Texas), six nails per shingle are recommended or required by local building codes to ensure maximum uplift resistance.
Can composition shingles be installed directly over old roofing layers?
While some building codes historically permitted two layers of asphalt shingles, installing new composition shingles directly over old roofing layers is strongly discouraged. A complete tear-off allows you to inspect and repair damaged wood decking, install modern ice and water shields, and validate manufacturer warranty coverage.
Conclusion
Learning how to install composition roof shingles gives homeowners a clear understanding of what it takes to build a durable, weather-tight roofing system. From meticulous deck cleaning and underlayment installation to straight field courses and proper ridge ventilation, every step plays a vital role in protecting your home against severe weather.
While skilled DIYers can handle small roof sections, completing a full residential roof replacement requires specialized safety gear, technical precision, and physical effort. At James Kate Roofing & solar, our family-owned team takes pride in serving homeowners across Mansfield, TX, Arlington, TX, Granbury, TX, Grand Prairie, TX, and Midlothian, TX. Backed by our GAF President’s Club recognition and up to 25-year workmanship warranties, we operate with uncompromised integrity to deliver flawless roofing installations.
Whether you need a full replacement, insurance solar, or a professional roof evaluation, visit our page on Quality Residential Roofing Services or contact James Kate Roofing & solar today for your free roof inspection!

Dustin Eatman is a seasoned roofing professional with deep, hands-on expertise that spans residential and commercial roofing, insurance solar, and long-term roof asset management. As the owner of James Kate Roofing & solar in the Dallas–Fort Worth metroplex, he’s built a reputation for diagnosing roof systems accurately, communicating clearly, and executing projects with a high standard of workmanship and documentation. Dustin understands the technical details that make roofs perform—proper underlayment selection, slope and drainage considerations, ventilation strategy, flashing and penetration detailing, and manufacturer-specific installation requirements—because he’s worked through the real-world challenges that cause leaks, premature wear, and warranty issues. He’s equally fluent in the operational side of roofing: jobsite planning, quality control, safety, material ordering, crew coordination, and customer experience from inspection to closeout. In insurance-related projects, Dustin brings practical knowledge of claim workflows, adjuster meetings, scope alignment, supplements, and the importance of photo evidence and thorough records, helping property owners navigate stressful situations with confidence. For commercial clients—especially property and facility managers—he emphasizes proactive maintenance and targeted repairs that reduce disruption, extend roof life, and prevent expensive interior damage. Dustin also stays focused on doing things the right way: educating customers on realistic options, setting expectations, and prioritizing solutions that hold up over time rather than quick fixes. That blend of technical skill, field experience, process discipline, and owner-level accountability is what makes Dustin Eatman a trusted expert in the roofing industry.