
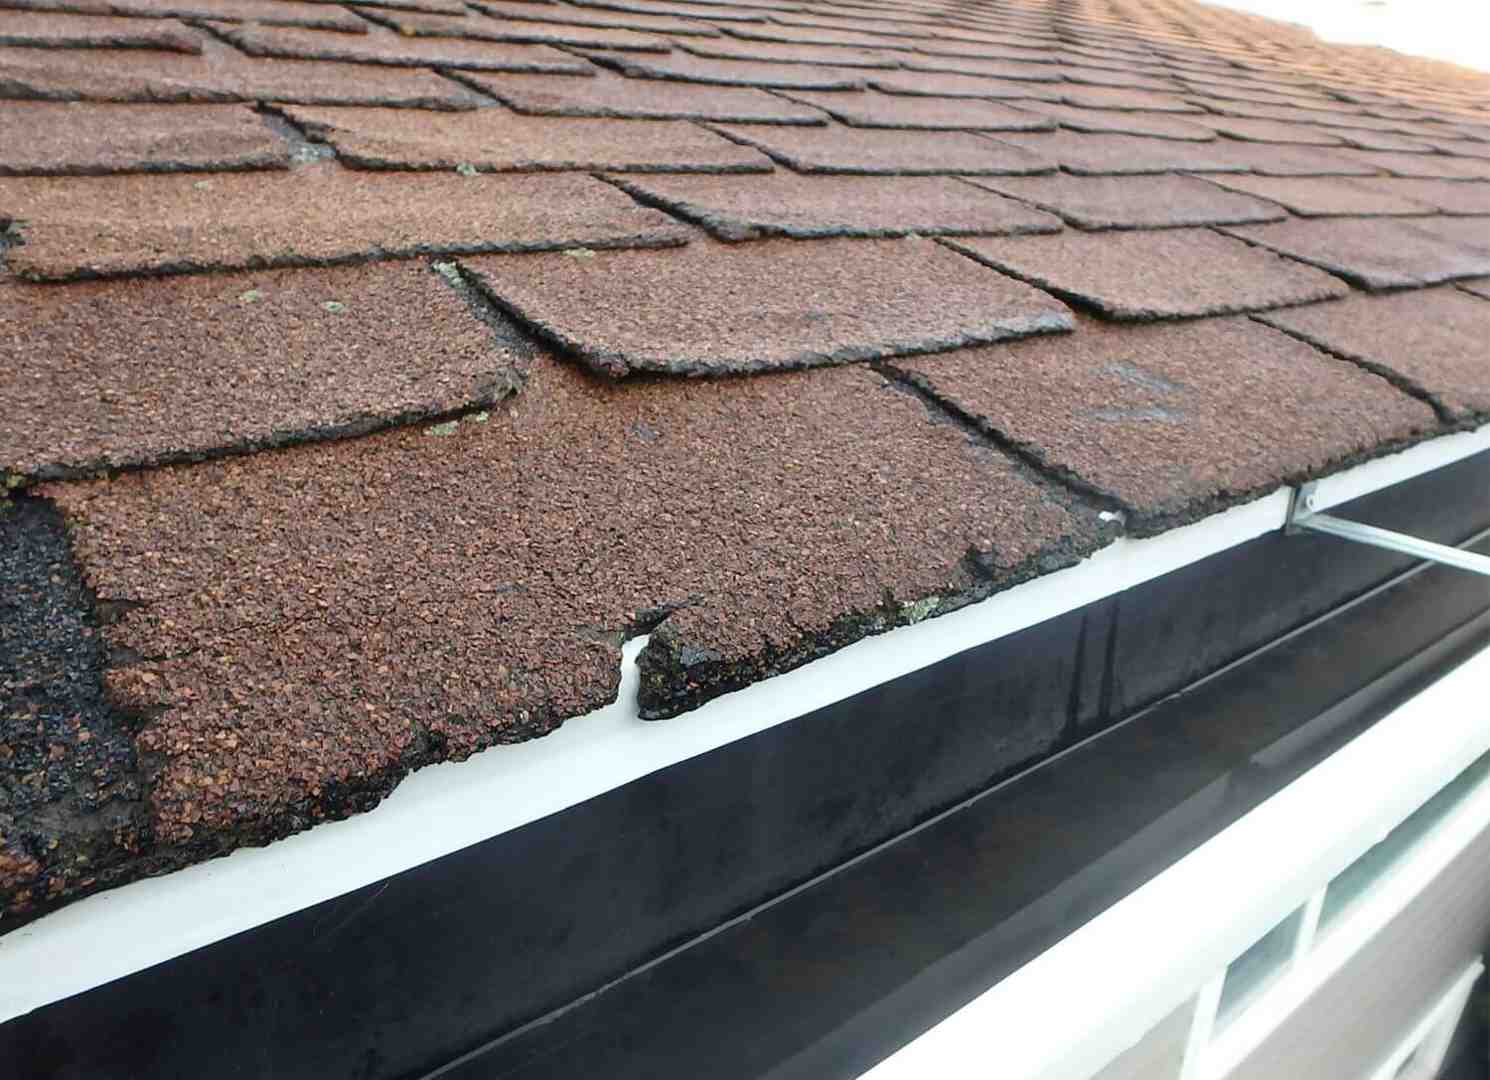
Temporarily Fix a Roof From Inside Without Making Damage Worse
You can fix a roof from inside as a short-term emergency measure, especially while rain or wind makes exterior work unsafe. First, protect furniture, catch the water, turn off the affected electrical circuit if water is near wiring, and drain any bulging ceiling into a bucket. Then, from the attic, trace wet rafters or decking up-slope to the highest wet point and apply a compatible temporary patch only after the surface is as dry as possible.
An interior patch can slow or redirect water, but it does not repair the failed shingle, flashing, vent seal, or underlayment on the outside. Flashing failures are a common cause of leaks, and water may travel several feet along framing before it reaches your ceiling.
I am Dustin Eatman, owner of James Kate Roofing & solar, with hands-on experience diagnosing roof leaks, storm damage, and insurance-related repairs across Dallas-Fort Worth. In this guide, I will show you how to safely fix roof from inside long enough to limit damage while you arrange a proper exterior repair.
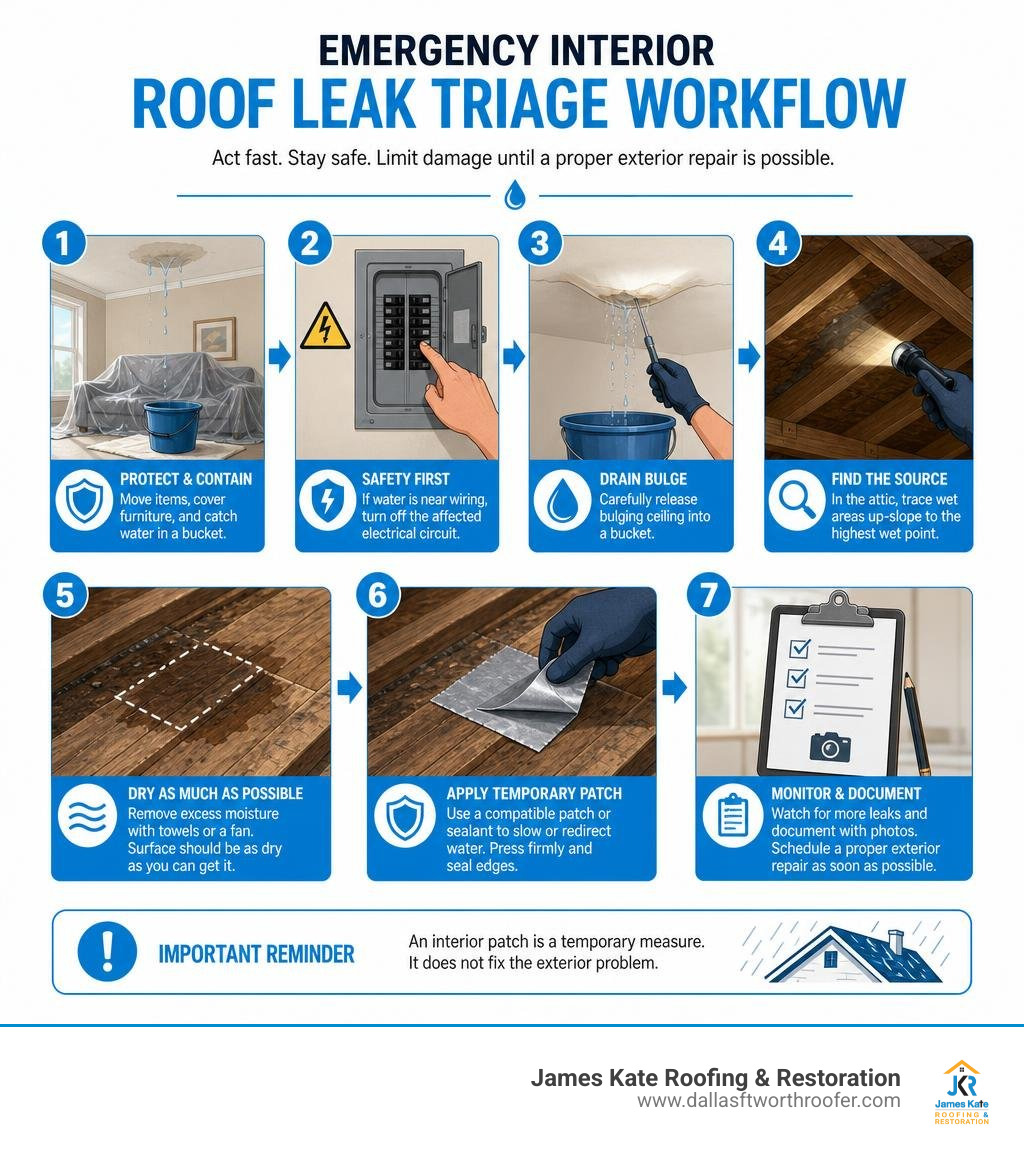
Simple guide to fix roof from inside terms:
First Steps: Immediate Interior Water Triage and Safety
When water starts making its way into your living space, panic can set in fast. However, taking systematic, calm action will save your drywall, floors, and personal belongings from catastrophic damage. Before heading up to the attic to attempt any repair work, focus entirely on containing the water inside your living area.
1. Protect Your Belongings and Contain the Spread
Move furniture, electronics, and rugs completely out of the drop zone. If you have heavy furniture that cannot be moved quickly, cover it with heavy-duty 6-mil polyethylene plastic sheeting. Set down buckets, large pots, or storage totes directly beneath the active drip. Place old towels around the base of the containers to absorb inevitable splashes that bounce off the plastic.
2. Isolate Electrical Hazards
Water and electricity are a hazardous combination. If you see water running down a wall near an outlet, pooling around an overhead light fixture, or dripping near your electrical panel, head straight to your breaker box and shut off power to that specific circuit. Do not touch damp switches or light fixtures with your bare hands.
3. Relieve Ceiling Pressure
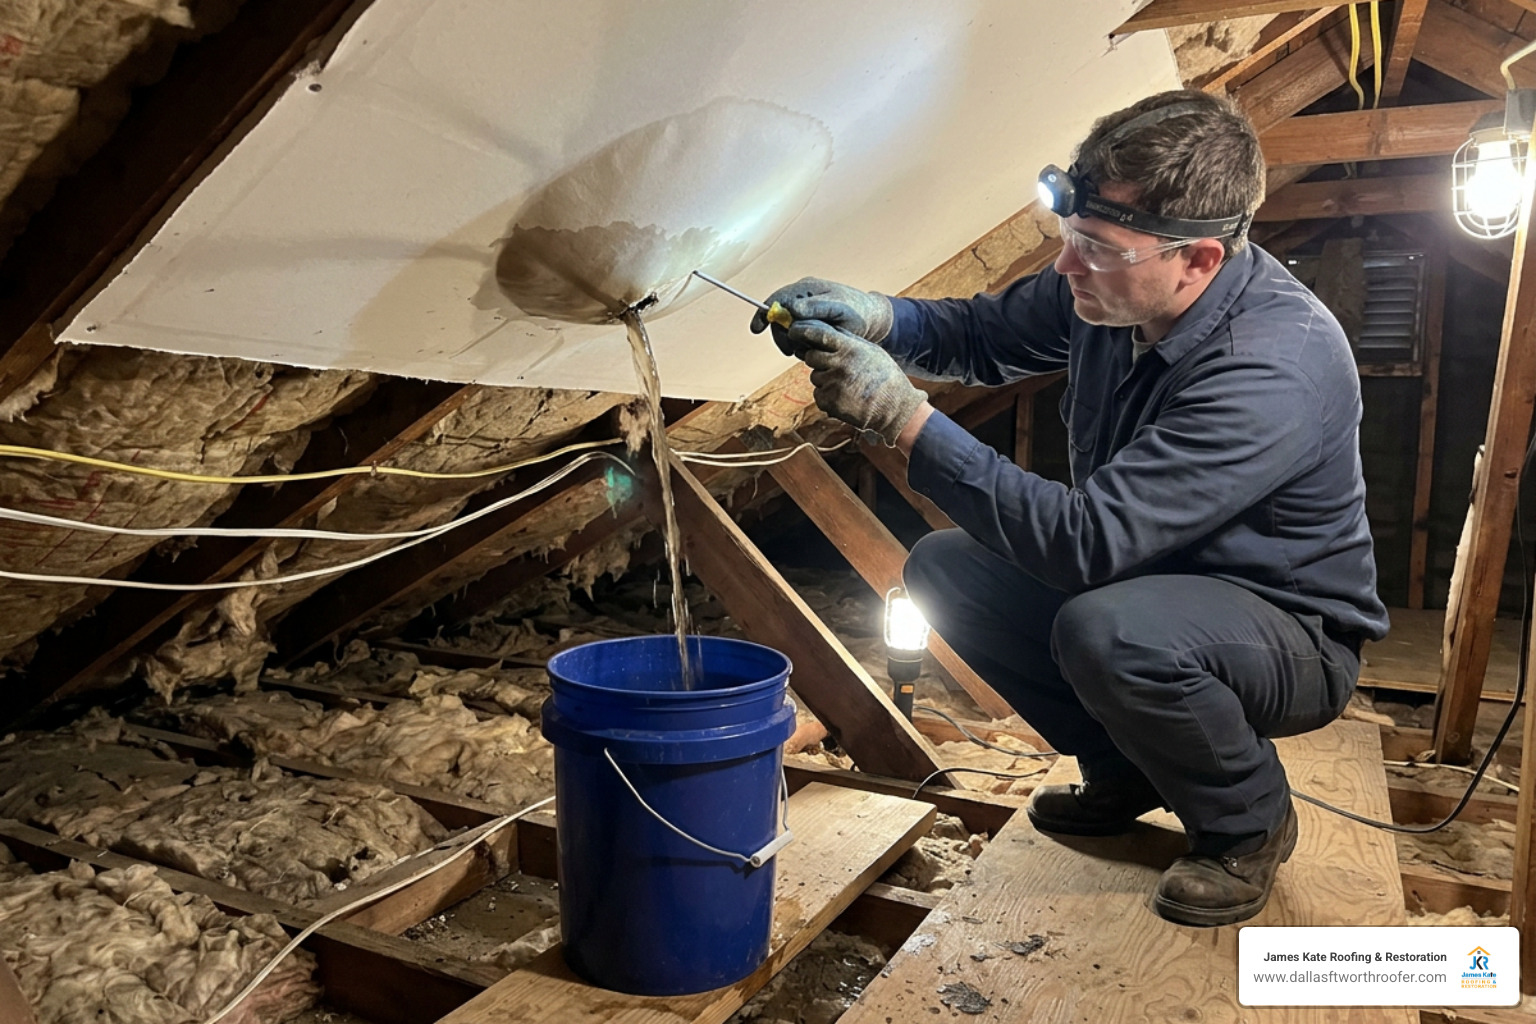
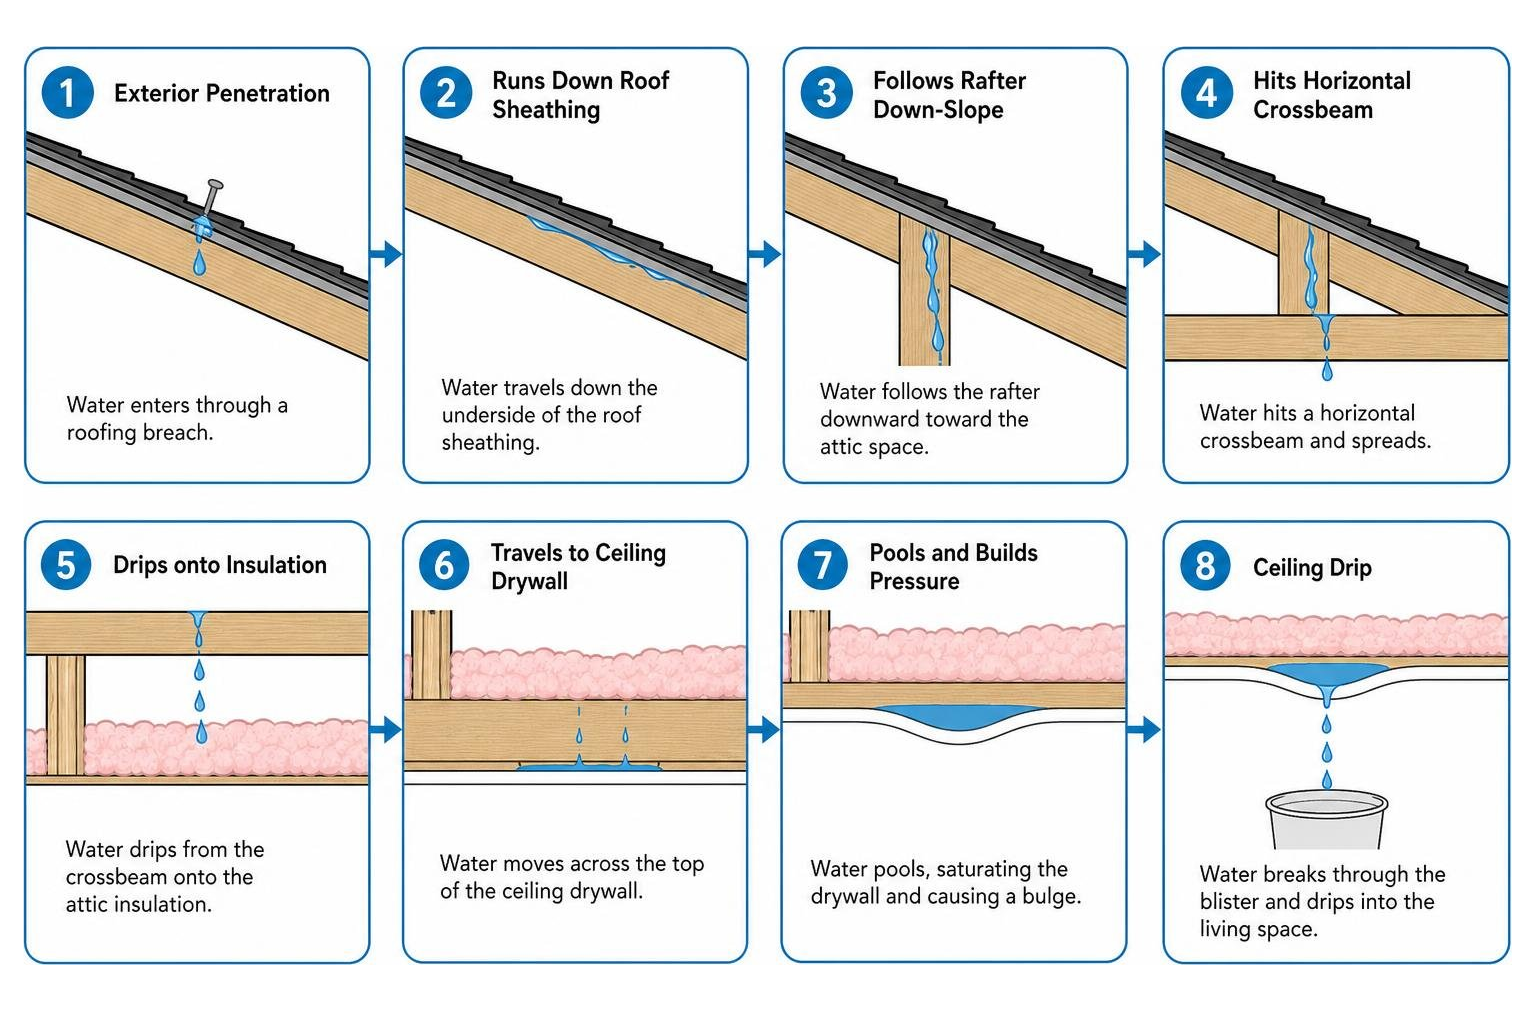
It feels completely counterintuitive to poke a hole in your ceiling on purpose, but leaving a water blister untouched is one of the quickest ways to bring down an entire drywall sheet. Water pools across the top of the drywall, saturating the core until the weight tears it away from the framing fasteners.
To perform a controlled drain:
- Place a five-gallon bucket directly beneath the center of the sagging ceiling bulge.
- Grab a long screwdriver or an awl.
- Stand slightly to the side (never directly underneath) and gently puncture the center of the blister.
- Let the trapped water drain cleanly into your container.
Relieving this hydraulic weight stops the moisture from spreading laterally across the ceiling plane, preserving the surrounding drywall and making repairing damp ceilings far easier once the storm passes.
4. Practice Safe Attic Navigation
Once the living area is stabilized, prepare to inspect the attic. Always wear sturdy work boots, gloves, an N95 dust mask to protect against airborne fiberglass, and a bright headlamp so your hands remain free.
Never step on the drywall ceiling between joists. Stepping onto drywall or loose insulation will send your foot right through the ceiling below. Step exclusively on the solid structural wooden joists, or span two joists with a thick piece of 3/4-inch plywood to create a stable kneeling platform.
How to Safely Locate the Leak Source from the Attic
Finding where water enters your home requires a bit of detective work. Water follows gravity and surface tension, rarely dripping straight down from the breach on the exterior roof. It routinely hits the top of a rafter, runs down the wood framing for six or eight feet, hits a horizontal crossbeam, and then drops onto your insulation.
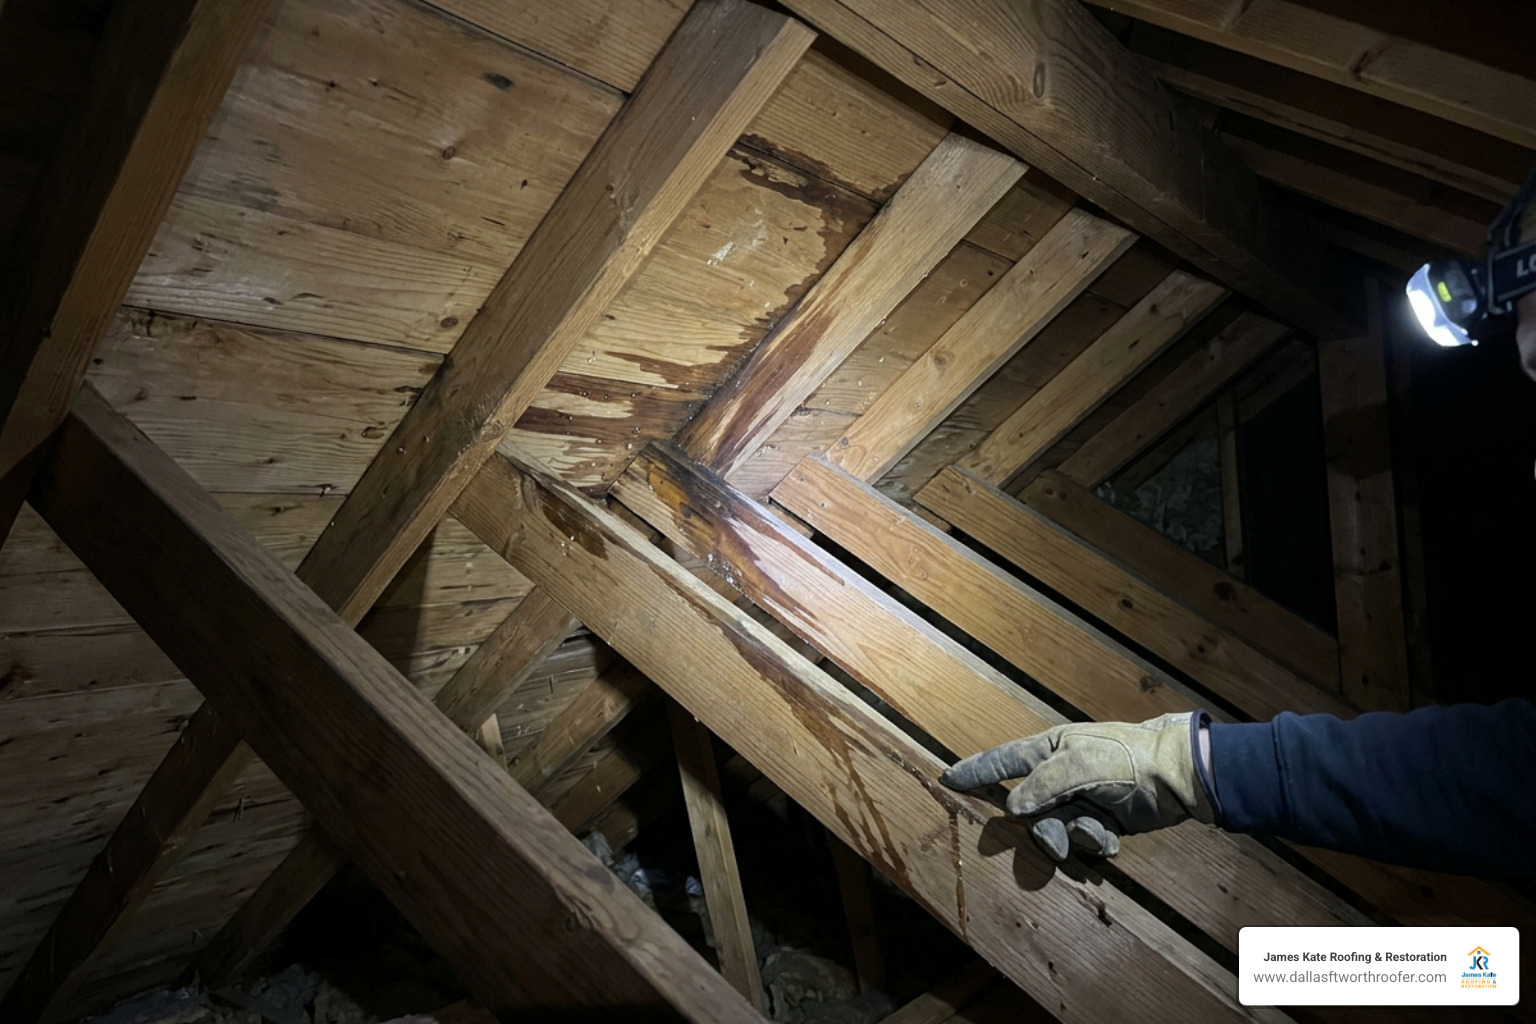
Follow the Moisture Trail Up-Slope
Start at the point where water is dripping onto your attic floor or ceiling drywall and look up. Inspect the rafters and the underside of the roof decking for dark damp streaks, moisture glistening in your light, or rows of rusted clout nails.
Always trace the water trail uphill toward the roof ridge. The true penetration point is located at the highest spot where you see damp wood or discolored water trails.
The Dry-Day Inspection Trick (The Daylight Test)
If the rain has stopped and the sun is out, finding the leak is significantly easier. Head into your attic during the brightest part of the day and turn off all flashlights and work lights. Give your eyes a minute to adjust to the darkness.
Scan the underside of the roof decking and felt underlayment. Pinpricks of daylight shining through the sheathing like tiny stars immediately reveal punctures, missing roofing nails, or cracked decking.
Account for Secondary Sources
Not all attic moisture originates from missing shingles. Check roof penetrations closely:
- Plumbing vent boots: Give the PVC vent pipe a gentle wiggle. If the rubber boot on the roof has cracked or the pipe has shifted, rainwater will run down the outside of the pipe straight into the attic.
- Chimney and valley junctions: Metal flashing expands in hot Texas summers and contracts in the winter, which breaks caulking seals and loosens fasteners over time.
- Attic condensation: Poor ventilation can trap high humidity inside the attic, creating condensation that looks identical to a roof leak, presenting as rusty nails or rows of small drip marks across the entire underside of the roof.
Take Reference Measurements
Once you pinpoint the internal entry point, pull out a tape measure. Measure the distance from the leak to a fixed architectural point, such as a gable end wall, a roof ridge, or the attic hatch. Write these measurements down. When dry conditions return, this gives roofing professionals the exact exterior coordinates needed to pinpoint damaged shingles or failed underlayment on the outside.
Step-by-Step Methods to Fix Roof from Inside
Before you apply any sealant or backing plate, proper surface preparation is vital. Applying adhesives directly over soaked, slimy, or moldy wood will cause the patch to delaminate within hours.
- Clear Waterlogged Insulation: Pull wet fiberglass or cellulose insulation away from the leak area and place it into heavy trash bags. Saturated insulation loses its thermal R-value and quickly becomes a breeding ground for mold.
- Dry the Substrate: Use dry rags or clean towels to remove standing water from the underside of the decking. If possible, set up a small portable fan to blow air across the timber for 20 to 30 minutes to pull moisture out of the surface grain.
- Scrape the Timber Clean: Use a stiff wire brush or a 2-inch putty knife to scrape away cobwebs, loose wood fibers, oxidation, and sawdust so your patching compounds make direct contact with sound wood.
Consulting a comprehensive roof patch buying guide helps ensure you choose adhesives engineered to stick to building materials under thermal stress.
Materials Needed to Fix Roof from Inside
To create a strong interior barrier, assemble materials specifically formulated for moisture resistance and mechanical stability:
| Material | Best Application | Cure / Set Time | Relative Bond Strength | Notes & Limitations |
|---|---|---|---|---|
| Bitumen Mastic (Lap Cement) | Underlayment felt patches & timber backing | 24 Hours | Excellent | Heavy-duty; remains semi-flexible; messy to apply without gloves. |
| Butyl Flashing Tape | Sealing deck seams, felt tears, small punctures | Instant | High | Requires a dry, dust-free surface; resists moderate thermal cycling. |
| 1/4-Inch Exterior Plywood | Rigid backing plates over decking holes | Immediate (Mechanical) | Structural | Distributes pressure; must be fastened with short exterior screws. |
| Galvanized Sheet Metal | Rigid backing plates over small punctures | Immediate (Mechanical) | Structural | Rigid and completely waterproof; edges are sharp, handle with care. |
| Polyurethane Sealant | Timber cracks and joint transitions | 12–24 Hours | High | Flexible; adheres well to clean wood, but will not bond to wet surfaces. |
| Standard Silicone Caulk | Not Recommended | 12–24 Hours | Low on Bitumen | Chemically rejects old asphalt/bitumen; peels under thermal movement. |
| Expanding Spray Foam | Do Not Use | N/A | None (Waterproof) | Acts as an open-cell sponge; traps moisture, accelerates wood rot. |
Applying a Rigid Backing and Roofing Cement Patch
For holes or punctures in plywood or OSB roof decking, a rigid backing patch reinforced with roofing cement provides a sturdy interior seal. This technique bridges structural decking gaps and stops water from pouring down into your ceiling framing.
Step 1: Cut and Dry-Fit Your Backing Plate
Measure the damaged area in the decking. Using 1/4-inch exterior-grade plywood or a piece of galvanized sheet metal, cut a patch that overlaps the hole by at least 2 inches (50 mm) on all sides. Hold the patch against the underside of the roof decking to ensure it sits completely flat between the rafters without obstruction.
Step 2: Apply the Mastic Bed
Using a putty knife, apply a generous, thumb-wide bead of plastic roofing cement (bitumen mastic) directly around the perimeter of the leak on the underside of the decking. Avoid smearing cement over the wet hole itself if water is actively dripping through; focus on building a thick perimeter gasket on the dry surrounding wood.
Step 3: Embed and Mechanically Fasten
Press your backing plate firmly into the mastic bed, squeezing out trapped air pockets to create a tight seal. While holding the patch in place, secure it using short exterior-grade wood screws spaced every 4 to 6 inches around the perimeter.
Safety Note: Choose screw lengths carefully (typically 3/4-inch to 1-inch) so they bite securely into your roof decking without punching entirely through the exterior asphalt shingles on the outside! Using screws is far better than nails because hammering creates severe vibrations that can loosen surrounding shingle nails and worsen exterior roof damage. You can read more about dealing with compromised decking in this decking replacement guide.
Step 4: Create a Sealed Dome
Once the plate is screwed tight, take your putty knife and spread another generous coat of roofing cement over the entire perimeter edge of the plate and over every individual screw head. This forms a continuous, waterproof dome that prevents water from seeping past the patch edges.
To explore more emergency methods, check out how to repair small roof leaks from inside your house for additional field-tested techniques.
How to Repair Damaged Roof Felt and Underlayment
If your roof decking is intact but the moisture barrier or roofing felt underlayment has torn or punctured, you can apply an internal felt patch to divert water toward your rafters and away from the ceiling below.
1. The 100mm Overlap Rule
Capillary action can draw standing water backward behind a patch if the contact area is too narrow. Always cut your replacement felt patch so that it overlaps the damaged section by at least 100mm (4 inches) on all sides.
2. Round the Patch Corners
Use utility shears to round off the four sharp corners of your felt patch. Square corners catch on wood framing, peel back easily during structural shifting, and delaminate under attic air currents.
3. Apply Bitumen Lap Cement
Coat the back of the replacement felt patch and the existing clean felt with bitumen lap cement. Never use standard bathroom silicone caulk; old bitumen felt naturally rejects silicone under seasonal thermal expansion, leading to rapid delamination. If you prefer a peel-and-stick method, use heavy-duty bitumen-backed flashing tape.
4. Eliminate the “Water Pocket” Trap
Press the patch smoothly from the center out to the edges to eliminate air pockets. When adhering felt from the inside, make sure the top edge of your patch is tucked cleanly or rolled flat against the upper slope. If your patch creates a sagging pouch, water running down the underlayment will pool inside the pocket, creating hydrostatic pressure that eventually rots your timber rafters.
For deeper technical insights into underlayment membranes, read this detailed guide on repairing roof felt from inside a loft.
Critical Mistakes That Make Interior Roof Leaks Worse
When dealing with a stressful leak, it is easy to reach for whatever materials you have in the garage. However, several common DIY shortcuts create massive structural headaches and accelerate internal rot.
1. Spraying Expanding Foam into Leak Gaps
Expanding spray foam is an excellent thermal insulator, but it is not a waterproof membrane. Spray foam has an open-cell structure that acts like a giant sponge. When sprayed into wet roof decking, it absorbs water, holds it directly against your wooden rafters, and blocks air circulation. Within a few months, the wood beneath rots out completely, forcing contractors to replace entire sheets of decking during permanent repairs.
2. Relying on Duct Tape
Duct tape is an everyday household staple, but it is useless for roof repair. Attic temperatures in North Texas routinely climb above 130°F in the summer and plunge below freezing in the winter. These extreme temperature swings quickly dry out the rubber-based adhesive on duct tape, causing it to crack, curl, and fall off within days. Always use bitumen mastic, butyl tape, or specialized flashing tape.
3. Sealing Over Rotting Wood
If the roof decking is spongy, soft, or crumbly, spreading caulk over it will not help. Rotten wood cannot hold fasteners or bond with adhesives. When wood has deteriorated to this degree, temporary patches will fail under the weight of water. For a wider perspective on addressing underlying damage properly, review our guide on one simple way to fix a roof leak.
4. Ignoring Failed Exterior Flashing
Trying to fix a chimney, valley, or sidewall flashing leak solely from the attic is nearly impossible. Flashing systems depend on overlapping metal step cards and counter-flashing designed to shed water with gravity. Once metal flashing pulls away from brick or splits at a seam, water enters above the decking plane. An interior patch might deflect water away from one rafter, but the water simply travels to another section of your ceiling.
5. Walking on Drywall or Unsupported Framing
Never attempt an attic repair in the dark or without stable footing. Stepping through attic drywall causes instant ceiling collapse, severe personal injury, and expensive repair bills. Keep your weight distributed on solid ceiling joists at all times.
Frequently Asked Questions
Can you permanently fix roof from inside?
No. An interior roof patch is strictly an emergency stopgap designed to minimize drywall and insulation damage while you arrange proper repairs. A roof functions like a raincoat: putting tape on the inside lining does not repair the tear in the outer shell.
Water that penetrates your shingles continues to soak the exterior wood decking and framing, even if an interior patch prevents it from dripping onto your ceiling. A properly installed interior patch or an exterior anchored tarp will hold for 30 to 90 days, while simple roofing caulk or tape applied during a storm may only survive a heavy rain or two. A permanent fix requires inspecting the exterior surface, replacing damaged shingles, replacing rotted decking, and sealing flashing from the outside.
What should you do if the ceiling is bulging with water?
If your ceiling is sagging or bulging with trapped water, act immediately to relieve the hydraulic weight:
- Clear the area beneath the bulge and set down a large bucket.
- Take a long screwdriver or awl and carefully puncture the center of the sagging drywall.
- Stand to the side while water drains into the container.
- Once the water drains completely, set up a fan to dry out the drywall.
Puncturing the bulge prevents the soaked drywall from giving way all at once and dumping gallons of water across your living room. Once the leak is fixed, you can follow standard drywall repair steps to patch the small drainage hole.
Does homeowners insurance cover roof leak water damage?
Most standard homeowners insurance policies cover sudden and accidental water damage resulting from covered storm events, such as high winds tearing shingles away or hail puncturing a roof membrane. However, policies almost universally exclude gradual damage caused by wear and tear, age, or deferred maintenance.
Insurance carriers expect policyholders to take reasonable steps to prevent further damage after a storm. Installing a temporary interior patch or placing a tarp over damaged areas demonstrates that you took active steps to protect the property. Document everything thoroughly: take clear, timestamped photos of the leak, the attic water trail, and any damaged drywall before touching anything.
Many policies expect damage notification within 24 to 48 hours. If your home has suffered severe storm damage, you can schedule emergency roof repair services to get professional documentation and rapid water containment for your insurance claim.
When to Call a Roofing and solar Professional
An interior emergency patch buys you valuable time during a storm, but it is not a permanent solution. Once weather conditions clear, the underlying exterior damage must be resolved by a qualified professional to protect your home’s structural integrity.
You should stop DIY attempts and call a professional roofer immediately if you notice:
- Multiple active leaks appearing across different areas of the home.
- Spongy, sagging, or visibly rotten roof decking timbers.
- Visible mold growth spreading across attic rafters or insulation.
- Leaks originating around complex flashing junctions, valleys, or skylights.
- Structural sagging along the main roof ridge line.
Comprehensive solar: Beyond the Shingles
Stopping the water coming through your roof is only the first half of the equation. Water that enters your attic saturates framing timbers, ruins insulation, and travels down wall cavities where it can cultivate mold spores in as little as 24 to 48 hours.
At James Kate Roofing & solar, we provide complete, end-to-end solutions for homeowners across Dallas-Fort Worth, including Arlington, Mansfield, Grand Prairie, Midlothian, and Granbury. As a family-owned company founded on honesty, integrity, and Biblical principles, we bring GAF President’s Club award-winning craftsmanship and up to 25-year workmanship warranties to every residential and commercial project.
Our team handles the entire recovery process under one roof:
- Emergency Roof Repairs: Rapid exterior tarping, shingle replacement, and metal flashing solar.
- Water & Moisture Mitigation: Industrial extraction, high-velocity structural drying, and thermal moisture tracking.
- Mold Remediation: Safe containment, spore filtration, and antimicrobial treatments.
- Build-Back Reconstruction: Full drywall replacement, ceiling re-texturing, insulation solar, and finish painting.
If you are dealing with a persistent roof leak or need immediate storm damage assistance, do not let minor water intrusion turn into a major structural loss. Connect with our trusted team of Dallas-Fort Worth roofing and solar experts today to schedule a thorough roof inspection and protect your home for decades to come.

Dustin Eatman is a seasoned roofing professional with deep, hands-on expertise that spans residential and commercial roofing, insurance solar, and long-term roof asset management. As the owner of James Kate Roofing & solar in the Dallas–Fort Worth metroplex, he’s built a reputation for diagnosing roof systems accurately, communicating clearly, and executing projects with a high standard of workmanship and documentation. Dustin understands the technical details that make roofs perform—proper underlayment selection, slope and drainage considerations, ventilation strategy, flashing and penetration detailing, and manufacturer-specific installation requirements—because he’s worked through the real-world challenges that cause leaks, premature wear, and warranty issues. He’s equally fluent in the operational side of roofing: jobsite planning, quality control, safety, material ordering, crew coordination, and customer experience from inspection to closeout. In insurance-related projects, Dustin brings practical knowledge of claim workflows, adjuster meetings, scope alignment, supplements, and the importance of photo evidence and thorough records, helping property owners navigate stressful situations with confidence. For commercial clients—especially property and facility managers—he emphasizes proactive maintenance and targeted repairs that reduce disruption, extend roof life, and prevent expensive interior damage. Dustin also stays focused on doing things the right way: educating customers on realistic options, setting expectations, and prioritizing solutions that hold up over time rather than quick fixes. That blend of technical skill, field experience, process discipline, and owner-level accountability is what makes Dustin Eatman a trusted expert in the roofing industry.