
Why Is Your Fibreglass Roof Leaking? Root Causes and Warning Signs
A fibreglass roof leaking is most often caused by topcoat alligatoring, pinholes, stress cracks, or failed perimeter flashing and upstand detailing. These localized vulnerabilities allow water to reach the underlying timber deck, and they can usually be repaired with a properly bonded GRP patch or a solar coating before structural damage spreads.
Glass Reinforced Plastic (GRP) roofing has earned a strong reputation for durability. When properly laid, a seamless polyester laminate acts as an impervious barrier against rain and environmental wear. However, no roofing system is completely immune to physical stress, structural settling, or material degradation.
When water enters your living or attic space, the failure rarely stems from a sudden catastrophic breakdown across the entire deck. More often, it develops from localized vulnerabilities that degrade over time. Identifying the most common causes of roof leaks helps property owners take corrective action before water damages the underlying timber decking.
Surface Alligatoring, Pinholes, and Stress Cracks
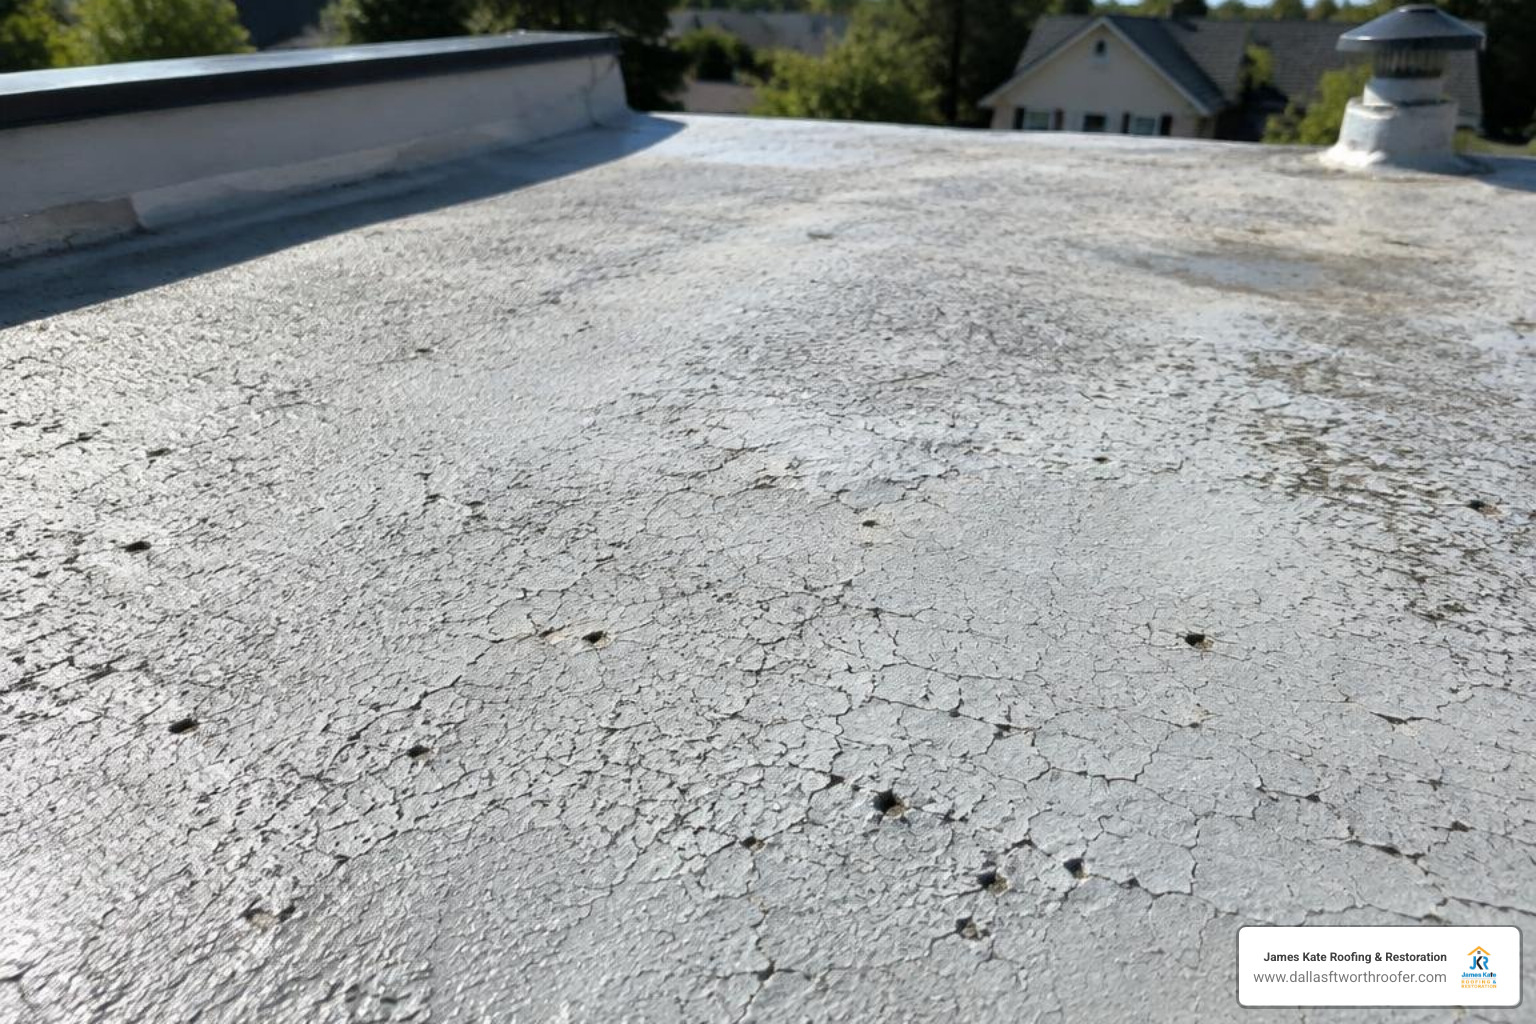
Polyester resins rely on an outer flowcoat (topcoat) to shield the underlying glass fiber matrix from harsh ultraviolet (UV) radiation. Over years of direct sunlight exposure, this topcoat can lose its flexibility and begin to shrink, developing a pattern of fine, interconnected fractures known as alligatoring. While alligatoring initially looks cosmetic, water can eventually work through these micro-fissures into the laminate itself.
Pinholes represent another frequent culprit. These tiny punctures typically stem from installation defects—such as resin starvation or applying the topcoat too quickly over uncured laminate, which traps minute air pockets. Under heavy rain and high winds, even a single pinhole can permit moisture ingress.
Stress cracks, on the other hand, often manifest as straight or star-shaped fractures. Because GRP is a rigid thermoset plastic, building movement or the expansion and contraction of the underlying roof boards can tear the laminate if adequate expansion joints are not incorporated during construction.
Diagnosing a Fibreglass Roof Leaking Around Flashing and Upstands
One of the most common leak scenarios occurs not in the open field of the roof, but around its perimeters. GRP flat roofs require specialized trims along edges, abutments, and penetrations:
- Lead Flashings and Wall Abutments: Where the flat deck meets an adjoining brick wall, simulated lead GRP trims or traditional lead flashings must be properly chased into the mortar joints. If the mortar fails, the flashing pulls away, or the mastic dressing cracks, wind-driven rain easily channels behind the membrane.
- Perimeter Drip and Fascia Trims: Trims that were inadequately bonded or mechanically secured during installation can lift under thermal stress, breaking the waterproof seal along the eaves.
- Roof Penetrations and Upstands: Vent pipes, skylights, and parapet walls require precise laminate consolidation. Poor collar detailing or insufficient upstand height (which should be at least 150 mm) allows water to crest the barrier during severe downpours.
Standing Water and Substrate Decking Issues
While fibreglass is impervious to standing water in the short term, prolonged pooling can accelerate topcoat degradation and exploit microscopic weaknesses in the resin matrix. Understanding how commercial roof ponding water affects flat structures is critical: low spots create substantial hydraulic head pressure over low-lying seams.
Water ponding usually indicates a sub-deck deflection or inadequate roof pitch. If water penetrates the laminate, moisture quickly absorbs into the underlying OSB3 (Oriented Strand Board) or plywood deck. As timber absorbs moisture, it swells and buckles. This timber expansion creates an upward heave that cracks the rigid GRP layer directly above it, escalating what was once a minor seep into a significant roof failure.
How to Pinpoint the Exact Leak Source on a GRP Deck
Water has a habit of traveling along joists, decking seams, and vapor barriers before finally dripping through an interior ceiling. Consequently, the damp patch inside your home is rarely directly underneath the external entry point on the roof.
Knowing what to do if your roof is leaking starts with a structured assessment to trace the water path back to its exterior origin.
Visual and Physical Deck Inspection
Wait for a dry day and clean any debris, leaves, or moss from the roof surface before inspecting:
- Walk the Surface Carefully: Feel for any soft, spongy spots beneath your feet. A localized dip or “give” underfoot indicates that water has rotted or swollen the sub-decking beneath the laminate.
- Examine Seams and Upstands: Check perimeter drip edges, fillet trims, and wall flashings. Look for cracks in the resin fillets where the flat deck transitions into vertical walls.
- Map the Cracks and Pinholes: Get close to the deck to inspect areas where water tends to pond. Look for hairline splits, star fractures, or flaking flowcoat.
- Listen for Delamination: Step slowly across the deck. A loud creaking, crunching, or popping noise often signals that the laminate has separated (delaminated) from the OSB board below.
Advanced Leak Detection Methods
When visual inspection does not reveal the problem, professional roofing technicians use non-destructive diagnostic tools:
- Electronic Leak Detection (ELD): Utilizing low-voltage or high-voltage vectors, ELD passes an electric current across the roof surface. Because dry GRP is an electrical insulator and water conducts electricity, the equipment pinpoints membrane breaches with millimeter accuracy.
- Thermal Imaging (Infrared Thermography): Conducted at dusk as the roof cools down, infrared cameras detect differences in thermal mass. Wet insulation and damp sub-decking retain heat longer than dry materials, creating a distinct glowing footprint on the screen.
- Moisture Meters and Tracing: Non-invasive impedance meters measure moisture levels within the decking substrate without puncturing the cured laminate.
How to Fix a Leaking Fibreglass Roof: Complete Step-by-Step Guide
Repairing a GRP roof requires strict adherence to chemical ratios and ambient working conditions. If you are learning how to fix a leaking roof built with fibreglass, keep in mind that moisture and contamination are the primary reasons repair patches fail.
Essential Materials and Safety Gear
Before beginning, assemble the proper equipment:
- Safety Equipment: Chemical-resistant nitrile gloves, safety goggles, and an organic vapor respirator mask (essential when working with styrene and MEKP catalyst).
- Surface Prep Tools: 40-grit to 60-grit oxide sandpaper or an angle grinder fitted with a coarse sanding disc, pure industrial acetone, clean lint-free wiping cloths, and a stiff brush.
- Lamination Supplies: Standard 450 g/m² or 600 g/m² Chopped Strand Mat (CSM), polyester laminating resin, MEKP (Methyl Ethyl Ketone Peroxide) catalyst, mixing buckets, measuring syringes, laminating rollers, a metal paddle roller (bubble buster), and a UV-stable exterior GRP topcoat (flowcoat).
Preparing the Surface and Cutting the Matting
A chemical patch will not adhere to oxidized resin, dirt, or fully cured wax topcoats without physical abrasion.
- Dry the Roof Thoroughly: Never attempt a GRP repair on a damp surface. Moisture halts the polyester chemical curing chain, resulting in an unbonded, tacky mess.
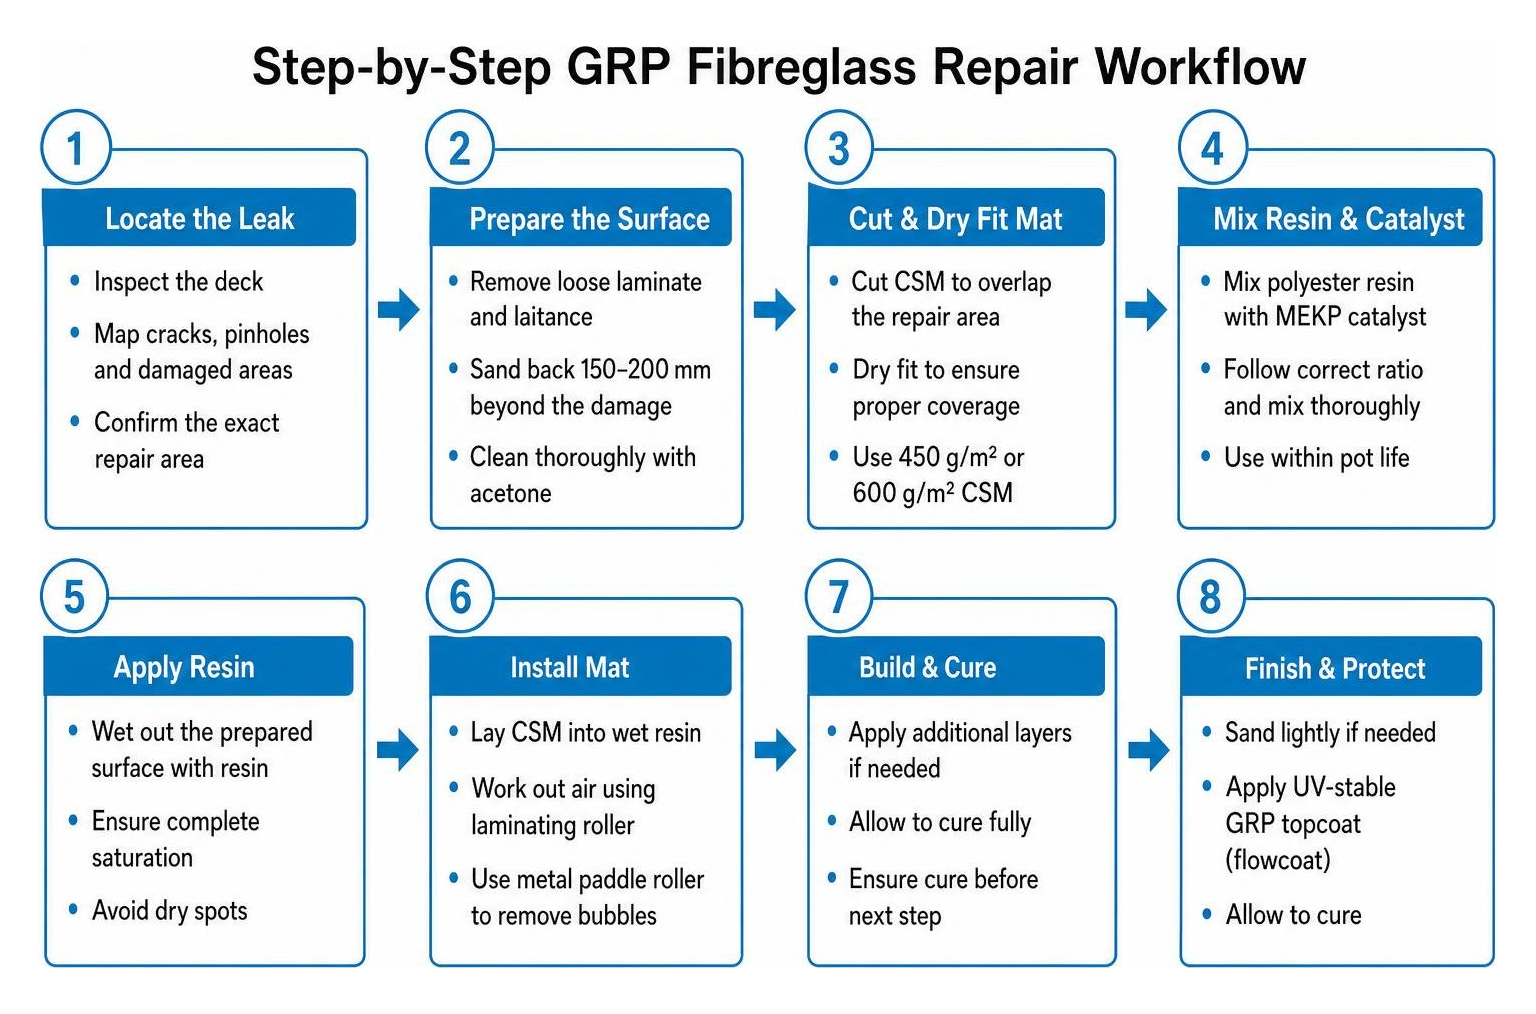
- Grind and Key the Substrate: Using your 40-grit sandpaper or grinder, abrade the damaged area and extend the sanding zone at least 50 mm to 100 mm beyond the crack or hole. Sand down through the topcoat until you reach the fibrous structural laminate below. The surface must have a completely rough, matte appearance.
- Acetone Wipe: Wipe down the sanded area with pure acetone on a clean rag. This removes loose dust, grease, and surface wax, creating a clean bonding surface.
- Cut the Reinforcement Mat: Measure the repair area and cut a piece of 450 g/m² Chopped Strand Mat that extends 50 mm past the defect on all sides. Feather the edges by tearing the matting by hand rather than cutting with scissors; feathered edges create a smoother, invisible transition without abrupt ridges.
Fixing a Fibreglass Roof Leaking from Cracks, Holes, or Pinholes
To restore structural integrity, execute the lamination process carefully according to proven, permanent GRP repair methods:
- Mix the Polyester Resin: Measure the required amount of polyester resin. Add MEKP catalyst at a 2% ratio by volume (adjust to 1% in hot summer weather to extend pot life, or up to 3% in cooler conditions). Mix thoroughly for 60 seconds.
- Apply Base Resin: Brush a generous layer of catalyzed resin directly over the prepared, sanded roof surface at an approximate coverage rate of 0.5 kg/m².
- Embed the Chopped Strand Mat: Place the feathered CSM patch directly into the wet resin bed.
- Saturate and Consolidate: Apply more resin over the top of the glass mat using a laminating roller until the white strands turn completely translucent. Immediately run a metal paddle roller over the wet patch using firm, overlapping strokes. This essential step forces out trapped air bubbles and consolidates the glass fibers into a single, dense composite.
- Initial Cure: Allow the laminated patch to cure until it is firm to the touch and no longer tacky (typically 1 to 2 hours depending on ambient temperature).
Applying Topcoat and Waterproof Sealing
The repair patch is not UV-stable or completely waterproof until sealed with a designated roofing topcoat.
- Sand Down Ridges: Once the resin has hardened, quickly run a sheet of 60-grit sandpaper over the patch to knock down any protruding glass fibers or sharp nibs. Wipe clean.
- Mix and Apply the Topcoat: Mix your UV-resistant flowcoat with 2% MEKP catalyst. Apply the topcoat evenly over the entire patched area with a brush or short-pile roller at an application rate not exceeding 0.5 kg/m². Applying topcoat too heavily causes brittleness and premature cracking.
- Curing and Testing: Allow the topcoat to cure fully for 24 to 48 hours. Once hardened, conduct a gentle water hose test across the repair area to verify that the leak is fully resolved and runoff flows freely toward the gutters.
DIY Patching vs. Professional Repair: Costs and Regulations
Understanding your repair scope helps you balance DIY efforts against the peace of mind offered by professional contractors.
| Factor | DIY Repair Kit | Professional GRP solar |
|---|---|---|
| Typical Cost | £100 – £200 | £500 – £2,000+ (varies with size & damage) |
| Coverage Area | Small, localized fixes (1–2 m²) | Full roof solar or section rebuilds |
| Expected Lifespan | 5 – 10 years (dependent on technique) | 15 – 25+ years (backed by warranties) |
| Skill Requirement | Moderate (requires handling chemicals & sanding) | Professional trade specialization |
| Structural Upgrades | Not included | Timber rot remediation, decking replacement |
| Regulatory Compliance | Homeowner responsibility | Handled by contractor (Part L & structural codes) |
When to Attempt DIY Repair
A DIY fix is a practical, cost-effective solution when:
- The damage is confined to a small area (less than 1 square meter).
- The timber decking beneath the laminate is completely firm, dry, and uncompromised.
- The leak stems from an identifiable surface scrape, pinhole array, or minor impact fracture.
- Weather conditions are dry with temperatures reliably between 10°C and 25°C.
Reviewing a comprehensive roof repair guide for 2026 will help you assess whether your tools, safety gear, and working environment are adequate for an effective self-repair.
When to Call a Roofing Professional
Certain conditions demand professional expertise to prevent severe structural damage:
- Sub-Deck Rot and Sponginess: If stepping on the roof feels soft or sagging, water has compromised the underlying OSB or joists. The damaged timber must be cut out and replaced before any new fiberglass is laid.
- Extensive Delamination: When large sections of the laminate pull away from the boards, localized patches will not restore the roof.
- Emergency Tarping Needs: If active rainfall prevents immediate composite curing, emergency roof tarping is necessary to protect the building interior while planning a permanent solution.
- Building Regulations Compliance: If a flat roof repair or replacement covers 25% or more of the total roof area, building regulations typically require formal approval. This often mandates upgrading roof insulation to achieve Part L compliance with a maximum thermal U-value of 0.18 W/m²K.
Can You Felt Over Fibreglass or Apply a solar Coating?
Property owners facing a leaking GRP roof often wonder if they can simply apply a layer of roofing felt over the deck to seal it quickly.
The Risks of Applying Felt Directly over GRP
Applying torch-on or self-adhesive mineral felt directly over an existing fibreglass deck is strongly discouraged:
- Adhesion Failure: Bitumen and polyester resin share no chemical compatibility. Felt adhesives struggle to form a permanent bond with cured, smooth GRP topcoats, leading to premature blistering and delamination.
- Fire and Chemical Hazards: Using open-flame torches directly on a polyester resin deck poses an extreme fire hazard and can release toxic chemical fumes while melting the underlying laminate.
- Thermal Expansion Differences: Felt and rigid fibreglass expand at vastly different rates during temperature shifts, causing rapid tearing along the felt seams.
If a felt overlay is unavoidable, the roof must first be overboarded with a minimum 9 mm to 12 mm layer of external-grade OSB3 or plywood mechanically fixed into the structural joists, creating a fresh, uniform substrate for the felt system.
Extending Roof Lifespan with GRP solar Coatings
Rather than adding heavy felt, a far superior alternative is recoating fibreglass roof systems with a dedicated liquid solar compound.
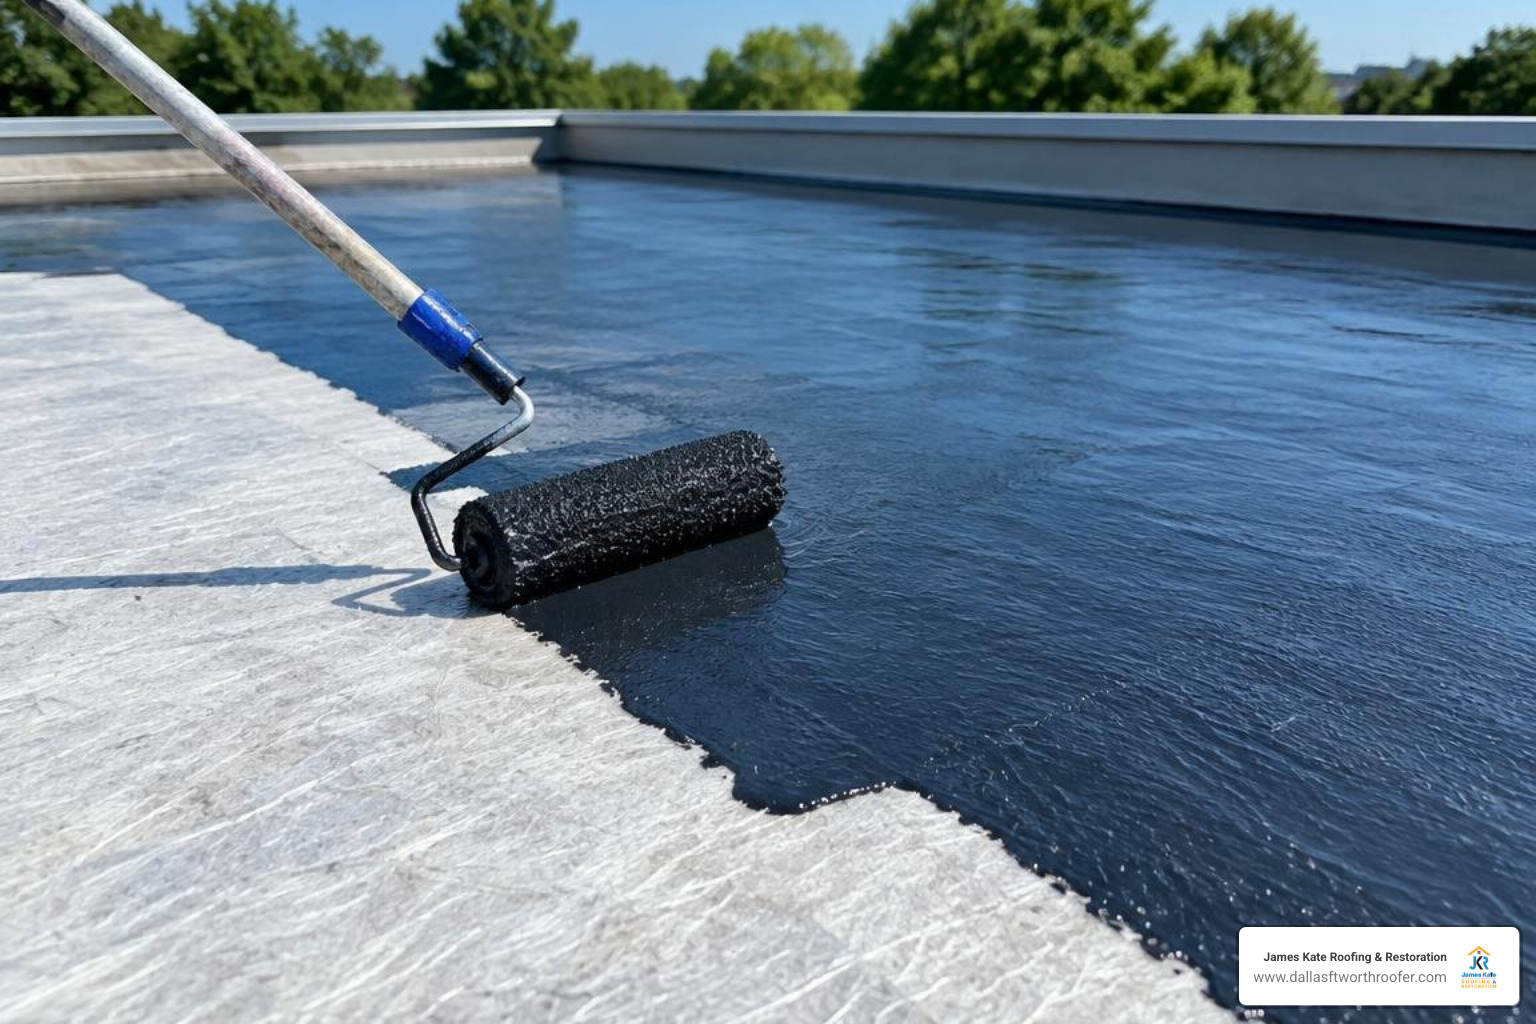
Advanced, moisture-tolerant liquid polymer coatings can be applied directly over thoroughly cleaned and abraded GRP roofs. These high-solids, fiber-reinforced coatings form a seamless, flexible, and UV-resistant membrane across the existing surface. Using high-grade waterproof paint for flat roofs or specialized single-coat solar resins can successfully extend the service life of an aging GRP deck by an additional 10 to 15 years without requiring a costly tear-off.
Proactive Maintenance to Prevent Future Fibreglass Roof Leaks
Maintaining a flat GRP roof requires minimal effort, but consistent upkeep prevents small imperfections from developing into structural leaks.
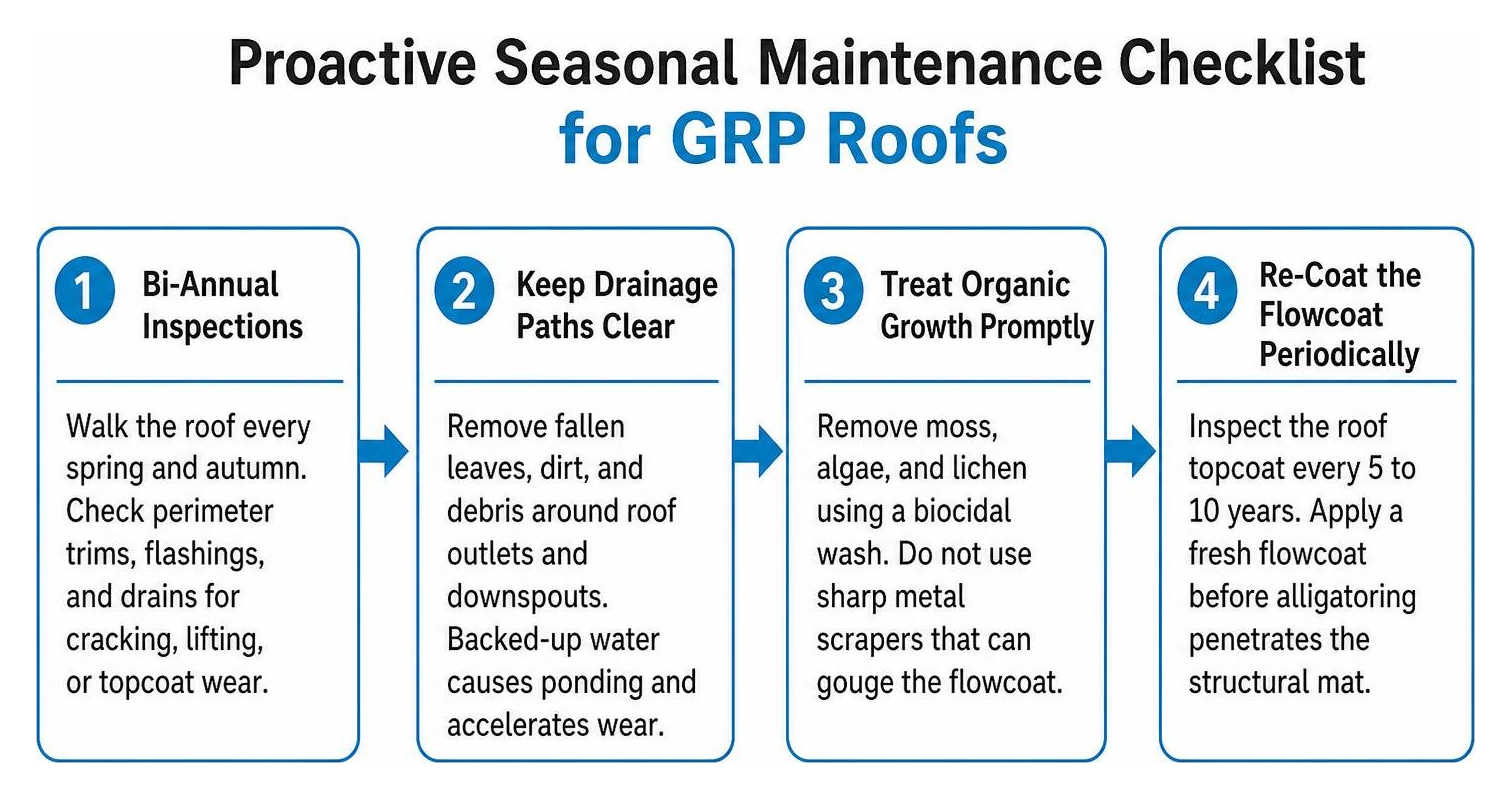
- Conduct Bi-Annual Inspections: Walk the roof every spring and autumn. Check the perimeter trims, flashings, and drains for any signs of cracking, lifting, or topcoat wear.
- Keep Drainage Paths and Gutters Clear: Remove fallen leaves, dirt, and debris that accumulate around roof outlets and downspouts. Backed-up water creates unnecessary ponding loads that accelerate wear.
- Treat Organic Growth Promptly: Remove moss, algae, and lichen using a biocidal wash. Do not use sharp metal scrapers that can gouge the flowcoat.
- Re-Coat the Flowcoat Periodically: Inspect the roof topcoat every 5 to 10 years. Applying a fresh flowcoat before alligatoring penetrates the structural mat keeps the laminate sealed and UV-resistant for decades.
Frequently Asked Questions About Leaking Fibreglass Roofs
How long does a patch repair on a fibreglass roof typically last?
When performed correctly—using coarse mechanical sanding, pure acetone cleaning, catalyzed polyester resin, and a UV-resistant topcoat—a localized GRP patch creates a permanent chemical bond. It typically lasts the remaining lifespan of the original roof, often 10 to 15 years or longer.
Can you repair a leaking fibreglass roof in wet or cold conditions?
No. Standard polyester resins require dry conditions and ambient temperatures above 5°C (ideally 10°C to 25°C) to cure properly. Moisture contaminates the chemical bonding process, resulting in an unbonded, milky, and sticky resin layer. In emergency wet-weather situations, use temporary waterproof tarps or specialized acrylic emergency sealants until dry conditions allow for a permanent structural composite repair.
Why does a fibreglass flat roof make creaking or popping sounds?
GRP is a rigid material with a noticeable thermal expansion coefficient. As the roof warms in the morning sun and cools at night, the fiberglass expands and contracts against the timber OSB deck. If expansion joints were omitted during installation (recommended roughly every 60 m²) or perimeter gaps were pinned too tightly, the structural movement produces creaking or popping sounds as the layers adjust to changing temperatures.
Conclusion
A leaking fibreglass roof does not have to result in an immediate, expensive tear-off. By diagnosing the exact source—whether caused by topcoat alligatoring, stress cracks, perimeter trim delamination, or flashing defects—you can apply an effective, permanent composite patch or protective solar coating.
Whenever structural timber damage, extensive soft spots, or complex flashing failures occur, working with experienced roofing specialists ensures your roof remains completely watertight. If you need assistance with flat roof evaluations, repairs, or full solar projects, the team at James Kate Roofing & solar is ready to help. Discover how our Irving TX roofing specialists provide dependable, high-quality roofing solutions designed to protect your property for decades to come.

Dustin Eatman is a seasoned roofing professional with deep, hands-on expertise that spans residential and commercial roofing, insurance solar, and long-term roof asset management. As the owner of James Kate Roofing & solar in the Dallas–Fort Worth metroplex, he’s built a reputation for diagnosing roof systems accurately, communicating clearly, and executing projects with a high standard of workmanship and documentation. Dustin understands the technical details that make roofs perform—proper underlayment selection, slope and drainage considerations, ventilation strategy, flashing and penetration detailing, and manufacturer-specific installation requirements—because he’s worked through the real-world challenges that cause leaks, premature wear, and warranty issues. He’s equally fluent in the operational side of roofing: jobsite planning, quality control, safety, material ordering, crew coordination, and customer experience from inspection to closeout. In insurance-related projects, Dustin brings practical knowledge of claim workflows, adjuster meetings, scope alignment, supplements, and the importance of photo evidence and thorough records, helping property owners navigate stressful situations with confidence. For commercial clients—especially property and facility managers—he emphasizes proactive maintenance and targeted repairs that reduce disruption, extend roof life, and prevent expensive interior damage. Dustin also stays focused on doing things the right way: educating customers on realistic options, setting expectations, and prioritizing solutions that hold up over time rather than quick fixes. That blend of technical skill, field experience, process discipline, and owner-level accountability is what makes Dustin Eatman a trusted expert in the roofing industry.