
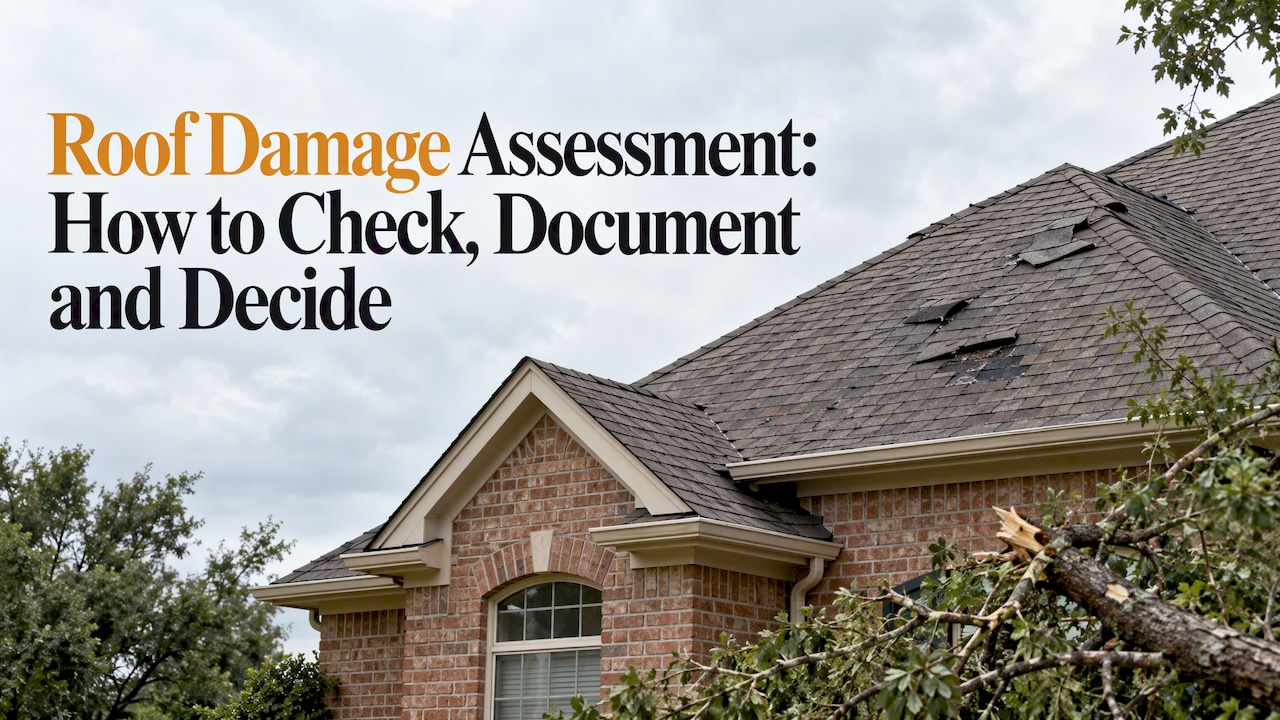
A roof damage assessment is a structured look at your roof, attic and ceilings that answers three questions: is there damage, what caused it, and does it call for a repair or a replacement. You can do the first pass yourself from the ground and from inside the house. The decision, and the paperwork that goes with an insurance claim, belongs with a qualified roofing professional. This guide walks through both halves in the order you will need them.
TL;DR
- Start from the ground and the attic: binoculars, a phone camera and a flashlight tell you a lot without a ladder.
- Never climb a storm-damaged roof, and never go up alone or in the dark.
- Photograph everything before any cleanup, and call your insurer promptly. Keep receipts for temporary repairs.
- A professional assessment separates storm damage from age and wear, and that distinction drives both the claim and the repair-or-replace call.
- A typical inspection costs a few hundred dollars nationally, and many roofers, including us, offer free inspections and estimates.
Table of Contents
- When a roof damage assessment makes sense
- Step 1: Put safety first
- Step 2: Check from the ground
- Step 3: Check the attic and ceilings
- Step 4: Document before you touch anything
- What a professional roof damage inspection covers
- Storm damage or normal wear? Why the difference matters
- Repair or replace: how the assessment answers it
- How insurance adjusters assess roof damage
- What does a roof inspection cost?
- Our perspective
- Get your roof assessed by a local team
- Avoid these common assessment mistakes
- FAQ
- Sources
When a roof damage assessment makes sense
The obvious trigger is a storm: hail, high wind or a fallen limb. In North Texas that happens often enough that many homeowners treat an after-storm check as routine. Other triggers are quieter: a brown stain on a bedroom ceiling, shingle pieces in the flower bed, a roof that is simply old, or a house you are about to buy or sell.
Do not wait for a leak. Hail bruises and lifted shingles can sit unnoticed for months while water works its way into the decking. By the time a stain appears on the ceiling, the damage underneath is usually bigger than the stain.
Step 1: Put safety first
The National Roofing Contractors Association says safety comes first: do not inspect a potentially unsound, storm-damaged roof alone, do not climb in darkness, and wear sturdy footwear, long sleeves and work gloves if you must be near the roof.
Our advice goes a step further. A homeowner does not need to be on the roof at all. A wet, damaged or sagging roof can fail underfoot, and your own footsteps can leave marks that muddy the assessment later. Everything in the next two steps can be done with both feet on the ground or in the attic.
Step 2: Check from the ground
Walk the full perimeter of the house with binoculars and look up at each slope. According to American Family Insurance, you are looking for dented, missing, lifted or loose roofing materials, plus leaves and moss collecting on the surface. Also check gutters, drains and downspouts.
Here is what to scan for, and what it often means:
| What you see | What it can point to |
|---|---|
| Shingle pieces or granules in the yard or gutters | Wind lift, hail impact or an aging surface |
| Missing or curled shingles | Wind damage or end of service life |
| Dents in vents, flashing, gutters or metal panels | Hail large enough to have hit the roof too |
| Bent or loose flashing around chimneys and vents | A likely future leak point |
| Sagging or buckling roof line | Possible structural problem: call a professional promptly |
| Debris, limbs or impact marks | Direct impact damage |
Soft metals are useful witnesses. Dents on roof vents, window screens, AC condenser fins and gutters tell you that hail reached your property, even when the shingles look fine from the street.
Sagging or buckling is the one finding that should end your own inspection. American Family notes that it needs a professional roofer.
Step 3: Check the attic and ceilings
The inside of the house often shows damage the outside hides. GAF lists stains on ceilings or walls, sagging in the attic and sunlight showing through the roof as interior signs of possible leaks. American Family adds water spots and mold in the attic to that list.
On a dry day, take a flashlight into the attic and look at:
- The underside of the roof deck near chimneys, plumbing vents and valleys, for dark stains or damp wood.
- Insulation, for compressed, wet or discolored patches.
- Pin-points of daylight where there should be none.
- Rafters and framing, for sagging or new cracks.
Do not step between joists onto drywall, and stay out if you see wet insulation near wiring. If a ceiling is actively dripping, place a bucket, move belongings, and read our guide to temporarily patching a roof hole from the inside while you arrange a professional visit.
Step 4: Document before you touch anything
Photos are the cheapest insurance you can buy. FEMA advises policyholders to photograph and video damage inside and outside the home and to list damaged property for the adjuster. The Better Business Bureau gives the same order of operations: contact the insurer immediately, take photos and videos, and save receipts for temporary repairs, then hold off on permanent repairs until the insurer approves.
A simple documentation routine:
- Shoot wide shots of each side of the house, then close-ups of every dent, crack or missing shingle.
- Include something for scale, such as a coin or a tape measure, in close-ups.
- Photograph interior stains with the date visible on your phone or in a note.
- Write down the date and time of the storm, plus hail size or wind conditions if you know them.
- Keep every receipt for tarps, boards and emergency work.
Temporary protection is expected. The NRCA recommends temporarily covering roof openings and keeping receipts. Permanent work is a different matter, and it should wait for the insurer’s go-ahead.
What a professional roof damage inspection covers
A ground-level look cannot confirm hail bruising or find a failing seal under a shingle tab. That is what a professional assessment is for. The InterNACHI standard for roof inspections lists what an inspector should report: the visible condition of the roof covering and flashings, gutters and downspouts, vents, skylights, chimneys and other penetrations, roof structure, trim, overhanging branches, and accessible attic areas for signs of moisture or damaged structural components. The inspector also documents how the inspection was carried out.
In practice, a thorough storm-damage assessment on a shingle roof includes:
- Roof surface: missing, creased or lifted shingles, granule loss, fractures and hail marks.
- Flashing and penetrations: the places leaks usually start.
- Ventilation: damaged or blocked vents that shorten roof life.
- Drainage: gutters, downspouts and any ponding on low-slope roofs.
- Attic and interior: moisture, staining, mold and framing condition.
- Collateral damage: dented metal, siding, fences and outdoor equipment that confirm the storm’s severity.
For documentation, expect photos of each slope and each problem area, often with markings or test squares, and a written report you can hand to the insurer. Our own checklist for assessing roof damage severity breaks down how we grade what we find, and our guide to types of roof storm damage explains how each one is typically handled.
Storm damage or normal wear? Why the difference matters
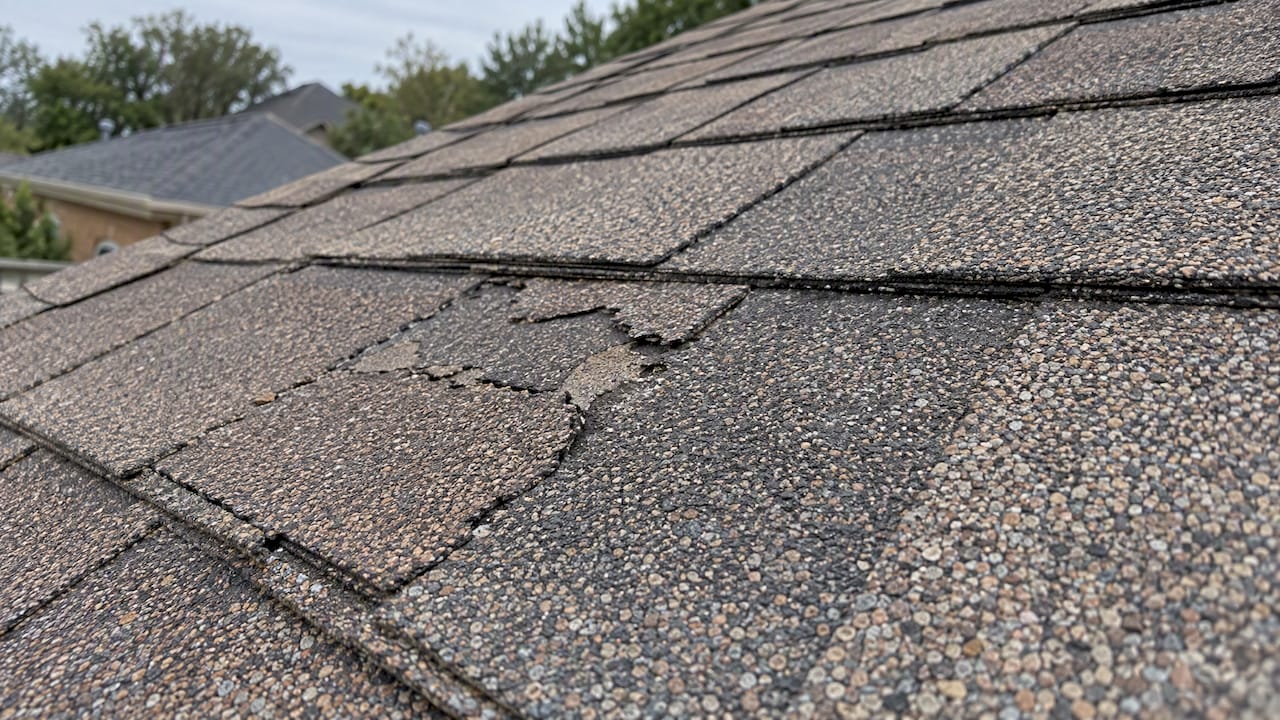
This is where most claims are won or lost. The Insurance Institute for Business & Home Safety says documenting roof damage involves comparing damaged materials against undamaged ones and telling storm damage apart from natural aging or poor maintenance.
The same care applies to what looks like hail. The IBHS warns that footfalls and tool marks can mimic hail impacts and need to be separated out during a professional assessment. That is one more reason to stay off the roof until it has been inspected.
A useful working definition comes from Texas. The Texas Windstorm Insurance Association describes functional hail damage as a reduction in a roof’s water-shedding ability or expected service life, often shown by fractures in composition shingles or dents in metal roofing. Cosmetic marks that do not affect performance are a different category. A good assessor tells you which one you have, and shows you the evidence.
Repair or replace: how the assessment answers it
The same TWIA guidelines point to the roof’s age, its condition and whether it can be repaired as the factors weighed when deciding between repair and replacement. In plain terms:
| Situation | Usual direction |
|---|---|
| Isolated damage, roof otherwise sound and not old | Repair |
| A few lifted shingles or failed flashing after wind | Repair |
| Widespread functional hail damage across several slopes | Replacement, often through an insurance claim |
| Old roof with brittle shingles, repairs no longer hold | Replacement |
| Repeated leaks in different spots | Replacement or a deeper investigation |
| Structural sagging or rotted decking | Repair of the structure, then replacement of the covering |
A written assessment lets you compare options on facts rather than on a salesperson’s urgency. If the assessor recommends replacement, ask to see the specific damage that justifies it, slope by slope.
How insurance adjusters assess roof damage
Your contractor’s assessment and the adjuster’s are separate. The National Association of Insurance Commissioners explains that adjusters inspect the home, take photographs and measurements, and estimate the damage. It also recommends that you find out your deductible and notify your insurer as soon as you know there is damage and decide to file a claim.
Three practical points:
- Know your coverage type. The NAIC says your declarations page shows whether you have replacement cost value or actual cash value coverage, and that this significantly affects roof payouts.
- Be there for the adjuster’s visit. Keep your photos, damage list and notes from the visit. The NAIC advises keeping emergency repair receipts, damage lists and photos.
- You can disagree. The NRCA notes that an adjuster’s inspection costs you nothing and that if you disagree with the outcome you can ask the insurer to reconsider. A contractor’s written assessment is useful supporting evidence in that conversation.
Check your own policy for deadlines and deductible rules, and ask your insurance agent about anything specific to your coverage. We can document roof conditions, but we cannot interpret your policy for you.
What does a roof inspection cost?
Angi reports a national average of $257 for a roof inspection in 2026, with most homeowners paying between $125 and $392. The full range runs from $75 to $1,200 depending on roof size, pitch and inspection type, and extras such as attic inspections ($200 to $500) or roof certifications ($150 to $200) add to the total.
What moves the price:
- Size and pitch: bigger and steeper roofs take longer and need more safety gear.
- Material: shingles are quick to assess, while tile, slate and complex metal systems take more expertise.
- Report depth: a verbal walkthrough costs less than a photo report prepared for an insurer or a sale.
- Add-ons: drone imagery, attic inspection and certifications.
If you are comparing, ask what is included in writing. Many contractors, including us, do inspections and estimates at no charge when the work may lead to a repair or replacement.
Our perspective
We see the same pattern after almost every North Texas storm: homeowners wait to see whether a leak appears, and the roof quietly gets worse. Our view is that an assessment should come first, before the repair quote and before the sales pitch.
A good assessment is data, not opinion. That is why we built our instant roofing quote tool around historical weather data: it helps you see whether severe storms have actually passed over your address, so you know whether a closer look is warranted.
When we inspect, we aim to explain what we find in plain language, show you the photos, and tell you whether we think you need a repair or a replacement. As a GAF Master Elite® contractor, we hold ourselves to the manufacturer’s standards, and for residential roof replacements we offer a transferable 15-year workmanship warranty.
Our advice: do not climb up there yourself, document what you can from the ground, and get a qualified set of eyes on the roof before you make any decisions.
the author
Get your roof assessed by a local team
If you have storm damage, a stained ceiling or an aging roof, we can inspect it, document the findings and give you a clear recommendation. We cover storm-damage assessments, hail and wind damage inspections, leak diagnosis and repair, and full replacements for homes and commercial properties across the Dallas-Fort Worth area. Our roof inspections and repairs come with free inspections and estimates.

Managing a commercial building? We also handle commercial roof repairs and replacement for flat and low-slope systems. You can also start with our storm-damage assessment and instant quote tool to see whether recent weather affected your roof.
Avoid these common assessment mistakes
- Going up for a closer look. Falls are the real injury risk, and footprints can complicate a hail claim.
- Cleaning up before photographing. Debris and damage in place is your evidence.
- Permanent repairs before approval. The BBB advises holding off until the insurer signs off; emergency tarping is the exception.
- Hiring whoever knocks on your door. Check licensing, insurance and local references, and get the findings in writing.
- Treating a patch as a fix. A small leak repair is sometimes enough, but our breakdown of the cost to fix a small roof leak shows where a repair stops making sense.
- Ignoring water inside the house. Wet insulation and drywall can grow mold. Our water damage checklist covers the first steps.
FAQ
How do you assess roof damage?
Start from the ground with binoculars, checking for missing, lifted or dented materials and for debris in gutters. Then check the attic and ceilings for stains, daylight, damp insulation and mold. Photograph everything, then have a roofing professional inspect the roof itself.
What does a roof damage assessor do?
An assessor examines the roof covering, flashings, vents, chimneys, gutters and accessible attic areas, then reports what they find and how they inspected. For storm claims, they also document and separate storm damage from age-related wear, with photos and a written report.
How do insurance adjusters determine roof damage?
Adjusters inspect the home, take photographs and measurements, and estimate the damage. They look for evidence that the storm caused it rather than age or poor maintenance. Keep your own photos and notes from their visit.
How much does a roof inspection cost?
Nationally, the average is about $257 in 2026, and most homeowners pay between $125 and $392, according to Angi. Price depends on roof size, pitch, material and report depth. We offer free inspections and estimates.
Should I repair or replace after hail?
It depends on whether the hail caused functional damage, meaning reduced water-shedding or service life, plus the roof’s age and condition. Isolated damage on a sound roof is usually repaired. Widespread damage on several slopes more often leads to replacement.
Sources
- NRCA: Roof Repair After Strong Winds
- American Family Insurance: How to check your roof for storm damage
- GAF: Storm Damage Roof Repairs resources guide
- FEMA: Documenting damage for insurance
- BBB: What to do after a damaging storm
- InterNACHI: How to Perform Roof Inspections
- IBHS: Roof survey practices
- NAIC: Post-Disaster Claims Guide
- NAIC: Claim Disaster Guide, 2019
- IBHS via NAIC: hail versus mechanical damage
- NRCA: After the Storm
- TWIA: Property Damage Evaluation Guidelines
- Angi: How much does a roof inspection cost?
Recommended
- Ultimate Checklist for Assessing Roof Damage Severity
- Types of Roof Storm Damage and How to Handle Them
- A Comprehensive Guide to Finding Trusted Hail Damage Repair
- Smart Ways to Temporarily Patch a Roof Hole From the Inside
Written with BabyLoveGrowth to earn links
