
Why Roof Leak Repair Needs to Happen Fast (2026 Guide)
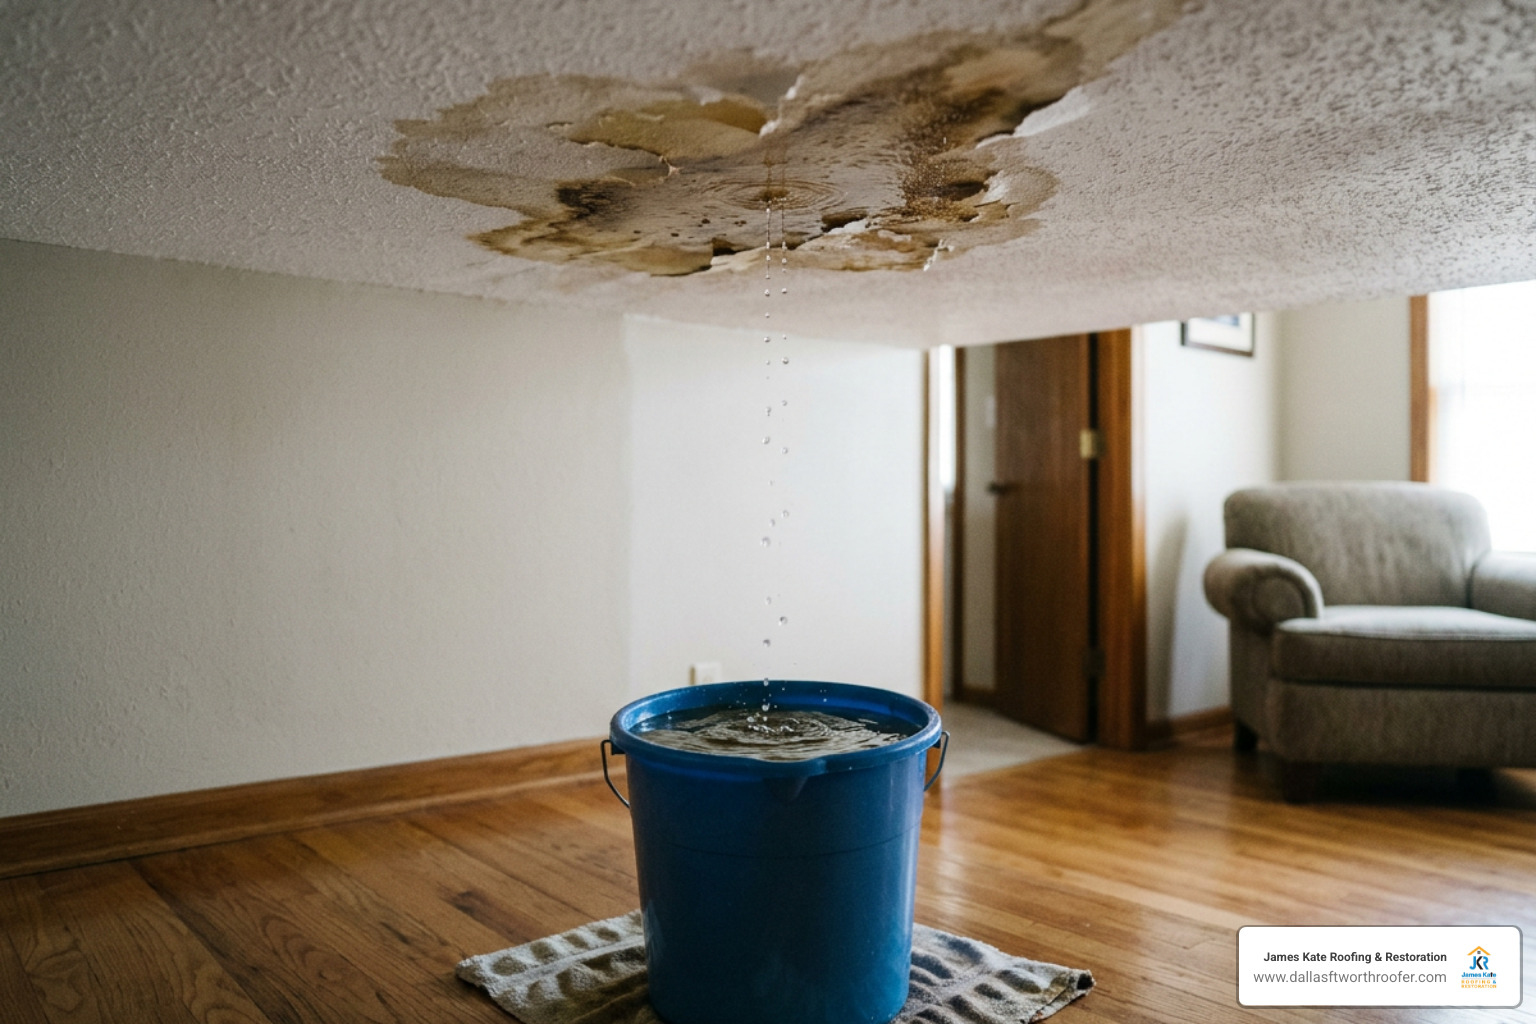
Roof leak repair is one of the most urgent home repairs you can face — and one of the most misunderstood.
Here is what most homeowners need to know right away:
| Situation | What to Do First |
|---|---|
| Active drip inside the home | Place a bucket, poke a small hole at the lowest point of the water bulge, then tarp the roof |
| Ceiling stain but no active drip | Inspect the attic with a flashlight — trace moisture uphill along rafters |
| Can’t find the source | Run a garden hose test starting low on the roof, moving uphill in 2–3 foot zones |
| Small, accessible repair (vent boot, single shingle) | DIY-safe with proper fall protection |
| Flashing, valley, or chimney leak | Call a professional roofer |
| Cost estimate needed | Budget $300–$1,500 for most residential repairs in 2026 |
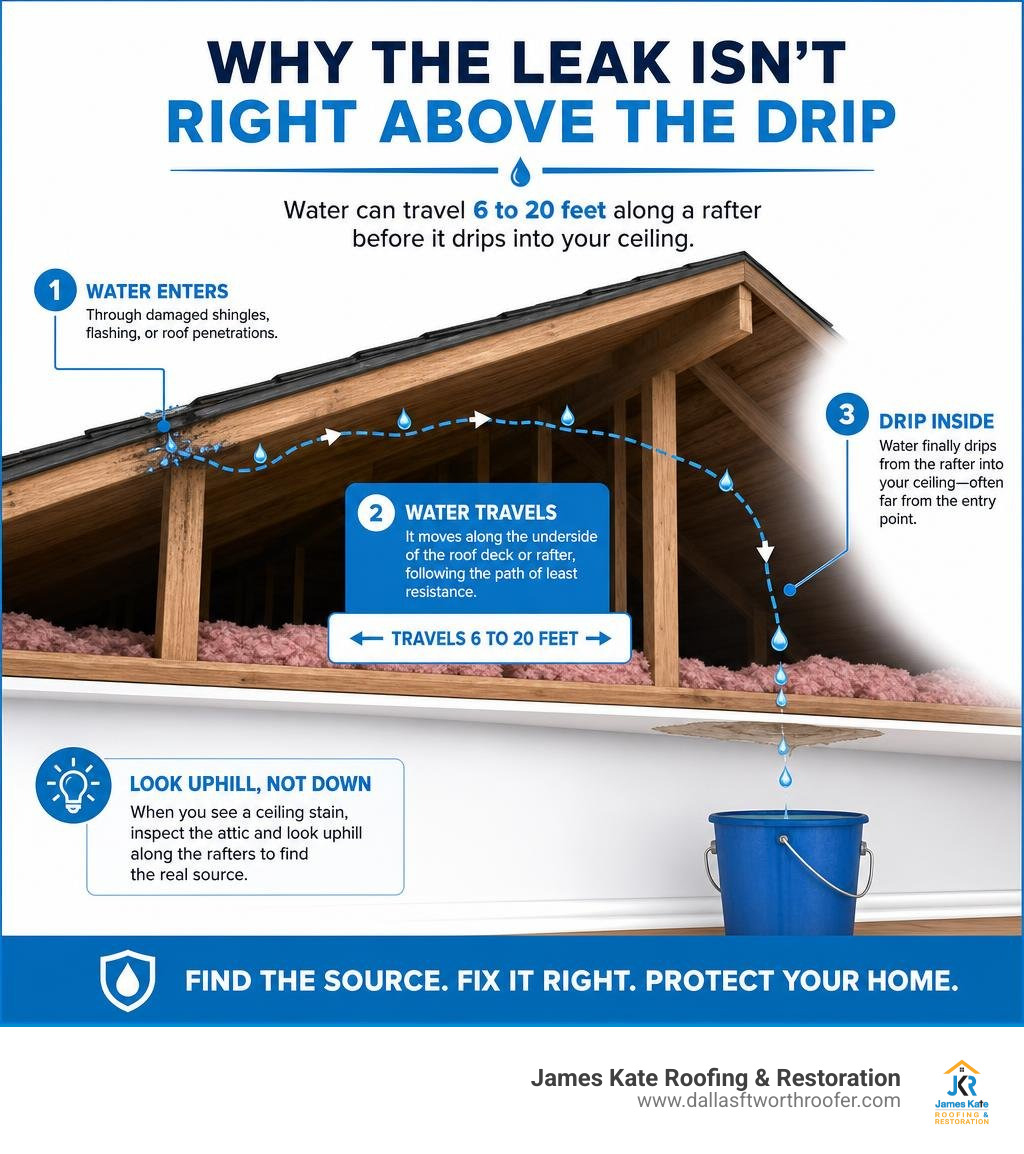
The tricky part? The wet spot on your ceiling is almost never directly below where water is getting in. Water can travel 6 to 20 feet along a rafter before it drips — which means chasing the stain instead of the source is the single most common mistake homeowners make.
Delaying the repair makes it significantly more expensive. An active leak that goes unaddressed for days can add hundreds of dollars in interior damage. Weeks of delay can push total costs into the thousands once drywall, framing, and mold remediation are factored in.
I’m Dustin Eatman, owner of James Kate Roofing & solar in the Dallas–Fort Worth area, and I’ve spent years diagnosing and executing roof leak repairs across residential and commercial properties — including insurance solar work where accurate documentation and source tracing make all the difference. In this guide, I’ll walk you through exactly how to find the leak, fix it correctly, and know when to call in a pro.
Pinpointing the Source: Common Causes and Leak Tracing
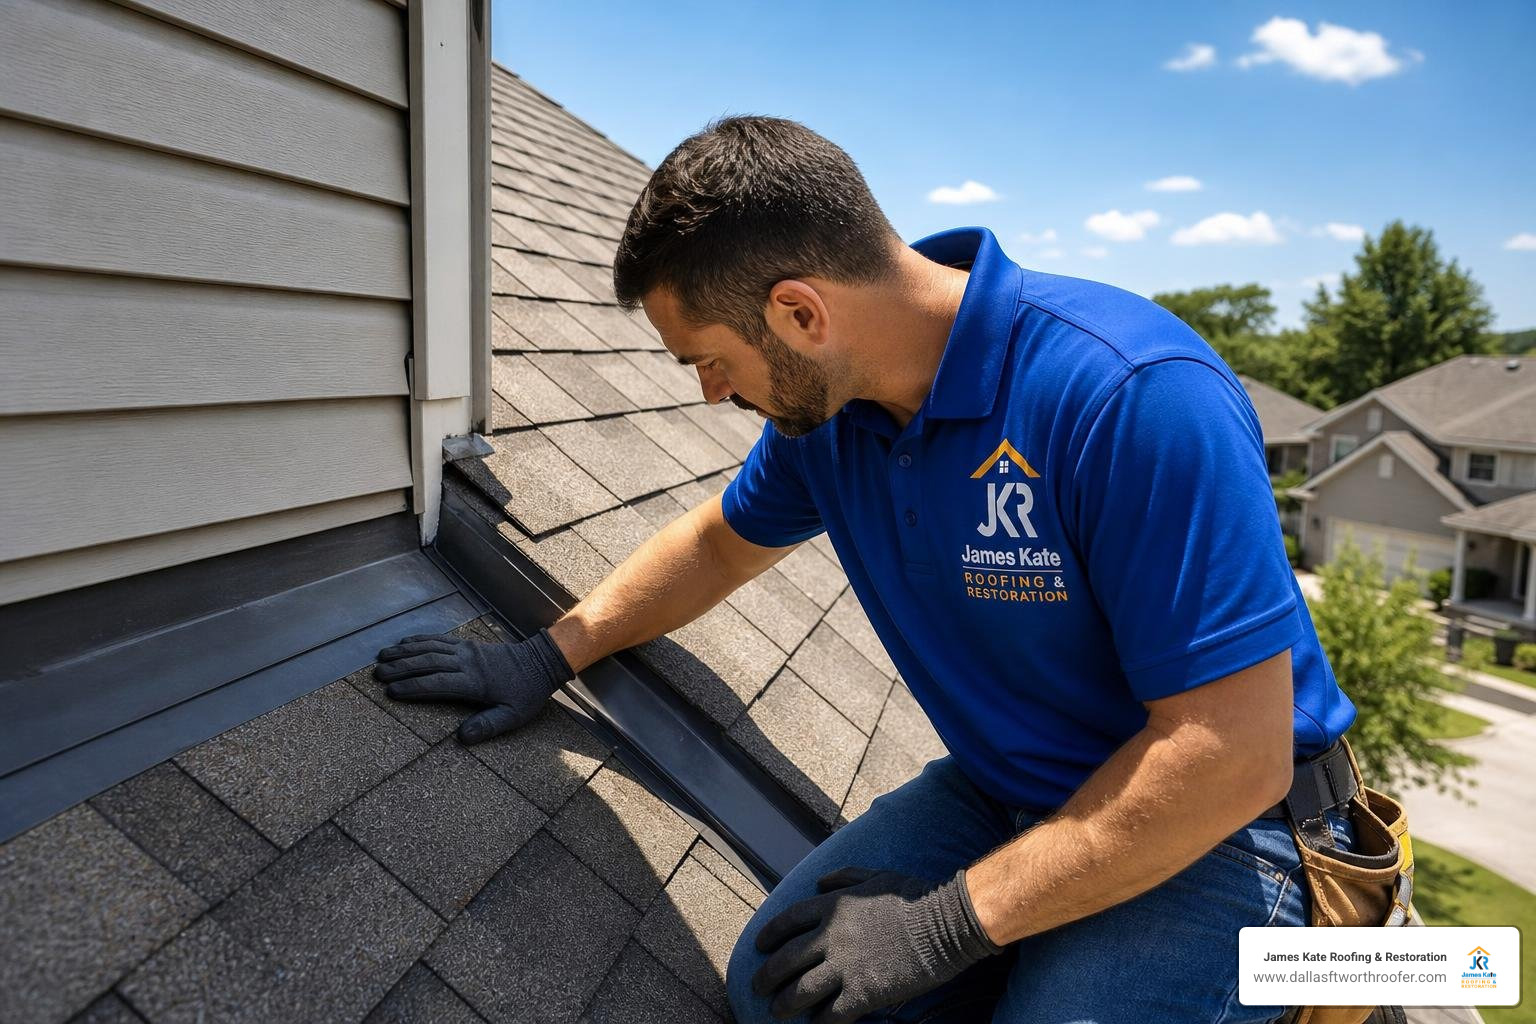
When water breaches your outer roof envelope, it rarely falls straight down. Field data from the National Roofing Contractors Association (NRCA) and post-storm building assessments reveal that flashing failures account for 40 to 50 percent of all residential roof leaks. Other frequent culprits include deteriorating vent pipe boots, damaged shingles, valley breakdowns, and ice dams during winter freezes.
Before you climb up or attempt any repair, understanding where water typically enters — and how it migrates — is vital. For step-by-step repair mechanics, you can consult How to Fix a Roof Leak: 2026 Step-by-Step | The Roofing Brief.
Here is a breakdown of the primary entry points we encounter across homes in Mansfield, Arlington, Grand Prairie, Midlothian, and Granbury:
- Flashing Failures (40%–50% of leaks): Thin sheet metal strips placed at transitions (chimneys, side dormers, walls) crack, rust, or separate from masonry mortar joints over time.
- Plumbing Vent Pipe Boots: EPDM rubber collars surrounding plumbing stacks crack after 10 to 15 years of continuous UV exposure, allowing water to stream straight down the pipe casing.
- Damaged or Missing Shingles: High thunderstorm winds tear tabs off or pop fasteners, exposing vulnerable underlayment and raw decking below.
- Roof Valleys: Valleys handle the heaviest water volume during downpours. A single valley can route 200 to 300 gallons of water during a storm, making improperly sealed seams or rusted valley metal prone to massive leaks.
- Skylight Curbs & Seals: Aged rubber gaskets or perimeter counter-flashing around glass frames degrade, letting wind-driven rain seep past internal channels. Homeowners dealing with skylight issues should review The Ultimate Guide to Skylight Repair and Leak Prevention for detailed sealing protocols.
Tracing Leaks from Attic to Exterior Roof
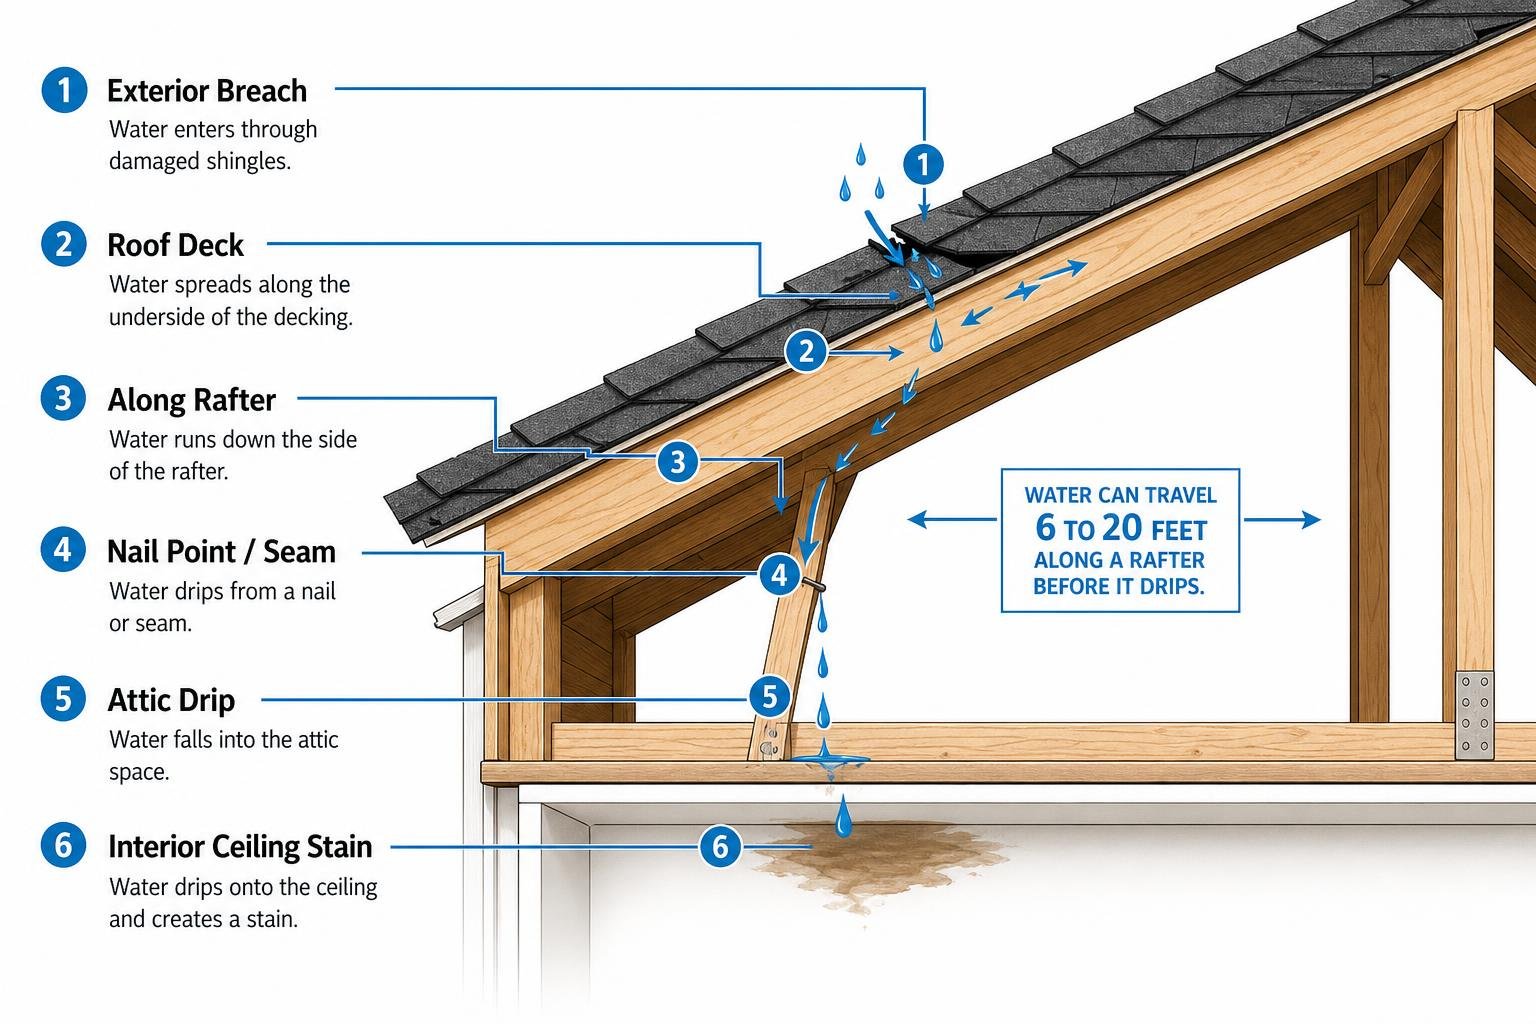
Because water follows gravity along the line of least resistance, it hits the roof deck, travels along the topside of tongue-and-groove or plywood decking, runs down the side of a sloping rafter, and finally drips off a nail point or seam onto your ceiling drywall.
To trace the real origin point, start inside your attic during daylight hours or while rain is actively falling:
- Bring a Bright Flashlight: Shine light along the underside of roof rafters, decking, and electrical conduits. Look for dark stains, white mineral deposits (efflorescence), swollen plywood edges, or glints of moisture.
- Trace Uphill: Always follow moisture trails upslope. If you see a water drip on a rafter 8 feet from the floor, shine your light 6 to 12 feet higher along that exact rafter toward the peak.
- Measure Interior Reference Points: Measure from the leak location to the nearest exterior wall inside the attic. When transferring this measurement to the exterior roof surface, remember to add 6 to 8 inches to account for the exterior wall overhang and soffit depth.
- Inspect Penetrations and Hardware: Check near satellite dish mounting brackets, roof vents, and wall intersections higher up the roof plane than your ceiling stain.
Isolating Hidden Leaks with the Garden Hose Test
When an attic inspection reveals no obvious entry point, conduct a controlled garden hose isolation test on a dry day. You will need a helper standing in the attic with a flashlight while you manage the hose on the roof.
- Start Low and Work Upslope: Spray water low on the roof plane directly above or slightly below the suspected leak zone first. If you spray high on the roof initially, water flowing downward will mask lower entry points, giving you a false location.
- Run 10-Minute Zonal Isolations: Keep the hose running on a single 2×3 foot section of roof for at least 10 minutes before moving higher. It takes time for water to saturate underlayment and travel along internal framing.
- Communicate via Phone or Radio: The assistant inside the attic alerts you the moment water breaks through the roof deck. Mark that exact exterior location on the roof with chalk immediately.
Step-by-Step Roof Leak Repair: From Emergency Tarp to Permanent Fix

Once you locate the breach, executing a reliable repair requires distinguishing between immediate emergency mitigation and a permanent architectural component replacement. To dive deeper into overall maintenance strategies, refer to our comprehensive Roof Repair Guide 2026.
Installing Temporary Tarp Protection
When a storm hits at night or active rain prevents permanent repairs, installing a proper emergency roof tarp stops water from devastating your interior ceilings. Never simply throw a tarp over shingles and weigh it down with bricks — wind will blow underneath it, and water will channel straight underneath the top edges.
- Choose Heavy-Duty Material: Use a woven, UV-resistant 8-mil or 10-mil poly tarp extending at least 3 feet beyond the leak zone on all sides.
- Wrap around 2×4 Furring Strips: Roll the upper edge of the tarp tightly around a 2×4 lumber strip two full turns. Screw the wood strip into the roof deck using 3-inch washer-head screws.
- Tuck Under Upslope Shingles (If Safe): Whenever possible, slip the wrapped top edge under the shingle course higher up the roof slope so water sheds naturally over the top edge of your tarp.
- Secure Perimeter Batten Boards: Screw additional 1×3 or 2×4 furring strips down along the side and bottom borders of the tarp to keep high wind from catching edges.
For full pricing structures and temporary protective steps, read The Price of Protection and What You’ll Pay for a Roof Tarp. If you reside near Arlington, you can also access localized emergency response details via Emergency Roof Repair Arlington.
Repairing Vent Boots, Damaged Shingles, and Flashing
For permanent fixes, replacing damaged components rather than coating them with short-lived surface paste ensures your home stays dry for decades.
Vent Pipe Boot Replacement
Replacing an aged vent boot is one of the most cost-effective repairs a homeowner can undertake.
- Option A (Retrofit Sleeve): Slide a specialized rubber/plastic retrofit boot sleeve (such as a Perma-Boot collar) directly over the existing stack pipe. This encapsulates the cracked original collar completely without disturbing higher shingle courses.
- Option B (Full Boot Replacement): Use a flat pry bar to carefully break adhesive seals on shingles surrounding the failed boot. Pull out old roofing nails, slide the damaged flashing plate out, slide a new heavy-duty pipe boot under the top and side shingle courses, secure it with galvanized washer-head roofing screws, and dab polyurethane caulk over exposed nail heads.
Replacing Damaged or Missing Shingles
Wind frequently lifts shingle tabs or shears them off entirely during spring storms across North Texas.
- Gently break the thermal seal on shingles in the row above the damaged shingle using a flat pry bar.
- Locate and remove the 4 nails holding the damaged shingle in place, as well as the nails in the shingle course directly above it that penetrate its top margin.
- Slide out the torn or cracked shingle tab.
- Slide a new matching shingle into position, align it with adjacent tabs, and secure it with four 1-1/4 inch galvanized roofing nails driven directly into the designated nail line.
- Apply quarter-sized dabs of asphalt roof cement under the new shingle tab and press down firmly to re-establish the wind-resistant seal.
If you are undertaking this project yourself, read our complete guide on How to Replace Damaged Shingles Like a Pro. If wind storms recently impacted your neighborhood, check out 6 Steps to Repairing Wind Damage Before Your Roof Takes Flight and Minor Wind Damage Advice for Concerned Homeowners.
Step Flashing & Chimney Flashing Repairs
Step flashing consists of individual 3x3x7 inch metal L-angles woven into every shingle course along vertical walls.
- When step flashing rusts or separates, remove surrounding shingles, strip out rusted metal sections, and weave new step flashing angles into the shingle courses from bottom to top.
- Never simply fill flashing voids with thick tar. Always secure new metal pieces under siding or counter-flashing, and seal seams using high-grade polyurethane sealant.
Verifying Your Roof Leak Repair with a Hose Test
Never assume a repair is complete until you test it under controlled conditions.
- Allow all applied polyurethane sealants or roofing cements to cure for at least 24 hours.
- Position a garden hose directly above the repaired area on the roof.
- Run water continuously for 15 to 20 minutes while your assistant stands inside the attic monitoring the underside of the decking with a bright flashlight.
- If the interior remains bone dry, your permanent component repair is officially verified watertight.
Essential DIY Materials, OSHA Safety, and DIY vs. Pro Scope
Roofing operations carry serious inherent safety risks. Falls remain the leading cause of residential construction injuries. Understanding OSHA guidelines, picking correct repair materials, and knowing where DIY safety boundaries end is critical.
OSHA Safety Guidelines & Fall Protection
Occupational Safety and Health Administration (OSHA Standard 1926.501) requires fall protection equipment whenever working at heights of 6 feet or greater above lower levels. While OSHA regulations strictly govern professional contractors, homeowners should follow identical safety procedures to prevent life-altering falls:
- Full-Body Harness & Lanyard: Wear a fitted OSHA-compliant full-body harness with a shock-absorbing lanyard or self-retracting lifeline (SRL).
- Reusable Roof Anchor: Install a heavy-duty reusable steel roof anchor ridge plate attached directly into structural roof rafters using approved 3-inch timber screws.
- Non-Slip Footwear: Wear soft-soled rubber work boots that grip granule surfaces effectively. Never walk on roofs in smooth-bottom sneakers, sandals, or wet weather.
- Ladder Positioning: Secure extension ladders at a 4:1 angle (1 foot out from the wall for every 4 feet of ladder height) and extend the ladder top at least 3 feet above the roof eave line.
Material Selection: Brands and Chemistry That Last
Using the wrong sealant chemistry causes premature failure within months. Asphalt shingles expand and contract constantly under Texas thermal cycling (-40°F to 180°F service range), demanding flexible, high-grade sealants.
| Material / Brand Name | Product Category | Service Life | Best Real-World Application |
|---|---|---|---|
| Henry 208R Wet Patch | Rubberized Asphalt Mastic | 1–3 Years | Emergency leak stopping in active rain or standing water; temporary patch |
| Karnak 19 Ultra | Rubberized Flashing Cement | 10–15 Years | Sealing vertical flashing laps, valley joints, and masonry chimney bases |
| Geocel 2300 ProFlex | Polyurethane / Polymer Sealant | 15–20+ Years | Perimeter flashing seams, exposed screw heads, and dormer corner joints |
| NPC Solar Seal 900 | Tripolymer Sealant | 15–20+ Years | High-grade metal-to-shingle bonding, gutters, and siding transitions |
| Silicone Caulk | Standard Commercial Silicone | Fails (1–2 Yrs) | Do NOT Use on Asphalt Roofs — degrades under UV and rejects granule adhesion |
When applying heavy mastic patches like Henry 208R, always use the 3-course patching technique:
- Trowel a 1/8-inch layer of rubberized asphalt mastic over the split or seam.
- Embed reinforcing fiberglass mesh (such as Henry 181 or 183 fabric) directly into the wet compound.
- Apply a final 1/8-inch top layer of mastic completely encapsulating the fabric mesh. This reinforcement increases repair tensile strength up to 5 times.
For additional guidance on choosing patches and compounds, review our Don’t Get Stuck: The Essential Roof Patch Buying Guide.
DIY vs. Professional Scope for Roof Leak Repair
Knowing when a job is safe to handle yourself versus when it demands a licensed roofing contractor protects both your physical well-being and your wallet. Detailed cost and scope breakdowns can be explored at Roof Leak Repair in 2026: Cost, DIY vs Pro | The Roofing Brief.
If your roof material contains specialized substrates like asbestos cement shingles, never attempt DIY repairs or grinding. Instead, refer to Don’t Rain on My Parade: A Guide to Fixing Asbestos Roof Leaks. For flat or low-slope commercial roofs utilizing single-ply or EPDM membranes, consult Don’t Let It Leak: Best Liquid Coatings for EPDM Roofs.
Avoid Common DIY Roofing Mistakes
- Mistake 1: Slathering Silicone Caulk Over Shingles: Silicone creates a slick residue that strips granules and prevents permanent polyurethane sealants from adhering in the future.
- Mistake 2: Relying on Exposed Roofing Tar as a Permanent Fix: Standard liquid asphalt tar breaks down under solar UV rays within 2 to 4 years, hardening and cracking into open fissures.
- Mistake 3: Patching the Interior Ceiling First: Painting over ceiling water spots or sealing interior attic wood traps water inside structural wall cavities, triggering dry rot and severe mold.
- Mistake 4: Pressure Washing Roof Shingles: Using a high-pressure power washer near a suspected leak strips protective mineral granules instantly and voids top manufacturer warranties (GAF, Owens Corning, CertainTeed).
2026 Repair Costs, Insurance Coverage, and Repair vs. Replace Criteria
Understanding repair economics in 2026 helps you budget accurately and evaluate contractor quotes across Mansfield, Arlington, Grand Prairie, and surrounding North Texas communities.
2026 Cost Comparison by Leak Source
| Roof Leak Repair Type | Typical DIY Material Cost | Professional Repair Cost Range (2026) | Expected Component Lifespan |
|---|---|---|---|
| Plumbing Vent Pipe Boot | $20 – $45 | $150 – $400 | 10 – 15 Years |
| Single Shingle Tab Replacement | $30 – $60 | $200 – $450 | 15 – 25 Years |
| Step Flashing Repair / Wall | $50 – $120 | $400 – $1,200 | 20+ Years |
| Chimney Flashing System | $100 – $250 | $500 – $1,800 | 20+ Years |
| Roof Valley Leak Repair | $150 – $350 | $600 – $2,400 | 15 – 25 Years |
| Skylight Perimeter Reseal/Flashing | $60 – $150 | $450 – $1,500 | 10 – 20 Years |
| Overall Residential Median Job | — | $600 – $850 | — |
Insurance Coverage: Sudden Storm Damage vs. Gradual Wear
Standard homeowners insurance policies (HO-3 forms) handle roof leaks under strict criteria:
- Covered Perils: Sudden and accidental storm events — such as severe hail, high thunderstorm straight-line winds, tornado debris, or falling tree limbs — are fully covered perils.
- Excluded Perils: Gradual leaks caused by normal aging, lack of maintenance, deferred maintenance, or long-term wear and tear are strictly excluded from coverage.
Documenting Damage for an Insurance Claim
- Take timestamped, high-resolution photographs of both the interior water ceiling damage and exterior roof conditions immediately following a storm.
- Maintain receipts for all emergency mitigation expenses (tarps, furring strips, buckets, water extraction). These costs fall under your policy’s mandatory “Mitigation of Loss” clause and are reimbursable.
- Schedule an inspection with a qualified contractor to generate a line-item estimate prior to meeting your adjuster. Learn how to hire the right expert through Your Guide to Hiring a Qualified Roof Inspector.
If interior water leakage lingers, mold can develop within 24 to 48 hours. Read Don’t Let It Fester: How to Handle Mold After a Leak for essential health and mitigation steps.
When to Repair vs. Replace Your Roof
Not every leaky roof should be repaired piece-by-piece. Spending money on repeated spot repairs on an old roof is throwing good money after bad.
When underlayment deteriorates across entire roof sections or plywood decking turns soft, localized patching fails. If deck boards show structural decay, read A Step-by-Step Guide to Replacing Damaged Roof Decking to understand full structural replacement. Homeowners assessing full roof health can also utilize Ultimate Checklist for Assessing Roof Damage Severity.
If you are exploring cosmetic or protective upgrades for an aging roof surface, review How to Make Your Old Roof Look Brand New Again.
Frequently Asked Questions About Roof Leaks
Can I fix a roof leak from inside the attic?
No. Attempting to repair a roof leak from inside the attic by spraying expanding foam, applying caulk, or smearing patch cement along the underside of roof plywood decking does not stop water entry. It only traps water inside the wooden decking and rafters. Trapped moisture accelerates wood decay, invites wood-boring insects, creates hidden mold pockets, and forces water to travel further sideways before collapsing other interior ceiling areas. Water entry must always be sealed from the exterior roof surface.
How long does a typical roof leak repair take and last?
A straightforward professional component repair — such as replacing a plumbing vent pipe boot or replacing several wind-damaged shingles — typically takes 1 to 3 hours to complete. When executed properly using new components (replacing flashing, underlayment, and shingles rather than applying surface mastic paste), a permanent repair lasts 15 to 20 years, effectively matching the remaining lifespan of surrounding shingles. Temporary wet patch mastic fixes (like emergency tarring) generally hold for 1 to 3 years before solar UV rays cause cracking.
What causes roof leaks to only happen during heavy rain?
Roof leaks that only appear during torrential downpours or heavy wind-driven rainstorms are usually caused by three issues:
- Overwhelmed Valleys & Gutters: High water volume backs up over the top edges of valley metal or clogged gutters, reaching areas under shingles that lack ice and water shield underlayment.
- Wind-Driven Rain Directional Entry: Strong winds force rain horizontally up and under step flashing, wall counter-flashing, or soffit vents that shed downward water normally during light showers.
- Small Flash Breaches: Minor cracks in rubber vent boots or dried caulking joints allow tiny amounts of water to enter during light rain, which evaporates inside the attic without staining drywall. Heavy downpours send enough water through the breach to break through interior ceilings.
Protecting Your Home with Proper Maintenance
Fixing a roof leak quickly protects your home’s structural integrity, health, and property value. By understanding how water migrates along rafters, installing immediate emergency tarp protection, using high-grade polyurethane sealants, and replacing damaged components rather than smearing temporary tar over symptoms, you can stop water damage in its tracks.
For complex chimney flashing, valley failures, steep-slope access, or extensive storm damage across Mansfield, Arlington, Grand Prairie, Midlothian, and Granbury, trust our expert team at James Kate Roofing & solar. As a family-owned DFW business rooted in honesty, integrity, and Biblical principles, we bring GAF President’s Club award-winning craftsmanship and up to 25-year workmanship warranties to every job. Beyond expert roofing, our team handles complete end-to-end solar — including emergency water mitigation, fire mitigation, mold remediation, and complete structural build-back construction.
Don’t let a small ceiling drip turn into a major solar headache. Review The DFW Roof Inspection Checklist for Savvy Homeowners and our Roof Inspection Arlington TX Guide to stay ahead of weather damage.
Need professional help right away? Visit our homepage at James Kate Roofing & solar or explore our Professional Roof Repair and Replacement Services to schedule a comprehensive roof leak inspection today!

Dustin Eatman is a seasoned roofing professional with deep, hands-on expertise that spans residential and commercial roofing, insurance solar, and long-term roof asset management. As the owner of James Kate Roofing & solar in the Dallas–Fort Worth metroplex, he’s built a reputation for diagnosing roof systems accurately, communicating clearly, and executing projects with a high standard of workmanship and documentation. Dustin understands the technical details that make roofs perform—proper underlayment selection, slope and drainage considerations, ventilation strategy, flashing and penetration detailing, and manufacturer-specific installation requirements—because he’s worked through the real-world challenges that cause leaks, premature wear, and warranty issues. He’s equally fluent in the operational side of roofing: jobsite planning, quality control, safety, material ordering, crew coordination, and customer experience from inspection to closeout. In insurance-related projects, Dustin brings practical knowledge of claim workflows, adjuster meetings, scope alignment, supplements, and the importance of photo evidence and thorough records, helping property owners navigate stressful situations with confidence. For commercial clients—especially property and facility managers—he emphasizes proactive maintenance and targeted repairs that reduce disruption, extend roof life, and prevent expensive interior damage. Dustin also stays focused on doing things the right way: educating customers on realistic options, setting expectations, and prioritizing solutions that hold up over time rather than quick fixes. That blend of technical skill, field experience, process discipline, and owner-level accountability is what makes Dustin Eatman a trusted expert in the roofing industry.