
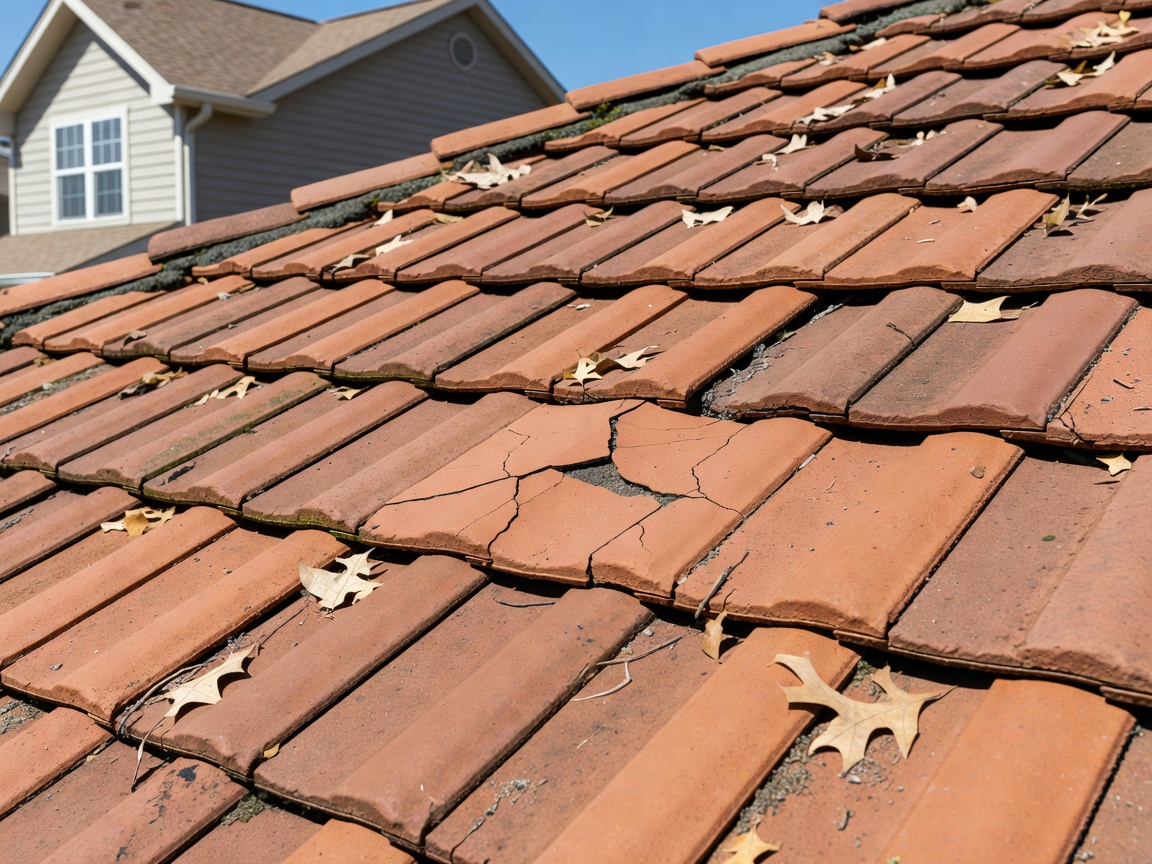
A Cracked Roof Tile Is More Than a Cosmetic Problem
A cracked roof tile can look like a minor issue from the driveway — but left alone, it can quietly allow water, wind, and heat to work their way into your home’s structure.
Here’s what you need to know quickly:
| Situation | What to Do |
|---|---|
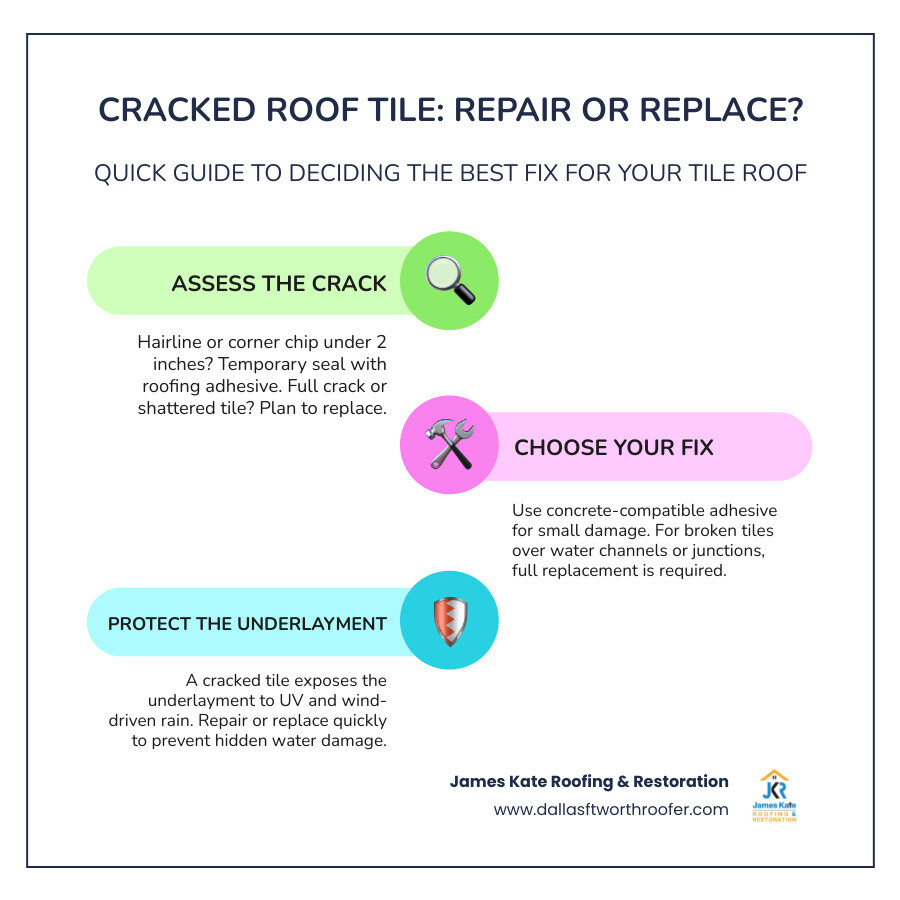
| Hairline crack, tile still in place, no missing pieces | Temporary seal with roofing-grade adhesive |
| Corner chip of 1–2 inches | Concrete-compatible adhesive is acceptable (per Tile Roofing Institute) |
| Full crack across the width or length of the tile | Replace the tile |
| Crack over a water channel or near a junction | Replace the tile |
| Multiple cracked tiles or visible underlayment | Call a professional |
The tile itself is not your roof’s waterproofing layer. That job belongs to the underlayment beneath it. When a tile cracks, it exposes that underlayment to UV rays, wind-driven rain, and debris — accelerating the damage in ways you can’t always see from the ground.
In coastal and high-humidity climates, one broken tile can let wind-driven rain reach the underlayment and deck before you ever notice a ceiling stain. In the Dallas–Fort Worth area, the combination of hail, extreme heat, and sudden temperature swings makes this an even more urgent concern.
This guide walks you through the causes, the assessment process, and the step-by-step repair and replacement options — so you know exactly what you’re dealing with and what to do about it.
I’m Dustin Eatman, owner of James Kate Roofing & solar in the DFW metroplex, and I’ve diagnosed and repaired hundreds of cracked roof tile situations across residential and commercial properties in North Texas. Whether it’s a single corner chip or storm-related tile failure, I’ll give you the straight answers you need to protect your home.
Cracked roof tile terms at a glance:
What Causes a Cracked Roof Tile?
Roofing tiles, whether crafted from classic clay or heavy-duty concrete, are incredibly durable. They can easily last for fifty years or more. However, they are also brittle. When subjected to specific physical stresses, they will snap. Understanding why your tiles are cracking is the first step toward preventing future damage to your roof.
Foot Traffic
The single most common cause of a cracked roof tile is improper foot traffic. Whether it is a homeowner cleaning the gutters, an air conditioning technician servicing a unit, or a holiday light installer, walking on a tile roof incorrectly is a recipe for disaster.
The physics of a tile roof explain why they break so easily underfoot. Interlocking tiles have a “coverlock” on the right side which is only half the thickness of the main tile body. If someone steps directly on this thin, unsupported edge, it will snap instantly. Additionally, stepping on the middle of a tile rather than the supported overlap area causes the tile to flex and crack.
Storm and Debris Impact
Living in North Texas means dealing with intense weather. From sudden spring hailstorms in Mansfield to high-wind events in Arlington, flying debris and hail are constant threats. A falling tree branch or a large hailstone hitting a brittle tile will easily cause a clean, structural break.
Thermal Expansion and Contraction
Our DFW climate experiences massive temperature swings, sometimes shifting 40 degrees in a single day. As the sun beats down on your roof, the tiles expand. At night, they contract. Over decades, this constant thermal movement creates stress. If the tiles were installed too tightly together without proper spacing, this expansion will cause them to pinch against one another and crack.
Aging Concrete and Clay
As concrete tiles age, the cement binder between the sand particles slowly erodes. This erosion makes the tiles more porous, absorbent, and brittle. In the winter, these water-logged tiles go through freeze-thaw cycles. The water trapped inside the tile expands as it freezes, creating microscopic fractures that eventually grow into visible cracks.
Structural Movement
Every house settles over time. If your home’s timber framing or roof trusses shift slightly, it can alter the alignment of the roof battens. This structural movement puts uneven pressure on the rigid tiles, leading to stress cracks across entire sections of the roof.
Assessing the Damage: Repair vs. Replacement
Before you grab a ladder and a tube of sealant, you must accurately assess the damage. A superficial fix on a severely damaged tile is like putting a band-aid on a broken bone — it might look slightly better, but it does nothing to solve the underlying structural issue.
When assessing a cracked roof tile, you need to look at the roof as a multi-layered waterproofing system. The tile itself serves as a water-shedding shield, while the underlayment underneath acts as the true moisture barrier. If a tile is cracked, water will bypass the shield. If your underlayment is old and degraded, that water will immediately rot your roof decking and leak into your attic.
To determine the severity of your roof damage, you can consult our Ultimate Checklist for Assessing Roof Damage Severity to help categorize what you see. If you are debating whether a spot-repair is enough or if it is time to look at the bigger picture, check out our guide on The Great Roof Debate: When to Replace and What to Expect.
When to Seal a Cracked Roof Tile
Sealing a tile with adhesive should be viewed as a temporary, cosmetic fix. However, according to the Tile Roofing Industry Alliance (TRI), there are specific scenarios where an adhesive repair is acceptable:
- Minor Corner Chips: If a small corner piece (approximately 1 to 2 inches in size) has broken off, it can be glued back in place using a concrete-compatible epoxy or high-grade polyurethane roofing sealant.
- Hairline Cracks: If the crack is incredibly fine, the tile has not shifted out of alignment, and the water-drainage channels are completely intact, sealing the hairline fracture is a viable option.
- Aesthetic Areas: If the chipped tile is near transitional flashing or valleys where replacing the entire tile might disrupt complex flashing layers, gluing the cosmetic chip is often preferred to preserve the water-tight flashing seal.
Always refer to the official Tile Roofing Industry Alliance Maintenance Guide for recognized industry standards on structural repairs.
When to Replace a Cracked Roof Tile
Replacement is almost always the superior, longest-lasting option. You must replace the tile immediately if you observe any of the following:
- Full Structural Breaks: If a crack runs completely across the width or length of the tile, dividing it into two or more distinct pieces.
- Exposed Underlayment: If a piece of the tile is missing entirely, leaving the black underlayment beneath exposed to direct sunlight and rain.
- Damaged Water Channels: Modern tiles feature interlocking channels designed to direct water down the roof. If a crack crosses these channels, water will bypass the tile and pool on the underlayment.
- Brittle, Crumbling Material: If the tile breaks or crumbles when you touch it, it has reached the end of its lifespan and cannot support an adhesive bond.
For a deeper dive into what to look for when planning a tile roof project, review Don’t Get Tiled Over: The Homeowner’s Checklist for Smart Tile Roof Replacement.
Step-by-Step Guide to Repairing and Replacing Roof Tiles
If you have assessed the damage and decided to move forward, here is how to execute the repairs safely and effectively.
Before starting, make sure you have the necessary safety equipment and tools. For a comprehensive overview of roofing safety and general repair standards, you can read our complete Roof Repair Guide 2026 or check out Family Handyman: Roof Repair and Safety Tips for general DIY best practices.
Step 1: Clean the Area Thoroughly
Adhesive will not bond to a dirty, dusty, or moss-covered tile. Use a stiff wire brush to scrub away all dirt, loose concrete fragments, and organic growth along the crack line. If the surface is damp from morning dew, wait for the sun to dry it completely.
Step 2: Apply the Adhesive (For Minor Repairs)
If you are repairing a 1-to-2-inch corner chip:
- Apply a generous bead of concrete-compatible polyurethane roofing sealant or heavy-duty epoxy along the broken edge.
- Press the broken chip firmly back into place.
- Hold the pieces together tightly for a few minutes. You can use stretched painter’s tape to keep the pieces aligned while the adhesive cures.
- Smooth out any excess adhesive that squeezes out of the joint to keep the water-drainage path clear.
Step 3: Remove the Damaged Tile (For Replacement)
If the tile must be replaced:
- Gently slide a flat pry bar under the tiles in the row directly above the damaged one. This lifts them slightly to release the interlocking pressure.
- Place a small wooden shim or wedge under those upper tiles to keep them propped open.
- If the damaged tile is nailed down, use a slate ripper or pry bar to gently pull or cut the nail. On batten systems, many field tiles are not nailed and can simply be lifted out.
- Carefully slide the broken tile out of its position.
Step 4: Inspect the Underlayment
With the tile removed, look closely at the exposed underlayment. If you see holes, tears, or rotting deck wood, the issue is much larger than a single cracked tile. Any compromised underlayment must be patched with roofing cement and a matching underlayment membrane before installing the new tile.
Step 5: Install the New Tile
- Slide the replacement tile up into the vacant space, ensuring its side locks align perfectly with the adjacent tiles and its top lugs hook securely over the wooden batten.
- Remove the wooden wedges holding up the upper row of tiles, letting them rest naturally over the new tile.
- Ensure the new tile sits flat and flush with the rest of the roof.
Sourcing Matching Tiles: The “Tile-Swapping” Technique
A challenge with older tile roofs is finding a replacement tile that matches. Over decades, sun exposure and weathering change the color of clay and concrete. A brand-new replacement tile will stick out like a sore thumb.
To bypass this aesthetic problem, pro roofers use the tile-swapping technique:
- Locate a hidden, inconspicuous area of your roof (such as behind a chimney, near a back valley, or on a low-slope porch roof).
- Carefully remove a weathered, perfectly matching tile from that hidden area.
- Use that weathered tile to replace the highly visible cracked tile on the front of your home.
- Put the brand-new, non-matching replacement tile in the hidden area.
If you cannot find a spare tile on your roof, visit local architectural reclamation yards. They specialize in salvaged building materials and often stock aged, weathered tiles of various discontinued profiles and manufacturers.
Comparing DIY Adhesive Repair vs. Full Tile Replacement
| Feature | DIY Adhesive Repair | Full Tile Replacement |
|---|---|---|
| Best Used For | Hairline cracks, 1–2 inch corner chips | Fully split tiles, missing pieces, structural breaks |
| Longevity | Short-term / Temporary (typically 1–5 years) | Permanent (lasts decades if done right) |
| Aesthetic Impact | May show visible glue lines over time | Seamless (especially using the tile-swapping method) |
| Risk of Failure | High (vulnerable to freeze-thaw cycles) | Low (restores original structural integrity) |
| Required Skill | Low to Medium | Medium to High (requires working on slopes) |
Frequently Asked Questions About Tile Roof Damage
Can I walk on my tile roof to inspect it?
We strongly advise homeowners to avoid walking on their tile roofs. The risk of cracking adjacent tiles and creating new leaks is incredibly high. If you absolutely must walk on the roof, step slowly and place your weight directly on the headlap — the lower 3 inches of the tile where it overlaps the tile below. This transfers your weight directly to the structural wooden batten underneath.
Never step on the middle of a tile, and avoid the right-hand interlocking coverlock, which is highly prone to snapping. For a complete guide on how to evaluate your roof safely, see The DFW Roof Inspection Checklist for Savvy Homeowners.
How long does roofing adhesive take to cure?
Most high-quality, concrete-compatible polyurethane roofing adhesives dry to the touch within 2 to 4 hours. However, they require a full 24 to 48 hours to cure completely. High humidity levels, common in our North Texas spring and summer months, can extend this curing window. Avoid disturbing, walking near, or watering the repaired tile during this curing timeframe.
What happens if I ignore a cracked tile?
Ignoring a cracked roof tile is a recipe for expensive structural repairs. Because the tile acts as the primary shield against the elements, a crack allows rainwater to pour directly onto your underlayment. While underlayment is waterproof, it is not designed for prolonged exposure to pooling water or direct UV sunlight.
Over time, the underlayment will rot, allowing water to soak into your wood decking, ruin your attic insulation, and spark toxic mold growth inside your home. To understand the critical role your roof’s foundation plays in preventing this, read our guide on Underlayment Upgrade: Uncovering the True Cost of Your Tile Roof’s Hidden Foundation.
Conclusion
A cracked roof tile might seem like a small cosmetic issue, but it is a direct threat to your home’s primary defense system against North Texas weather. While sealing a minor chip with adhesive can buy you some time, replacing the damaged tile is always the safest and most reliable way to preserve your roof’s integrity.
If your tile roof has suffered storm damage, or if you are uncomfortable climbing onto a steep, brittle roof, let our team handle it safely. At James Kate Roofing & solar, we are a family-owned DFW business built on honesty, integrity, and Biblical principles. As a GAF President’s Club contractor, we back our work with up to a 25-year workmanship warranty. Beyond roofing, we provide complete solar services, including water mitigation, mold mitigation, and full build-back construction.
We proudly serve homeowners and businesses across Mansfield, Arlington, Granbury, Grand Prairie, and Midlothian. Contact us today to schedule a professional, honest inspection of your tile roof through our Professional Roofing Services.

Dustin Eatman is a seasoned roofing professional with deep, hands-on expertise that spans residential and commercial roofing, insurance solar, and long-term roof asset management. As the owner of James Kate Roofing & solar in the Dallas–Fort Worth metroplex, he’s built a reputation for diagnosing roof systems accurately, communicating clearly, and executing projects with a high standard of workmanship and documentation. Dustin understands the technical details that make roofs perform—proper underlayment selection, slope and drainage considerations, ventilation strategy, flashing and penetration detailing, and manufacturer-specific installation requirements—because he’s worked through the real-world challenges that cause leaks, premature wear, and warranty issues. He’s equally fluent in the operational side of roofing: jobsite planning, quality control, safety, material ordering, crew coordination, and customer experience from inspection to closeout. In insurance-related projects, Dustin brings practical knowledge of claim workflows, adjuster meetings, scope alignment, supplements, and the importance of photo evidence and thorough records, helping property owners navigate stressful situations with confidence. For commercial clients—especially property and facility managers—he emphasizes proactive maintenance and targeted repairs that reduce disruption, extend roof life, and prevent expensive interior damage. Dustin also stays focused on doing things the right way: educating customers on realistic options, setting expectations, and prioritizing solutions that hold up over time rather than quick fixes. That blend of technical skill, field experience, process discipline, and owner-level accountability is what makes Dustin Eatman a trusted expert in the roofing industry.