
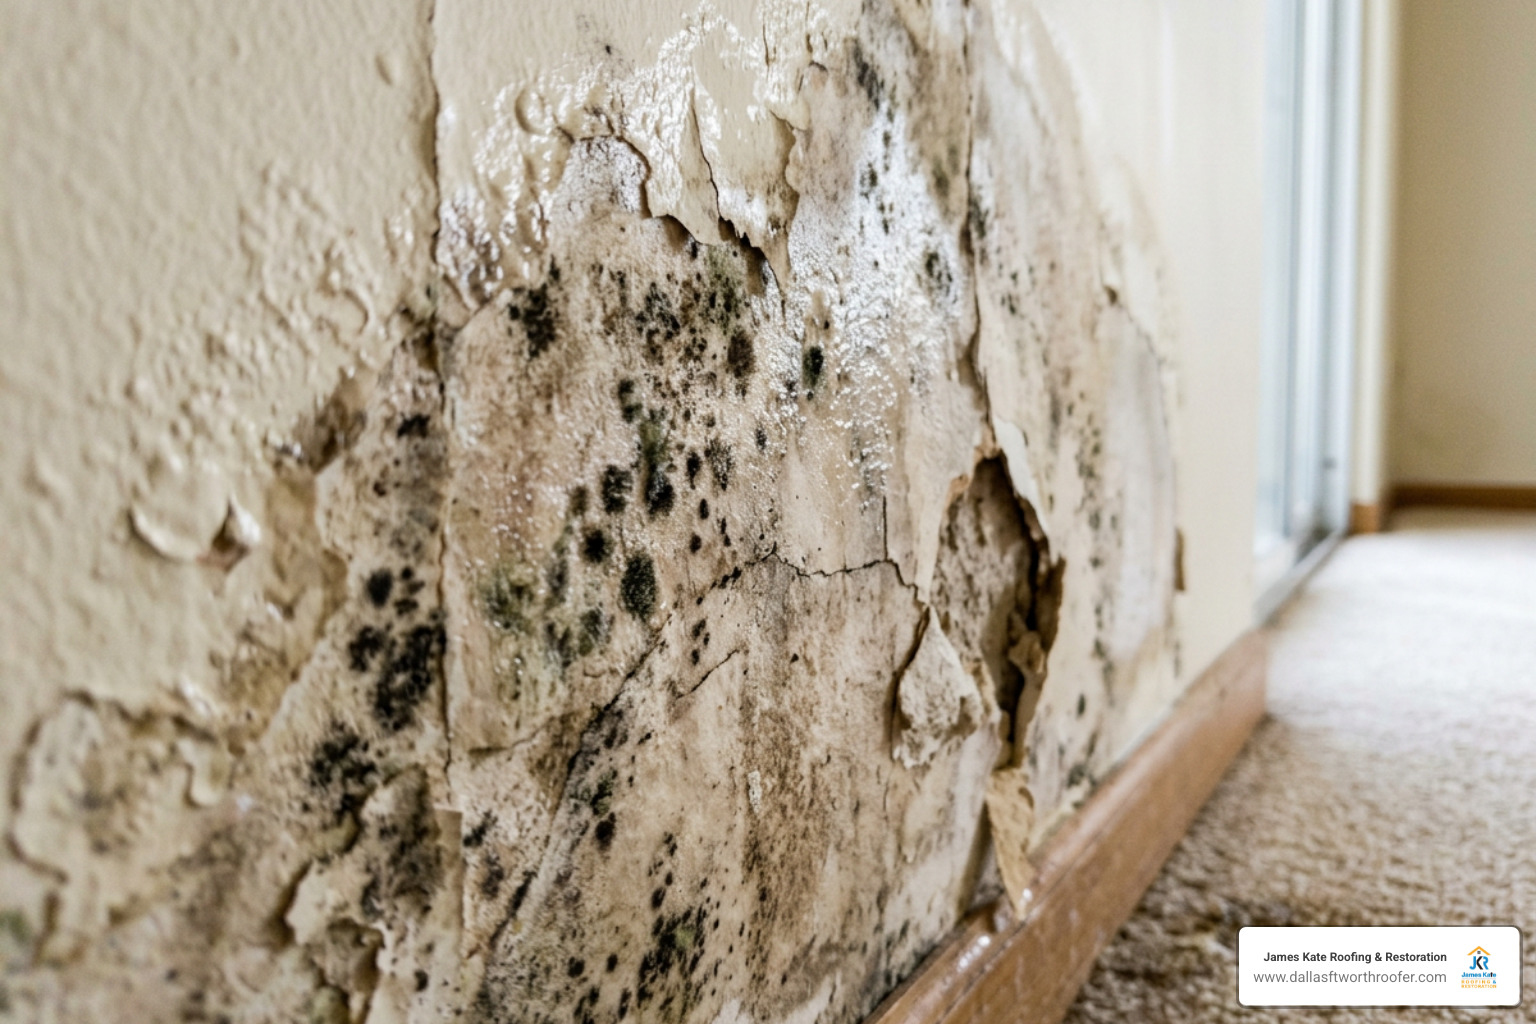
Act Fast When Water Damage Causes Mold
Start cleaning up mold from water damage as soon as the water source is stopped and the area is safe to enter. Mold can begin growing within 24 to 48 hours, so remove standing water, dry wet materials, and fix the leak right away.
For a small patch on a hard surface, you can usually:
- Wear an N95 respirator, gloves, and sealed goggles.
- Scrub the surface with detergent and water.
- Dry it fully with ventilation and dehumidification.
- Throw away moldy porous materials, such as carpet, insulation, and badly affected drywall.
Do not handle it yourself if the affected area is larger than about 10 square feet, involves sewage or floodwater, may be inside HVAC equipment, or anyone in the property has asthma, immune suppression, or serious respiratory illness. Mold cleanup only works when the moisture problem is fixed first. Cleaning or painting over visible growth without drying the structure allows it to return.
I am Dustin Eatman, owner of James Kate Roofing & solar, with hands-on experience finding roof leaks, documenting water intrusion, and guiding property owners through cleaning up mold from water damage. In the sections ahead, I will explain how to make safe decisions, protect your property, and prevent the same water problem from causing new damage.
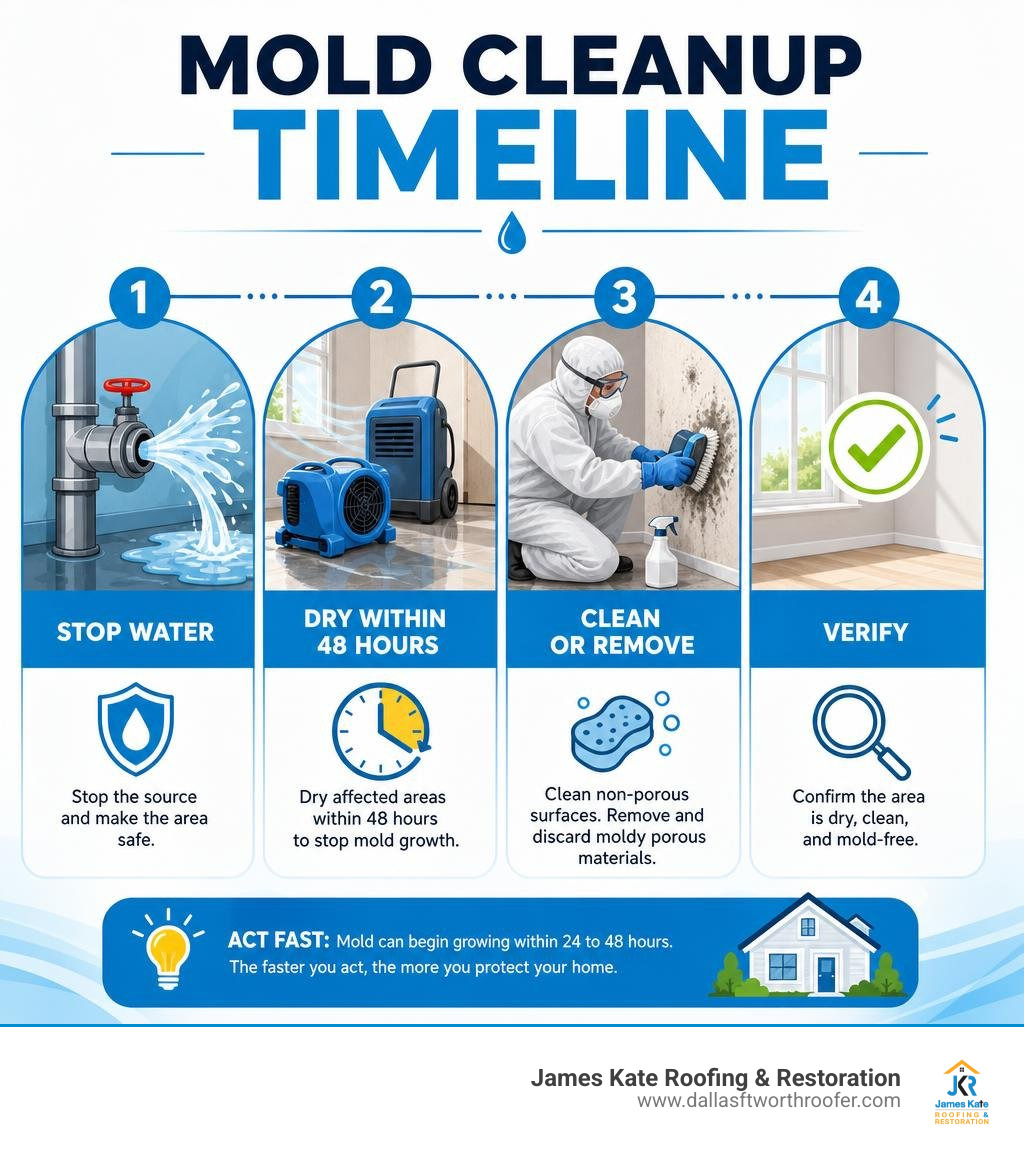
Cleaning up mold from water damage terms to know:
Understanding the 24 to 48 Hour Mold Growth Timeline
Microscopic fungal spores exist naturally in both outdoor and indoor air. Under normal conditions, they remain dormant and harmless. However, when an unexpected water intrusion occurs—whether from a burst pipe, severe storm, or sudden roof leak—these spores find the moisture and organic food sources they need to germinate. Within just 24 to 48 hours of water exposure, spore germination begins, rapidly leading to active fungal colonization.
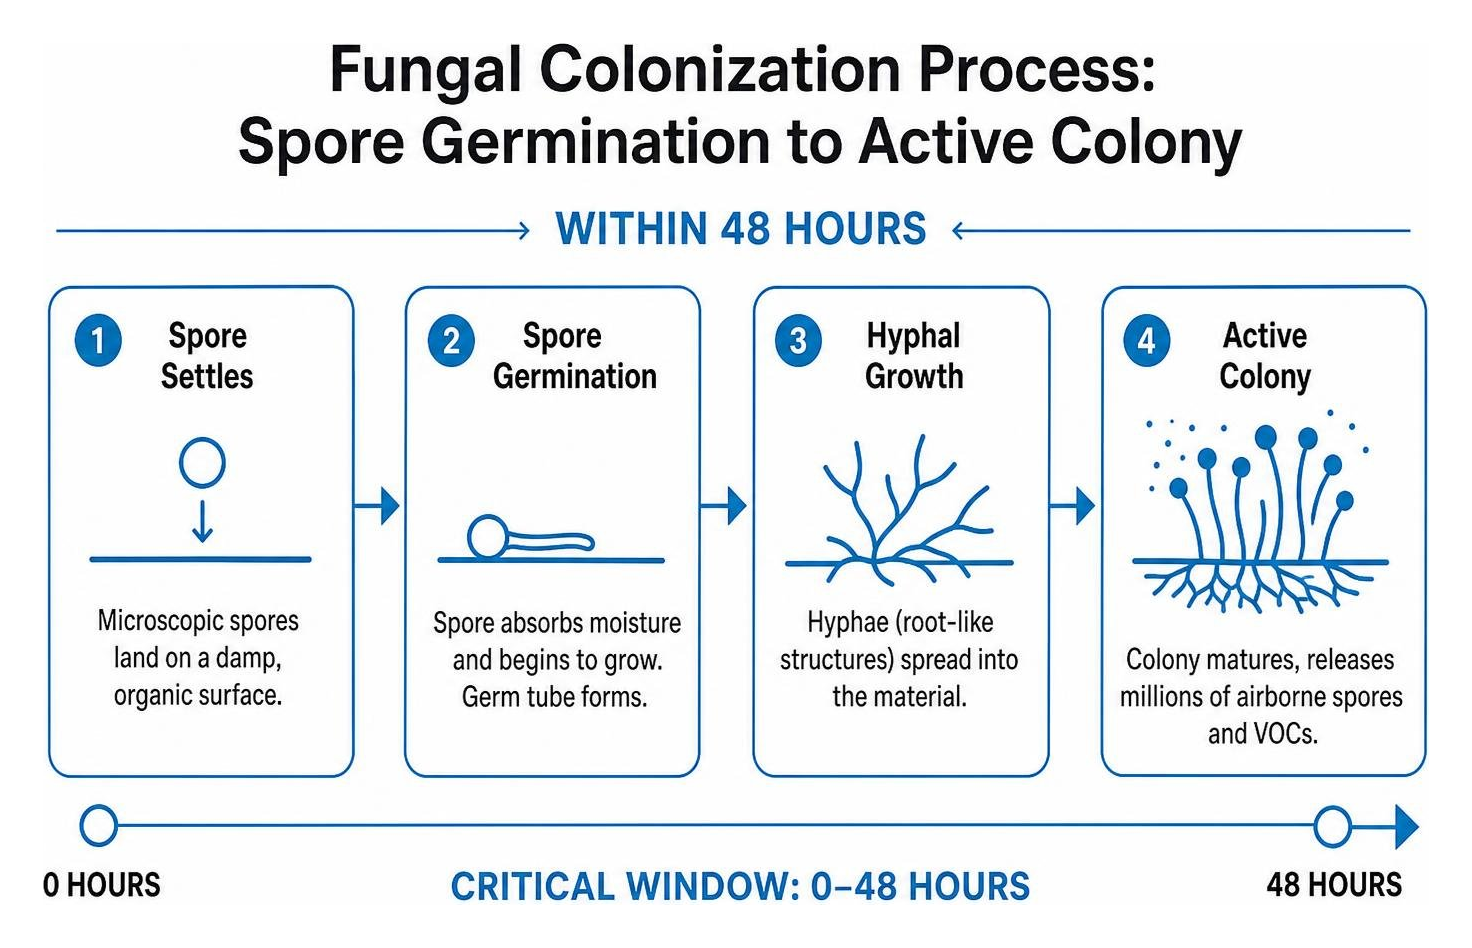
When organic building materials like drywall paper, subflooring, and wooden wall studs reach elevated moisture saturation levels, mold establishes deep-seated hyphae (root structures). As colonies expand, they release volatile organic compounds (VOCs) and millions of airborne spores into the living space. This rapid spore amplification degrades indoor air quality and causes health issues for building occupants. Exposure frequently triggers respiratory irritation, coughing, eye and throat discomfort, and worsening of asthma symptoms.
To halt this aggressive biological cycle, homeowners must achieve rapid drying within that critical initial window. Gaining a clear perspective on understanding water damage mold repair for homeowners helps you prioritize immediate moisture extraction before localized water damage escalates into full-scale structural microbial contamination.
Essential Preparation and Safety Gear for Cleaning Up Mold from Water Damage
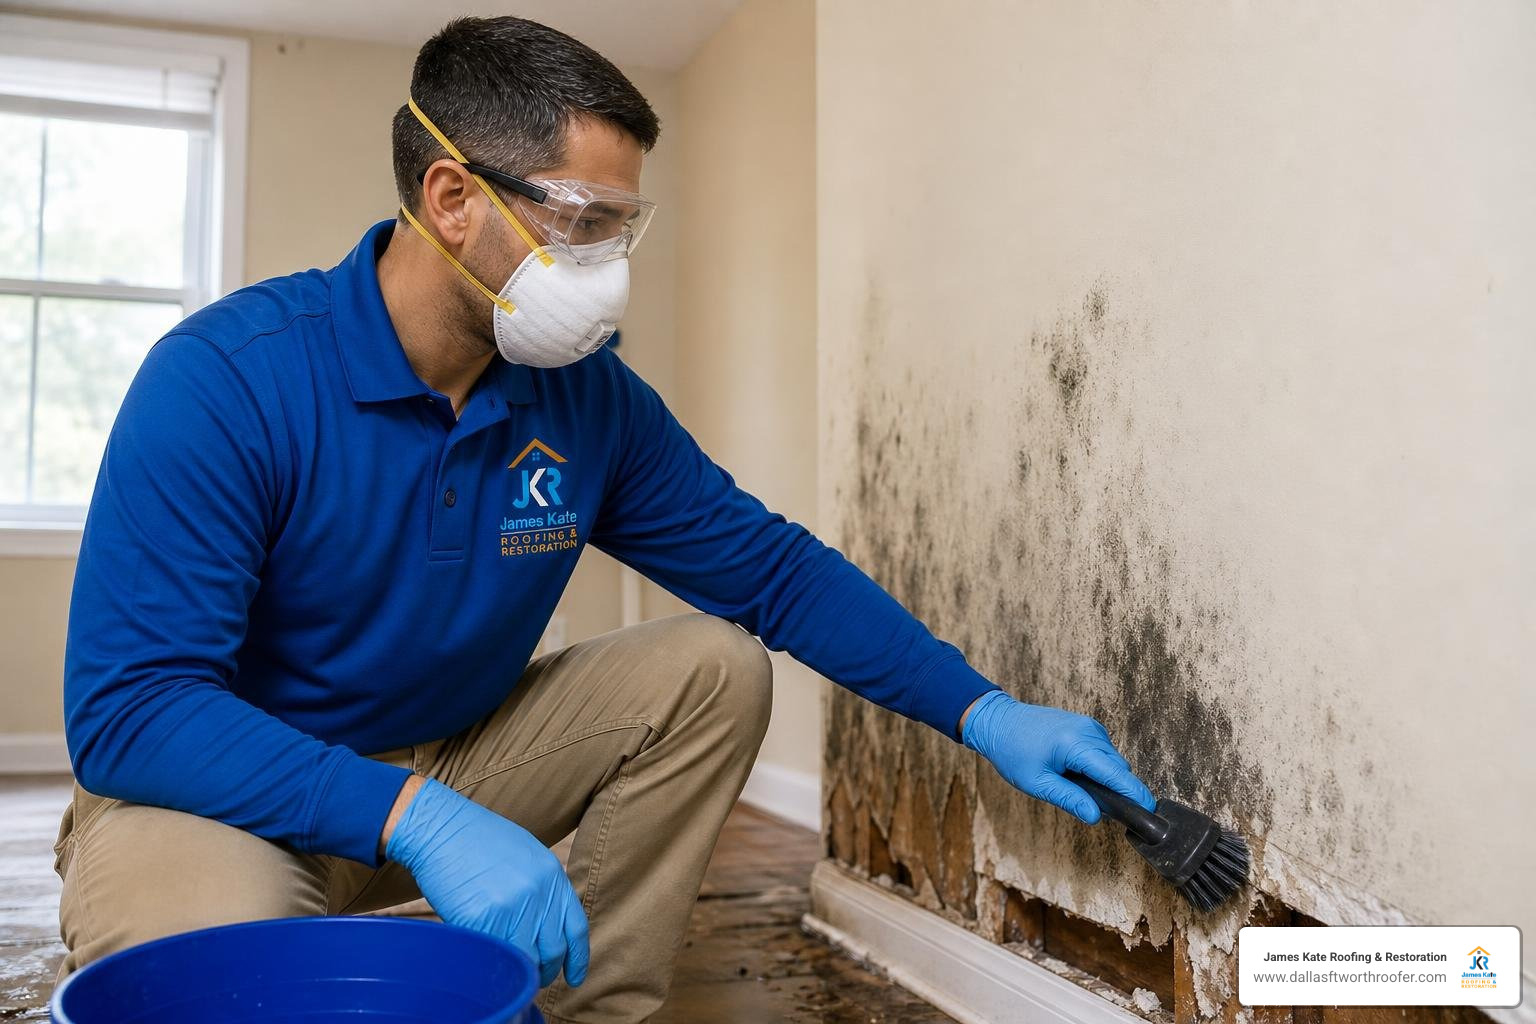
Disturbing active mold colonies releases clouds of spores into the surrounding air. Without proper containment barriers and personal protection, attempting to clean an affected area can quickly cross-contaminate clean rooms throughout the property.
Required Personal Protective Equipment (PPE)
Protecting your respiratory system, eyes, and skin is non-negotiable before tackling any microbial cleanup. Microscopic spores easily bypass standard paper dust masks, making professional-grade personal protective equipment essential:
- Respiratory Protection: Wear a NIOSH-approved N95 respirator at a bare minimum. For moderate mold growth or dusty demolition, upgrade to a half-face respirator equipped with P100 HEPA particulate filters.
- Eye Protection: Standard safety glasses with open side vents do not protect against airborne spores. Use non-vented or indirect-vent safety goggles to prevent fungal spores from irritating ocular tissues.
- Hand Protection: Wear long, heavy-duty non-latex gloves (such as nitrile or neoprene) to shield your skin from both fungal contact and harsh cleaning solutions.
- Protective Clothing: Use disposable poly-coated coveralls with attached hoods and shoe covers. If using standard clothing, remove and wash it immediately in hot water, and shower right after leaving the work zone.
For comprehensive safety protocols following severe storms or plumbing failures, consult the Homeowner’s and Renter’s Guide to Mold Cleanup After Disasters.
DIY vs Professional: Determining the Scope of Cleaning Up Mold from Water Damage
The Environmental Protection Agency (EPA) established clear guidelines regarding what homeowners can safely clean themselves versus when certified professionals must intervene. If the visible mold contamination covers less than 10 square feet (roughly a 3-foot by 3-foot patch), you can generally handle the remediation using DIY methods—provided the moisture source is completely resolved and the water was clean.
However, if fungal growth exceeds 10 square feet, reaches the 100-square-foot threshold, impacts your central HVAC system, or involves compromised structural framing, hiring a certified remediation firm is necessary. Attempting DIY removal on large-scale infestations without negative air pressure machines and containment chambers will inevitably contaminate your entire home.
| Assessment Factor | DIY Cleanup Feasible | Professional Remediation Required |
|---|---|---|
| Contamination Area | Less than 10 sq. ft. (3 ft. x 3 ft.) | Greater than 10 sq. ft. or multi-room spread |
| Water Contamination Class | Category 1 (Clean supply line / rainwater) | Category 2 or 3 (Gray water, sewage, floodwater) |
| Material Porosity | Non-porous hard surfaces (tile, metal, glass) | Saturated drywall, structural timbers, ductwork |
| HVAC Involvement | None | Spores or growth inside ducts, coils, or blower |
| Occupant Health Status | Healthy individuals without sensitivities | Asthma, COPD, mold allergies, immune suppression |
| Typical Cost Range | $50 – $200 (Cleaning supplies & PPE) | Review realistic mold remediation costs and what homeowners should expect ($1,500 – $6,000+) |
Comprehensive Process for Remediating Water-Damaged Structures
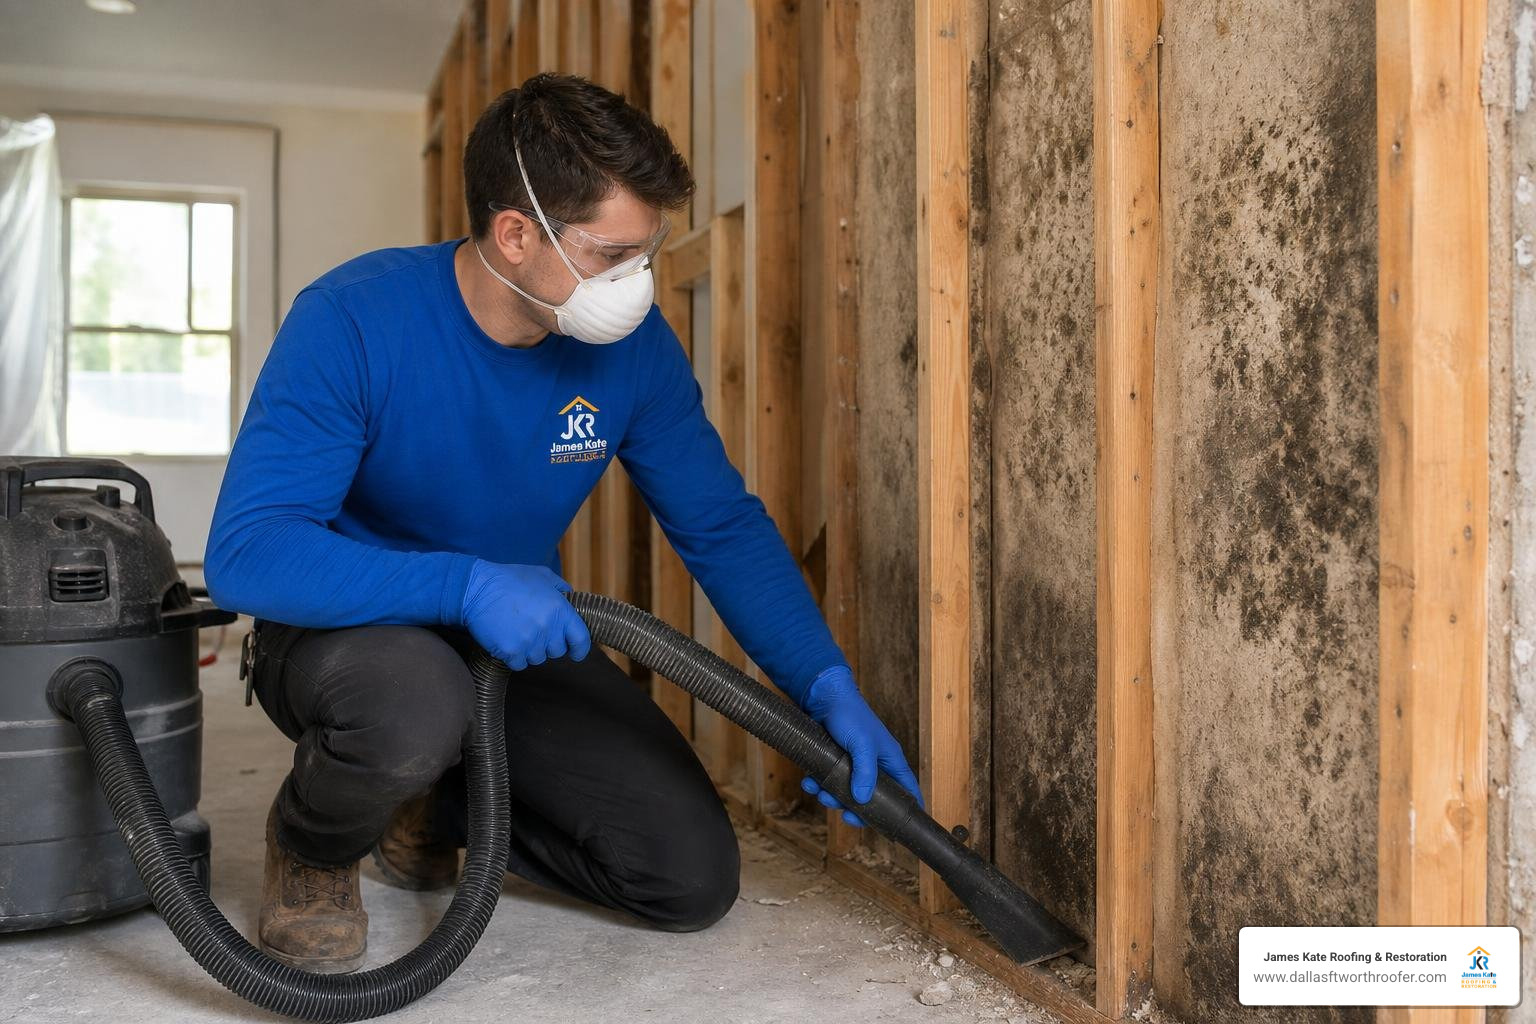
Remediating water-damaged building assemblies requires a systematic approach aligned with the ANSI/IICRC S520 standard. Simply spraying a chemical on moldy materials will not solve the underlying issue. Moisture mapping, identifying water intrusion pathways, repairing active leaks, and ensuring adequate attic ventilation are vital preliminary actions. For instance, knowing how to safely evict mold from your attic for good prevents upper-level roof leaks from compromising the structural framing and living spaces below.
Step-by-Step Protocol for Cleaning Up Mold from Water Damage
Executing a proper cleanup requires strict adherence to sequential steps to avoid re-contaminating clean environments:
- Eliminate the Moisture Source: Repair leaking plumbing, replace damaged roof flashing, or resolve foundation seepage before starting any remediation.
- Establish Containment Chambers: Seal off the affected room using 6-mil polyethylene sheeting and painter’s tape over doorways, windows, and HVAC supply/return registers.
- Set Up Negative Air Filtration: Run an air scrubber equipped with true HEPA filtration to maintain negative air pressure, exhausting air outside so dislodged spores cannot drift into adjoining rooms.
- Physically Remove Porous Materials: Bag and dispose of saturated materials that cannot be restored, following established safety guidance like the Mold Cleanup in Your Home | US EPA framework.
- Clean Non-Porous Surfaces: Scrub all structural framing and non-porous elements thoroughly using professional detergents and EPA-registered antimicrobial agents.
- HEPA Vacuuming: Vacuum all surfaces with a commercial-grade HEPA vacuum before and after damp wiping to capture fine fungal particulate.
- Complete Structural Drying: Deploy commercial dehumidifiers and high-velocity air movers to extract all moisture bound within building materials.
Removing Porous Materials vs Cleaning Hard Surfaces
Building materials respond differently to water damage and fungal growth depending on their porosity:
- Porous Materials: Drywall, fiberglass insulation, acoustic ceiling tiles, and carpet padding act like sponges. Mold hyphae grow directly into the core matrix of these materials, making complete cleaning virtually impossible. Saturated drywall must be cut out at least 12 to 24 inches above the highest water mark. To safely remove and replace damaged wallboards, follow our dedicated drywall mold remediation guide and standard cleaning procedures.
- Semi-Porous Materials: Solid wood framing, structural studs, and plywood subflooring can often be saved if structurally sound. Use wire brushing or abrasive sanding to remove surface fungal growth, vacuum the debris with a HEPA system, and apply an EPA-registered fungicide.
- Non-Porous Hard Surfaces: Metal, glass, glazed tile, and rigid plastics can be scrubbed clean with a solution of household detergent and warm water.
Why You Should Avoid Bleach on Porous Surfaces: Using chlorine bleach on wooden studs or drywall is a common and costly mistake. Bleach consists of roughly 90% water and 10% sodium hypochlorite. The chlorine molecules cannot penetrate porous surfaces, remaining on the outside while the water component soaks deep into the wood or drywall core. This provides fresh moisture to the embedded fungal roots, often causing mold to return aggressively a few weeks later. Instead, use an EPA-registered botanical fungicide, quaternary ammonium compound, or standard detergent and water.
Structural Drying and Humidity Control
Cleaning up surface mold is ineffective if structural framing retains excess moisture. Professional remediation teams rely on the science of applied structural drying, using industrial low-grain refrigerant (LGR) or desiccant dehumidifiers paired with commercial air movers to draw trapped moisture out of wall cavities and subfloors.
To dive deeper into modern moisture removal strategies, explore the professional secrets of applied structural drying. Structural timber framing must read below 17% wood moisture equivalent (WME) on a calibrated moisture meter before applying new insulation or hanging fresh drywall. Throughout the drying cycle, indoor relative humidity should remain between 30% and 50% to prevent remaining dormant spores from reactivating.
Handling Contaminated Black Water and Category 3 Flooding
Water losses are classified by their contamination levels under the IICRC S500 standard:
- Category 1 (Clean Water): Originates from broken clean water supply lines or rainwater.
- Category 2 (Gray Water): Carries significant chemical or biological contamination (e.g., washing machine overflow, dishwasher discharge).
- Category 3 (Black Water): Highly unsanitary water containing pathogenic bacteria, raw sewage, or outdoor storm surge floodwaters.
When water damage involves Category 3 black water, mold growth is accompanied by dangerous biological hazards, including E. coli, Salmonella, and parasitic organisms. DIY cleanup is strongly discouraged for black water contamination. All impacted porous materials—including hardwood floors, drywall, and insulation—must be treated as biohazardous waste and removed immediately. Certified technicians must apply hospital-grade disinfectants and broad-spectrum antimicrobial agents under strict containment before drying can begin. Homeowners facing this severe scenario should consult our guide on black water blues understanding and remediating category 3 water damage for detailed recovery protocols.
Post-Remediation Verification and Long-Term Prevention
Remediation is only complete when structural materials pass rigorous clearance criteria. Never assume an area is safe simply because visible surface discoloration is gone. Post-remediation verification (PRV) includes:
- Visual Inspection: Confirming all surfaces are entirely free of visible dust, debris, and microbial staining.
- Moisture Mapping: Ensuring all structural framing and subflooring reach normal dry standards (framing moisture below 17%).
- Odor Assessment: Verifying that musty fungal odors (microbial VOCs) have been eliminated.
- Independent Air Clearance Testing: In large remediations, an independent indoor environmental professional (IEP) takes air samples inside the containment zone. The project passes clearance when indoor airborne spore counts are equal to or lower than outdoor background levels, with a similar fungal distribution. You can learn more about this validation process by reading how to stop indoor spores with smarter mold testing and mitigation.
Long-term prevention requires keeping indoor relative humidity consistently between 30% and 50% using exhaust fans in kitchens and bathrooms, operating dehumidifiers during humid seasons, and addressing exterior roof or plumbing leaks immediately.
Frequently Asked Questions About Mold Cleanup
What should I do if mold spreads into the HVAC system?
If you suspect or visually confirm mold within your ductwork, air handler coils, or blower compartment, turn the entire HVAC system off immediately. Running the air conditioner or furnace will circulate millions of spores throughout every room in the building. Mechanical ductwork and air handlers require specialized cleaning by licensed HVAC remediation professionals who utilize HEPA-filtered vacuum extraction and EPA-registered duct sanitizers.
Can you simply paint over moldy drywall or framing?
No. Applying paint, primer, or caulk directly over active mold will not kill the fungal root system. The mold will continue to consume the underlying paper backing or wood fiber, feeding on trapped moisture beneath the paint layer. This causes the paint to blister, peel, and crack, while fungal rot spreads invisibly inside the wall assembly. All mold must be physically removed, the substrate sanitized, and the framing completely dried before applying any mold-resistant primer or finish paint.
How long does the complete mold cleanup process take?
Most residential mold remediation projects take between 1 and 5 days to complete. The exact timeline depends on the square footage affected, the level of demolition required, and the depth of structural moisture:
- Containment setup and demolition: 1 to 2 days
- Antimicrobial cleaning and HEPA vacuuming: Half a day to 1 day
- Applied structural drying and dehumidification: 2 to 3 days
- Post-remediation verification testing: 1 day
Conclusion
Successfully cleaning up mold after a water loss requires fast, decisive action, proper containment, and disciplined structural drying. Taking shortcuts—such as spraying bleach over porous wallboards, ignoring high humidity, or closing up wet wall cavities—inevitably leads to recurring fungal growth, costly structural decay, and health risks for your family.
At James Kate Roofing & solar, we operate across Mansfield, TX, Arlington, TX, Granbury, TX, Grand Prairie, TX, and Midlothian, TX. Our family-owned company provides comprehensive roofing, water mitigation, fire solar, mold mitigation, and full build-back reconstruction. We stand behind our work with GAF President’s Club recognition and up to a 25-year workmanship warranty. When moisture strikes your property, turn to our proven team for professional water damage solar and mold remediation to protect your investment and restore your peace of mind.

Dustin Eatman is a seasoned roofing professional with deep, hands-on expertise that spans residential and commercial roofing, insurance solar, and long-term roof asset management. As the owner of James Kate Roofing & solar in the Dallas–Fort Worth metroplex, he’s built a reputation for diagnosing roof systems accurately, communicating clearly, and executing projects with a high standard of workmanship and documentation. Dustin understands the technical details that make roofs perform—proper underlayment selection, slope and drainage considerations, ventilation strategy, flashing and penetration detailing, and manufacturer-specific installation requirements—because he’s worked through the real-world challenges that cause leaks, premature wear, and warranty issues. He’s equally fluent in the operational side of roofing: jobsite planning, quality control, safety, material ordering, crew coordination, and customer experience from inspection to closeout. In insurance-related projects, Dustin brings practical knowledge of claim workflows, adjuster meetings, scope alignment, supplements, and the importance of photo evidence and thorough records, helping property owners navigate stressful situations with confidence. For commercial clients—especially property and facility managers—he emphasizes proactive maintenance and targeted repairs that reduce disruption, extend roof life, and prevent expensive interior damage. Dustin also stays focused on doing things the right way: educating customers on realistic options, setting expectations, and prioritizing solutions that hold up over time rather than quick fixes. That blend of technical skill, field experience, process discipline, and owner-level accountability is what makes Dustin Eatman a trusted expert in the roofing industry.