
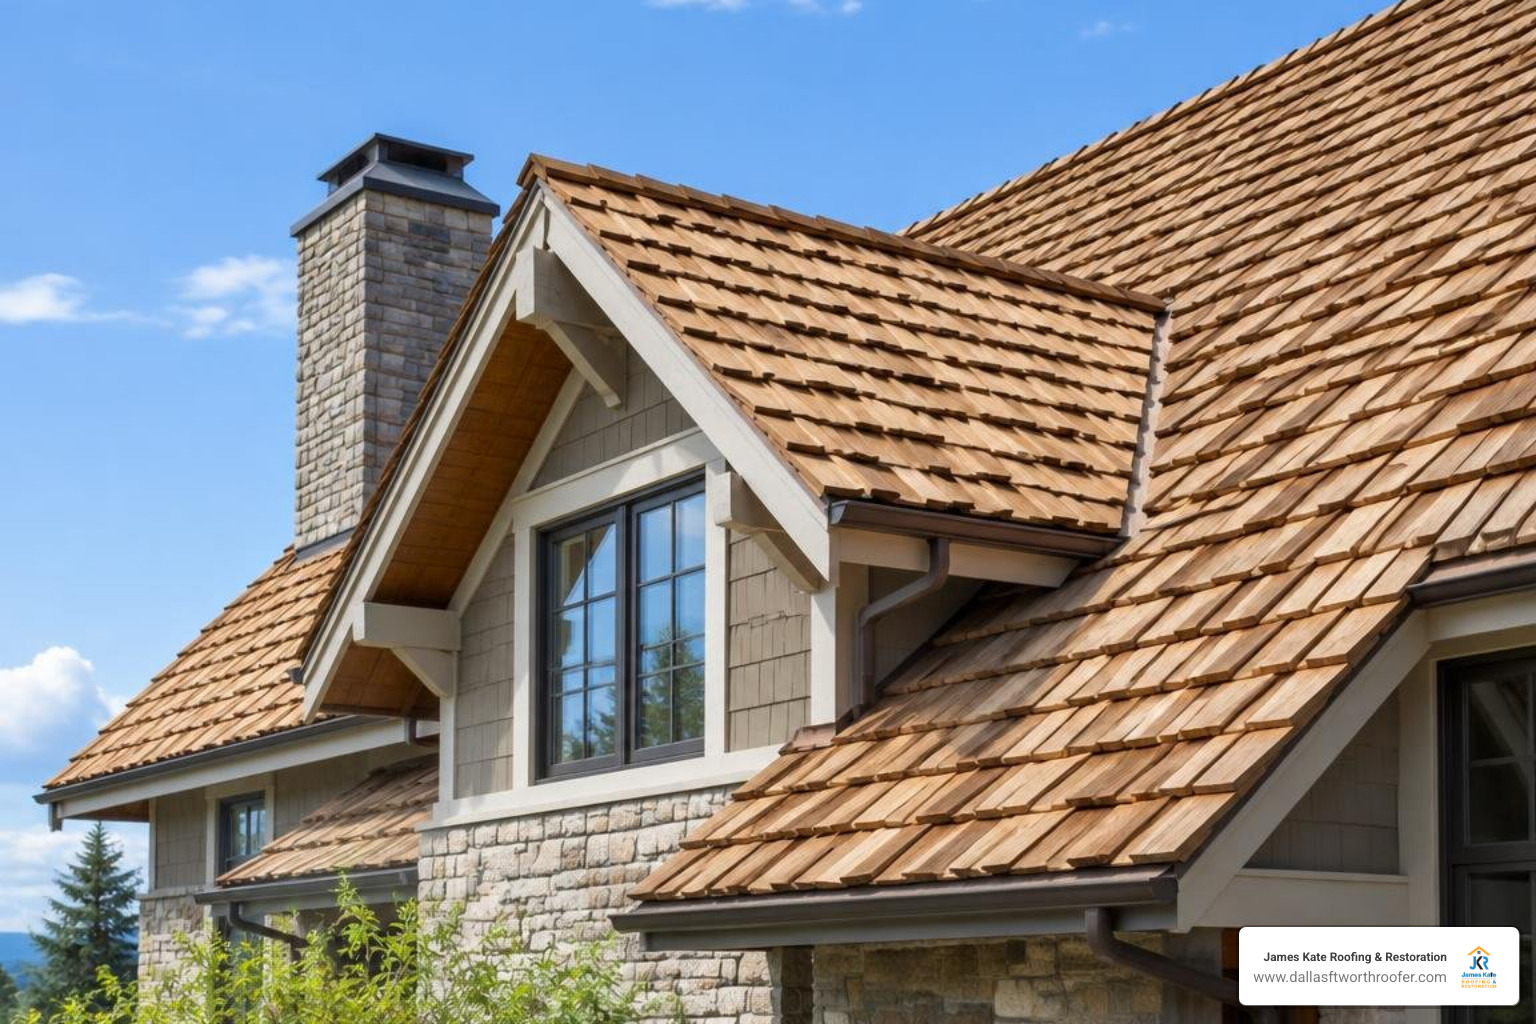
How Cedar Shake Roof Installation Works
A sound cedar shake roof starts with a solid, dry deck and a slope suited to the product. The roofer installs underlayment and flashing, lays a starter course at the eaves, then works upward with evenly spaced shakes. Each course needs the right exposure, staggered joints, and covered fasteners. Valleys, chimneys, hips, and ridges need careful flashing because those details are common leak points.
Hand-split cedar offers a rich, rustic look and natural insulating value. But its long life depends as much on drainage, ventilation, and workmanship as it does on the wood itself.
I’m Dustin Eatman, owner of James Kate Roofing & solar. My hands-on roofing work includes the deck, flashing, ventilation, and quality checks that make cedar shake roof installation hold up over time.
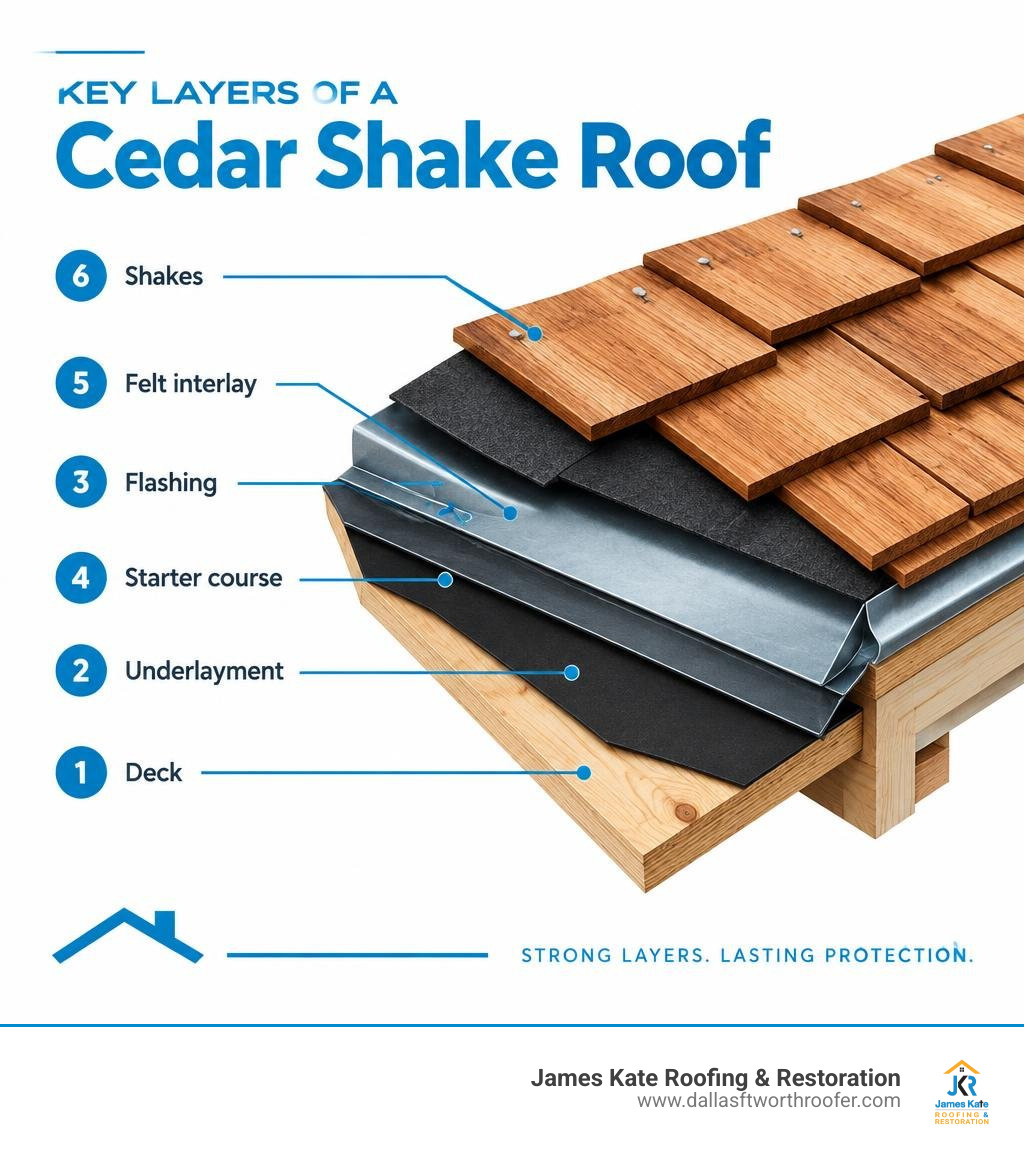
Easy cedar shake roof installation glossary:
Advantages of Hand-Split Shakes vs. Synthetic Alternatives
Natural Western Red Cedar contains natural extractives called thujaplicins. These organic compounds act as a built-in preservative, giving the wood high resistance to decay, moisture intrusion, and insect damage without synthetic treatments. Cedar also has a low physical density, providing excellent dimensional stability with minimal shrinkage or swelling across varying weather patterns.
Beyond rustic visual appeal, wood provides natural thermal insulation that reduces attic heat transfer. However, modern polymer options have grown in popularity. When selecting durable materials for severe weather, comparing natural hand-split wood with synthetic composite shakes helps determine the best fit for your home.
| Feature / Metric | Natural Hand-Split Cedar Shakes | Synthetic Composite Shakes |
|---|---|---|
| Material Composition | 100% Western Red or Yellow Cedar | Recycled engineered polymer composite |
| Impact Resistance | Resilient against hail (varies by thickness) | UL 2218 Class 4 rated (highest impact) |
| Fire Rating | Class C (Class A/B with pressure treatment) | Class A fire rating standard |
| Standard Exposure | 7 ½” (18″ shake) or 10″ (24″ shake) | Up to 10″ maximum exposure |
| Expected Service Life | 30 to 50+ years with regular maintenance | 50+ years with minimal maintenance |
| Keyway Spacing | 3/8″ to 5/8″ required for expansion | 3/16″ minimum (3/8″ recommended) |
Natural Cedar Shakes vs. Composite Alternatives
Natural shakes certified under the Certi-label® program undergo independent third-party inspections to verify grain orientation and clear heartwood content. Premium grade wood requires 100% edge grain and 100% clear heartwood, eliminating weak cross-grain patterns.
Synthetic alternatives replicate the deep, rugged grain of hand-split wood using recycled polymer formulations. Products such as synthetic cedar shake options deliver high architectural curb appeal while providing a standard Class A fire rating and Class 4 impact resistance. Composite tiles do not absorb water, eliminating rot and moss concerns while remaining fully recyclable at the end of their service life.
Critical Substrate and Deck Preparation Steps for Cedar Shake Roof Installation
A successful wood roof starts with deck preparation. The minimum recommended roof slope for Certi-label® shakes is 4:12. For cedar shingles, the minimum slope is 3:12. Lower-pitch roofs drain slowly, increasing the risk of standing water and premature rot if not detailed correctly.
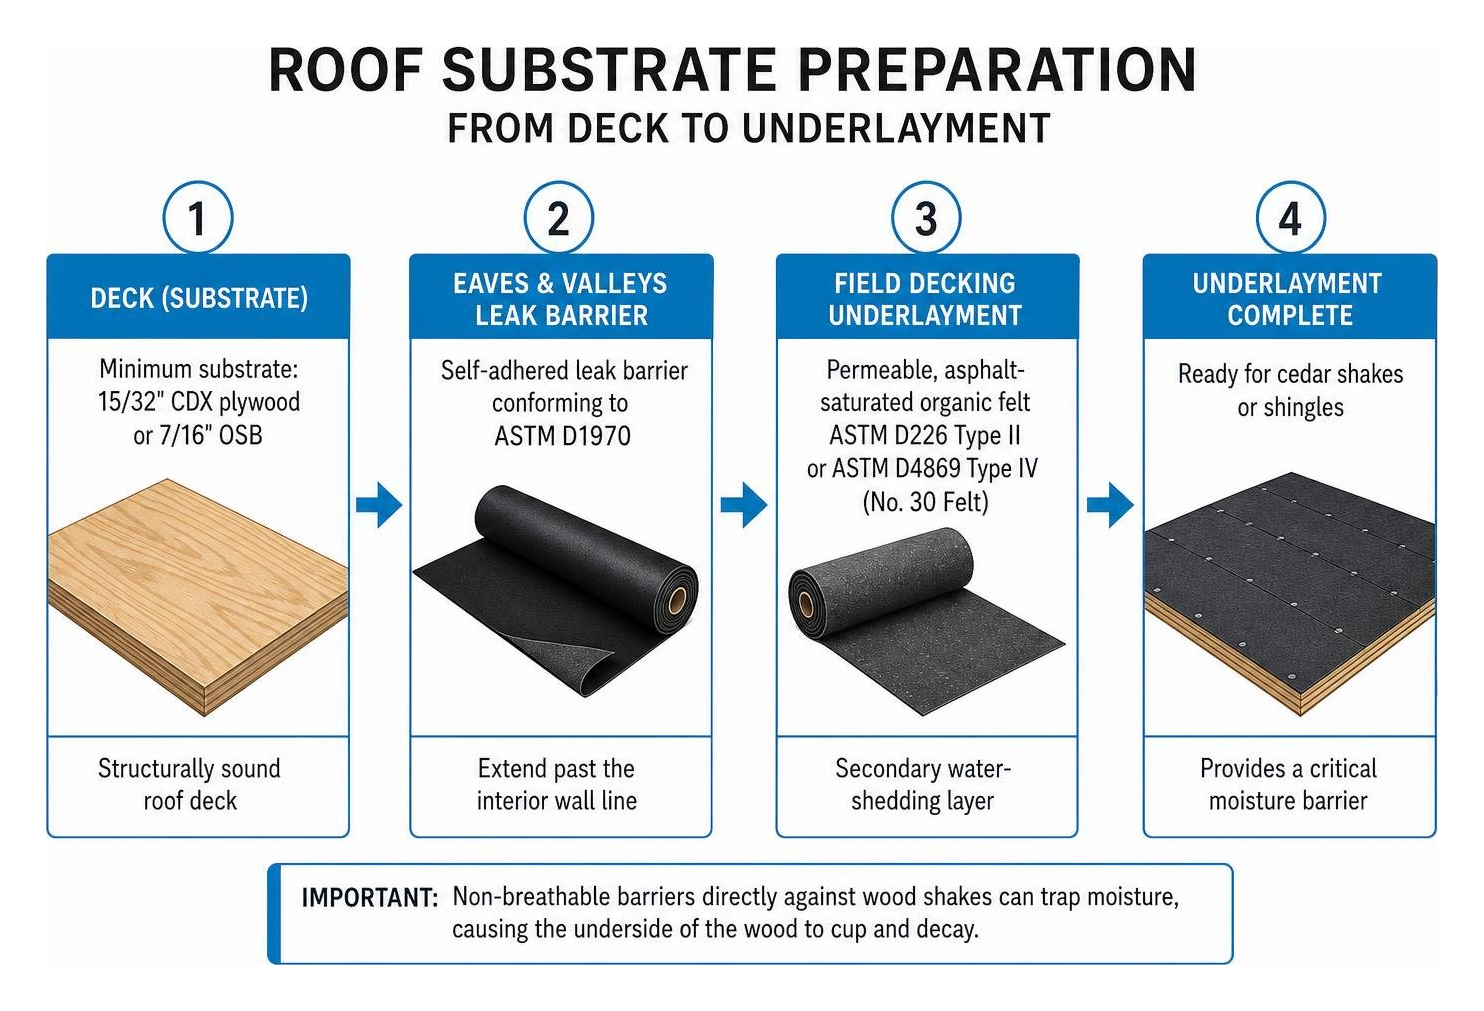
The roof deck must be structurally sound. Install a minimum substrate of 15/32-inch CDX plywood or 7/16-inch oriented strand board (OSB). In high-wind areas, solid decking is required to prevent fastener pullout.
Proper underlayment creates a crucial secondary water-shedding boundary:
- Eaves and Valleys: Install a self-adhered leak barrier conforming to ASTM D1970 extending past the interior wall line.
- Field Decking: Cover the deck with a permeable, asphalt-saturated organic felt such as No. 30 ASTM D226 Type II or ASTM D4869 Type IV. Non-breathable barriers directly against wood shakes can trap moisture, causing the underside of the wood to cup and decay.
- Attic Ventilation: Balance the intake and exhaust ventilation to achieve a minimum 1:150 net free ventilating area ratio relative to the ceiling square footage.
Fastener and Deck Specifications for Cedar Shake Roof Installation
Fasteners must resist corrosion caused by cedar’s natural tannic acids. Never use electro-galvanized fasteners, which corrode rapidly when exposed to wood tannins and moisture.
The CSSB New Roof Construction Manual specifies using hot-dipped zinc-coated nails, Type 304 stainless steel, or Type 316 stainless steel within 15 miles of saltwater environments. Ring-shank nails provide superior holding power against wind uplift. Fasteners must penetrate the sheathing at least 3/4 inch or completely through the underside of the plywood deck.
Flashing Details for Valleys, Rakes, and Penetrations
Flashings protect joints where roof planes meet walls, chimneys, and valleys:
- Open Valleys: Fabricate a “W” profile metal valley with a minimum 1-inch center crimp. Maintain a 4-inch open channel at the top of the valley, tapering wider toward the bottom.
- Closed Valleys: Use a “W” style flashing featuring a 1 ½-inch center crimp to direct runoff straight down the valley centerline.
- Side Walls: Install corrosion-resistant metal step flashing overlapping a minimum of 2 inches. Each step piece must extend under the shakes by at least 6 inches.
- Head Walls & Chimneys: Apply metal counter-flashing with a 6-inch vertical leg, fastening at the upper corner. At the base of dormers or transitions, ensure the metal apron laps over the lower shakes by at least 6 inches and extends up the slope a minimum of 8 inches under the self-adhered membrane.
Step-by-Step Hand-Split Cedar Shake Installation
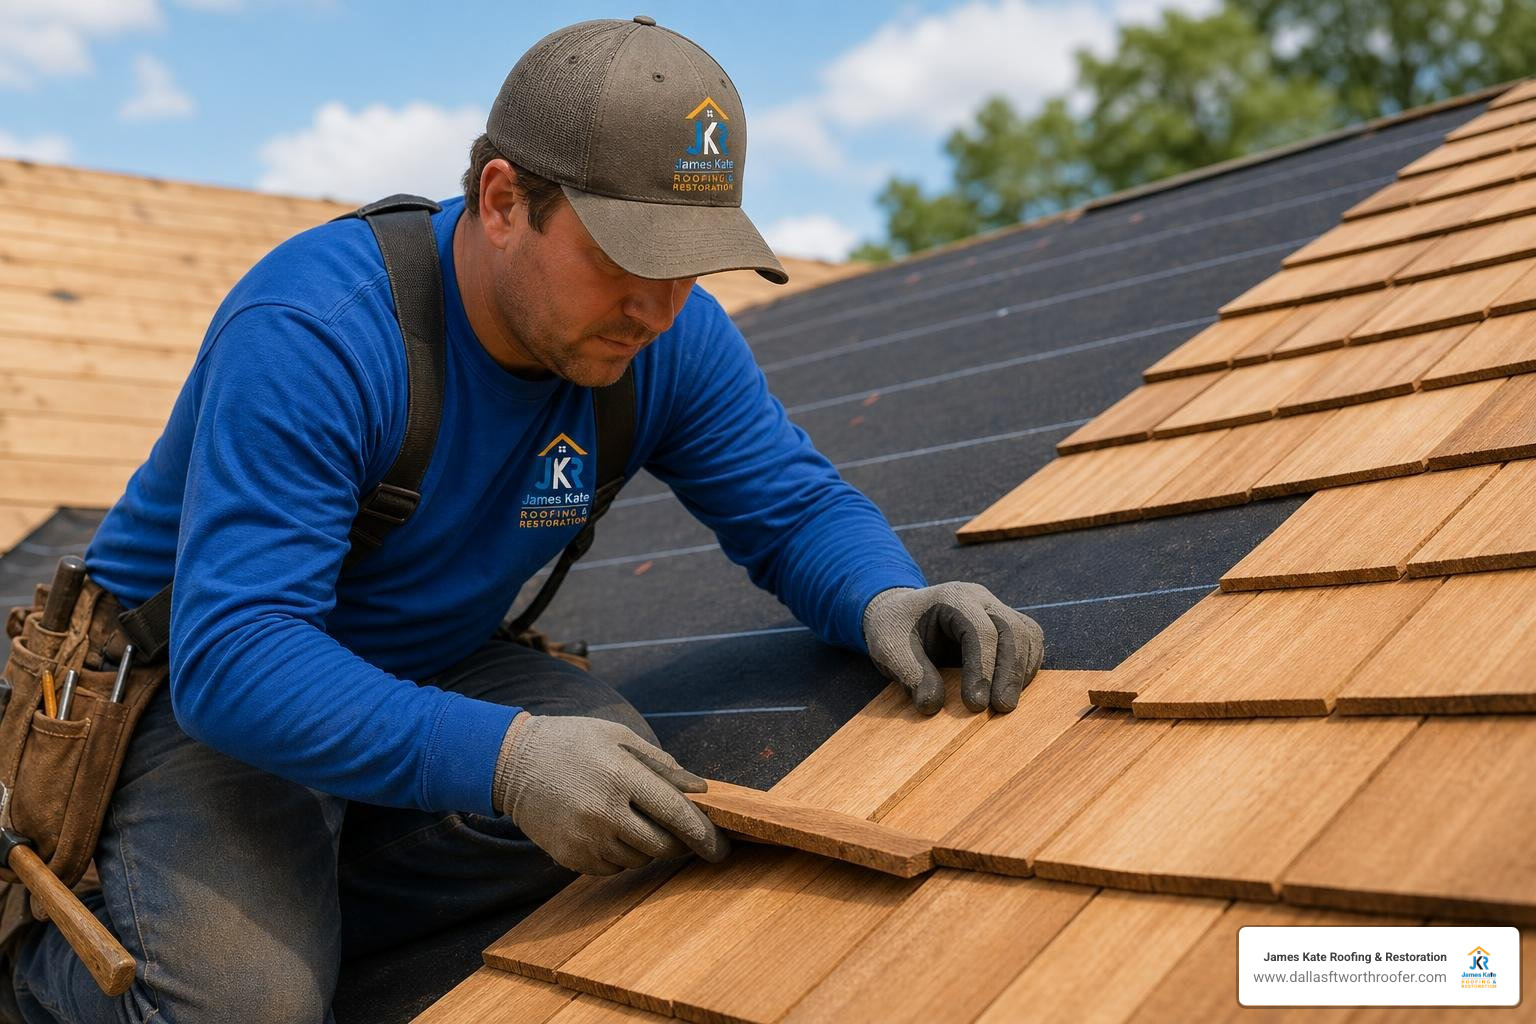
Follow this proven sequence when executing a step-by-step cedar shake installation for modern craftsmen:
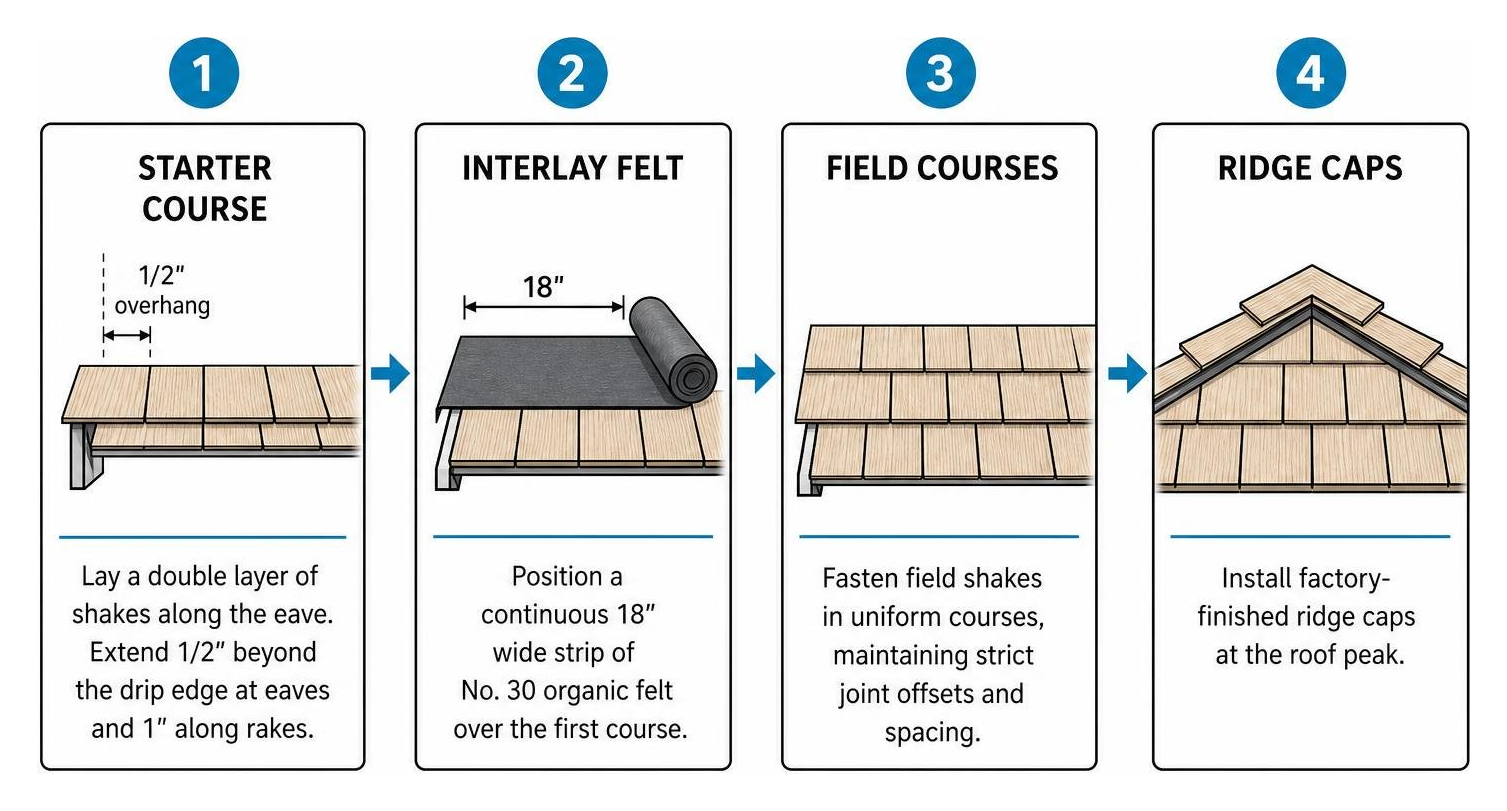
- Starter Course: Lay a double layer of shakes along the eave. The bottom layer can use an undercoursing grade. Extend the starter course 1/2 inch beyond the drip edge at the eaves and 1 inch along the rakes to ensure clean water runoff.
- First Course Placement: Fasten the first course directly over the starter layer, staggering all joints by at least 1 ½ inches.
- Felt Application: Position a continuous 18-inch-wide strip of No. 30 organic felt over the top of the first course.
- Field Shake Application: Fasten field shakes in uniform courses, maintaining strict joint offsets and spacing.
Field Shake Layout and Spacing for Cedar Shake Roof Installation
Wood shakes expand as they absorb ambient humidity. For hand-split cedar, leave a keyway space between adjacent shakes of 3/8 inch minimum to 5/8 inch maximum. This space prevents buckling when wet.
Maintain a side lap offset of at least 1 ½ inches between joints in consecutive courses. Joints in adjacent courses should never align over the course below. Align your weather exposure based on shake dimensions:
- 24-inch Shakes: Recommended exposure is 10 inches (on 4:12 slopes and steeper).
- 18-inch Shakes: Recommended exposure is 7 ½ inches.
For composite alternatives, refer to the Florida Building Code Cedar Shake Installation Guide, which permits exposures up to 10 inches with keyway gaps of 3/16 inch minimum to 3/8 inch recommended.
Proper Interlay Felt Placement and Moisture Baffling
Felt interlay is mandatory for wood shake roofs, serving as an internal weather baffle.
- Position 18-inch-wide strips of No. 30 ASTM D226 Type II organic felt over each course of shakes.
- The bottom edge of the felt interlay must sit above the shake butt at a distance equal to twice the weather exposure. For example, with a 10-inch shake exposure, place the bottom edge of the felt 20 inches above the butt line.
- This placement covers the top of the shake and extends onto the roof deck, preventing wind-driven rain and snow from reaching the substrate while keeping the lower exposed half of the shake free to breathe and dry.
Note: Never interlay felt when installing smooth cedar shingles. Shingles require continuous flat contact across three overlapping wood layers, whereas thicker, uneven hand-split shakes rely on interlaid felt baffles.
Ridge, Hip, and Slope Transition Detailing
Hips and ridges experience heavy wind exposure and require careful detailing. Use pre-assembled hip and ridge units or fabricate them on-site using shakes joined with alternating overlap joints.
Fasten ridge caps using corrosion-resistant nails long enough to penetrate 3/4 inch into the structural wood decking beneath both layers of shakes.
Where a steep roof plane meets a lower pitch, install metal flashing that extends 8 inches up the upper slope and laps over the lower shake course by at least 6 inches. Seal the metal flange to the upper deck using self-adhered ASTM D1970 membrane lapped at least 3 inches over the metal edge.
Common Cedar Shake Installation Mistakes and Maintenance Best Practices
Avoiding key installation errors ensures your wood roof achieves its full lifespan:
- Improper Keyway Spacing: Jamming shakes tightly together causes them to cup and crack when wet. Always leave a 3/8″ to 5/8″ gap.
- Overdriven Nails: Sinking nail heads deep into the wood crushes the outer grain and accelerates localized rot around the fastener head. Drive nail heads flush with the shake surface.
- Exposed Fasteners: Placing fasteners below the exposure line creates direct leak paths. Fasten shakes approximately 1 ½ inches above the exposure line and 3/4 inch inward from each edge.
- Misaligned Sidelap: Placing a joint directly over another joint within 1 ½ inches creates vertical channels where water reaches the underlayment.
Reviewing fundamental installation techniques outlined in our guide on mastering roof shingle installation techniques helps crews maintain clean nailing lines.
To keep a cedar roof lasting 30 to 50 years, remove fallen leaves, pine needles, and debris from valleys each spring and fall. Clear debris from between the keyway gaps to ensure unobstructed drainage down the roof.
Frequently Asked Questions About Cedar Shake Roofing
What is the minimum roof slope required for cedar shake installation?
Certi-label® cedar shakes require a minimum roof slope of 4:12. For cedar shingles, the minimum slope is 3:12. In certain low-slope applications between 3:12 and 4:12, pressure-impregnated preservative-treated wood applied over solid sheathing with a continuous waterproof membrane and reduced exposure can be used.
How often do cedar shake roofs need maintenance?
Inspect cedar shake roofs twice a year—once in spring and once in late autumn. Clear collected debris from roof valleys and gutters, and remove moss or lichen growth with a mild, wood-safe cleaner.
Can cedar shakes be installed directly over existing asphalt shingles?
No. Installing cedar shakes over old shingles violates building codes and traps moisture against the wood shakes, accelerating rot. Always perform a complete tear-off down to the wood deck. For more on evaluating substrates, read our guide on choosing the right roofing material for your home.
Conclusion
A hand-split cedar shake roof offers exceptional architectural character, natural insulation, and long-term durability when installed with proper underlayment, correct keyway spacing, and sound flashing techniques.
At James Kate Roofing & solar, we operate across Mansfield, Arlington, Granbury, Grand Prairie, and Midlothian, TX. We treat your property with integrity and craftsmanship backed by our GAF President’s Club standing. When you are planning your next roofing project, reach out to our Grand Prairie roofing specialists for a comprehensive roof inspection and estimate.

Dustin Eatman is a seasoned roofing professional with deep, hands-on expertise that spans residential and commercial roofing, insurance solar, and long-term roof asset management. As the owner of James Kate Roofing & solar in the Dallas–Fort Worth metroplex, he’s built a reputation for diagnosing roof systems accurately, communicating clearly, and executing projects with a high standard of workmanship and documentation. Dustin understands the technical details that make roofs perform—proper underlayment selection, slope and drainage considerations, ventilation strategy, flashing and penetration detailing, and manufacturer-specific installation requirements—because he’s worked through the real-world challenges that cause leaks, premature wear, and warranty issues. He’s equally fluent in the operational side of roofing: jobsite planning, quality control, safety, material ordering, crew coordination, and customer experience from inspection to closeout. In insurance-related projects, Dustin brings practical knowledge of claim workflows, adjuster meetings, scope alignment, supplements, and the importance of photo evidence and thorough records, helping property owners navigate stressful situations with confidence. For commercial clients—especially property and facility managers—he emphasizes proactive maintenance and targeted repairs that reduce disruption, extend roof life, and prevent expensive interior damage. Dustin also stays focused on doing things the right way: educating customers on realistic options, setting expectations, and prioritizing solutions that hold up over time rather than quick fixes. That blend of technical skill, field experience, process discipline, and owner-level accountability is what makes Dustin Eatman a trusted expert in the roofing industry.